转自Appium pro
This post is the second in a 3-part series on visual testing with Appium. Visual testing is an important category of testing and can catch visual regressions as well as functional bugs. The inspiration for this series comes from a free online video course on mobile visual testing I produced for Test Automation University. Check it out! (And don’t forget to read the first part in this series first).
In the first part of this series, we looked at how to put together a simple but effective homebrew visual testing framework for mobile apps using Appium and Appium’s built-in image processing capabilities (thanks, OpenCV!). Our approach did have a number of limitations, however:
- We had to manage our own baseline images by storing them in a directory on the machine running Appium. This is obviously not very scalable, since whole teams would need access to these images, we’d probably want to keep a revision history in case we want to roll back to a previous baseline, etc…
- We had to manage the logic for comparing screenshots to baselines, including deciding what to do when we detected differences. In the case of the logic we implemented, we simply threw an exception when differences were detected. But this would kill our functional test as well! It’s nice for the functional test to continue and for visual differences to be merely flagged for later review rather than cause the whole test to fail.
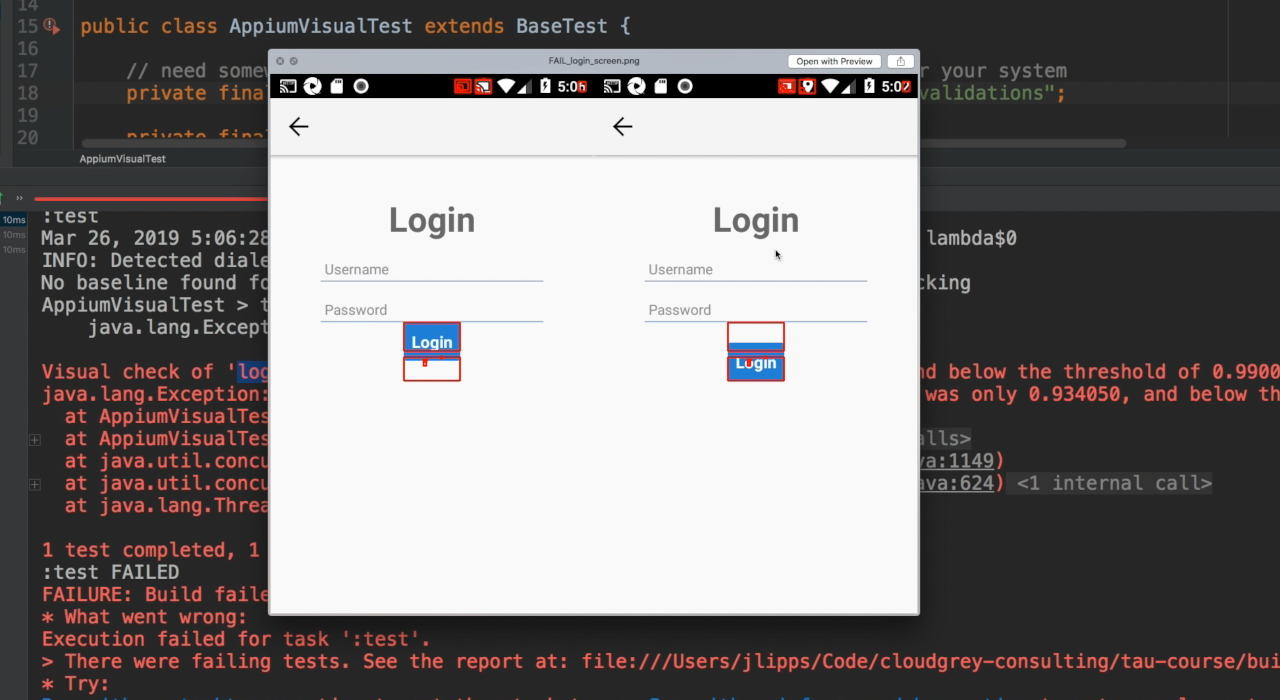
- In our old system, if we detected a visual difference, an image would be generated for us that shows us where the differences might be. It would look something like this, which is an example of how things show up when encountering a failure:As you can see, it’s not just the dislocated “Login” button which is highlighted. Various bits of the device UI have also changed. How long until there are enough changes in this part of the UI for a visual test to fail, when in reality nothing changed in our app? In general, we have to worry a lot about false positives, which is when we are alerted to a potential problem when none in fact exists. Other typical causes for false positives include, for example, dynamic text whose content is irrelevant to the visual check but which does visually change every time the test is run.
- The current approach doesn’t at all handle scrolling content. What happens when we want to visually verify a screen which has a list or a scroll view? For this to work, we’d need to use Appium to incrementally scroll, take screenshots, and stitch them together into one long image for comparison. This is certainly possible, but it can be pretty finicky.
Making visual testing robust and maintainable
Thankfully, we can solve pretty much all of these challenges. My favorite way to handle them is with a service called Applitools, which specializes in exactly this kind of visual testing. Let’s see how I can eliminate a bunch of code from the last article and at the same time improve the quality and developer experience of our visual testing.
First, I have to ensure that I have the Applitools Eyes SDK set up in my project:
testImplementation group: 'com.applitools', name: 'eyes-appium-java4', version: '4.2.1'
Now, I can adjust my setUp and tearDown methods to manage the state of the Eyes service, represented by a class field named eyes :
@Before
public void setUp() throws Exception {
// <snip>caps and driver instantiation</snip>

// set up Eyes SDK
eyes = new Eyes();
eyes.setLogHandler(new StdoutLogHandler());
eyes.setApiKey(System.getenv("APPLITOOLS_API_KEY"));
}

@After
public void tearDown() {
eyes.abortIfNotClosed();
if (driver != null) {
driver.quit();
}
}
Here I am merely telling Eyes to log its output to stdout so I can read it from the console, and also registering my API key (which I’ve stored as the value of an environment variable) so that the service knows to associate checks and screenshots with me and not someone else.
Now, for each distinct visual test session, I call eyes.open and eyes.close , like so:
eyes.open(driver, "TheApp", "appium pro basic design test");
// actual functional test logic and visual checks go here
eyes.close();
Notice that this is where we actually give the eyes object access to our driver , which is how it will be able to tell Appium to take screenshots at the appropriate times.
In the previous article, we had implemented a method for performing visual checks, called doVisualCheck . Now, we can completely delete that entire method. Instead, any time we want to perform a visual check based on the current screenshot, we call eyes.checkWindow . Like our own method, it takes a parameter which is the name of the check. So here’s how our actual test method could look, mixing Appium’s functional commands with Applitool’s visual check commands:
@Test
public void testAppDesign() {
eyes.open(driver, "TheApp", "appium pro basic design test");

WebDriverWait wait = new WebDriverWait(driver, 5);

// wait for an element that's on the home screen
WebElement loginScreen = waitForElement(wait, LOGIN_SCREEN);

// now we know the home screen is loaded, so do a visual check
eyes.checkWindow(CHECK_HOME);

// nav to the login screen, and wait for an element that's on the login screen
loginScreen.click();
waitForElement(wait, USERNAME_FIELD);

// perform our second visual check, this time of the login screen
eyes.checkWindow(CHECK_LOGIN);
eyes.close();
}
That’s it!
Visual testing in action
To see how this new approach addresses some of the challenges, we’ll need to actually run the test using two different versions of the app, to simulate two builds occurring at different points in time with app changes having occurred between them. I have uploaded two versions of The App here:
String APP_V1 = "https://github.com/cloudgrey-io/the-app/releases/download/v1.10.0/TheApp-VR-v1.apk";
String APP_V2 = "https://github.com/cloudgrey-io/the-app/releases/download/v1.10.0/TheApp-VR-v2.apk";
If we first run the test with APP_V1 as the value of the app capability, the test will pass. (And if you want to follow along, remember that the full code for this article is available). That’s great! If I wanted, I could log into the Applitools dashboard and see that baselines have been captured from the run. But at this point, nothing interesting has happened because we’ve just set the baselines. So let’s make things more interesting, and switch the app capability to APP_V2 , and run the test again. This time, I’ll get a failure, and the following output:
Edition099_Visual_Testing_2 > testAppDesign FAILED
com.applitools.eyes.exceptions.DiffsFoundException: Test 'appium pro basic design test' of 'TheApp' detected differences! See details at: https://eyes.applitools.com/app/batches/<redacted>/<redacted>
at com.applitools.eyes.EyesBase.close(EyesBase.java:793)
at com.applitools.eyes.EyesBase.close(EyesBase.java:735)
at Edition099_Visual_Testing_2.testAppDesign(Edition099_Visual_Testing_2.java:81)
That’s actually a pretty handy error message. We even get a link so we can directly hop into the web app and start exploring the differences that were found. Once I log in, I can see the result of the most recent run:
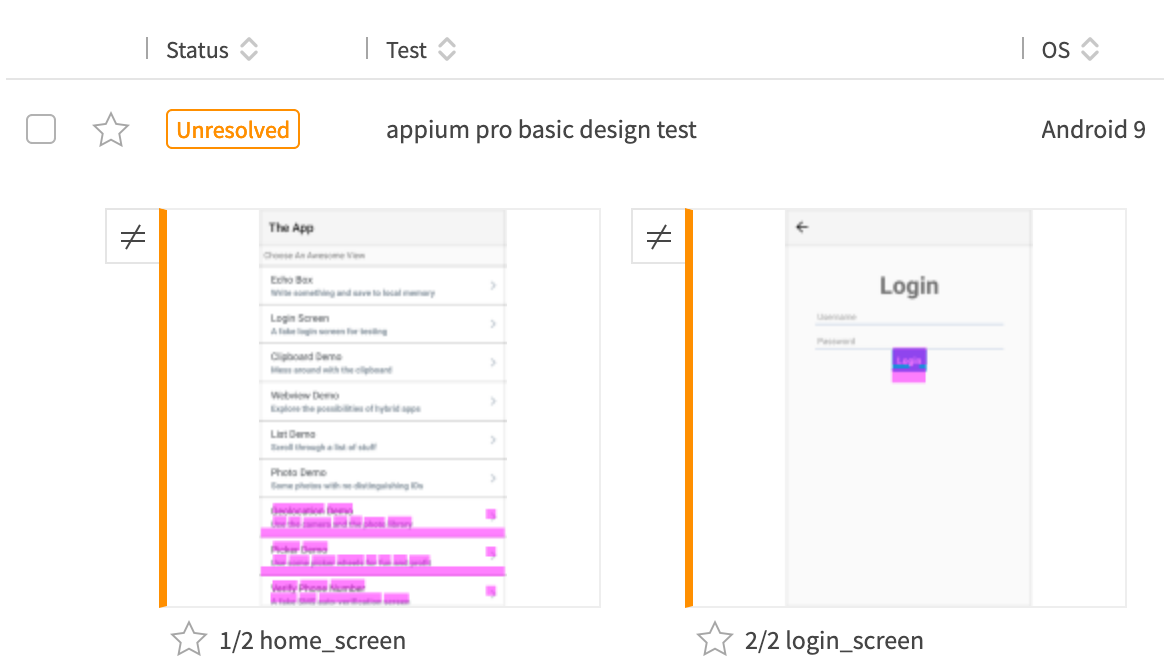
It’s marked as “unresolved”, and sure enough there are some apparent differences. I can click on the first difference, and I’m greeted with an interface that allows me to see the differences in more detail:
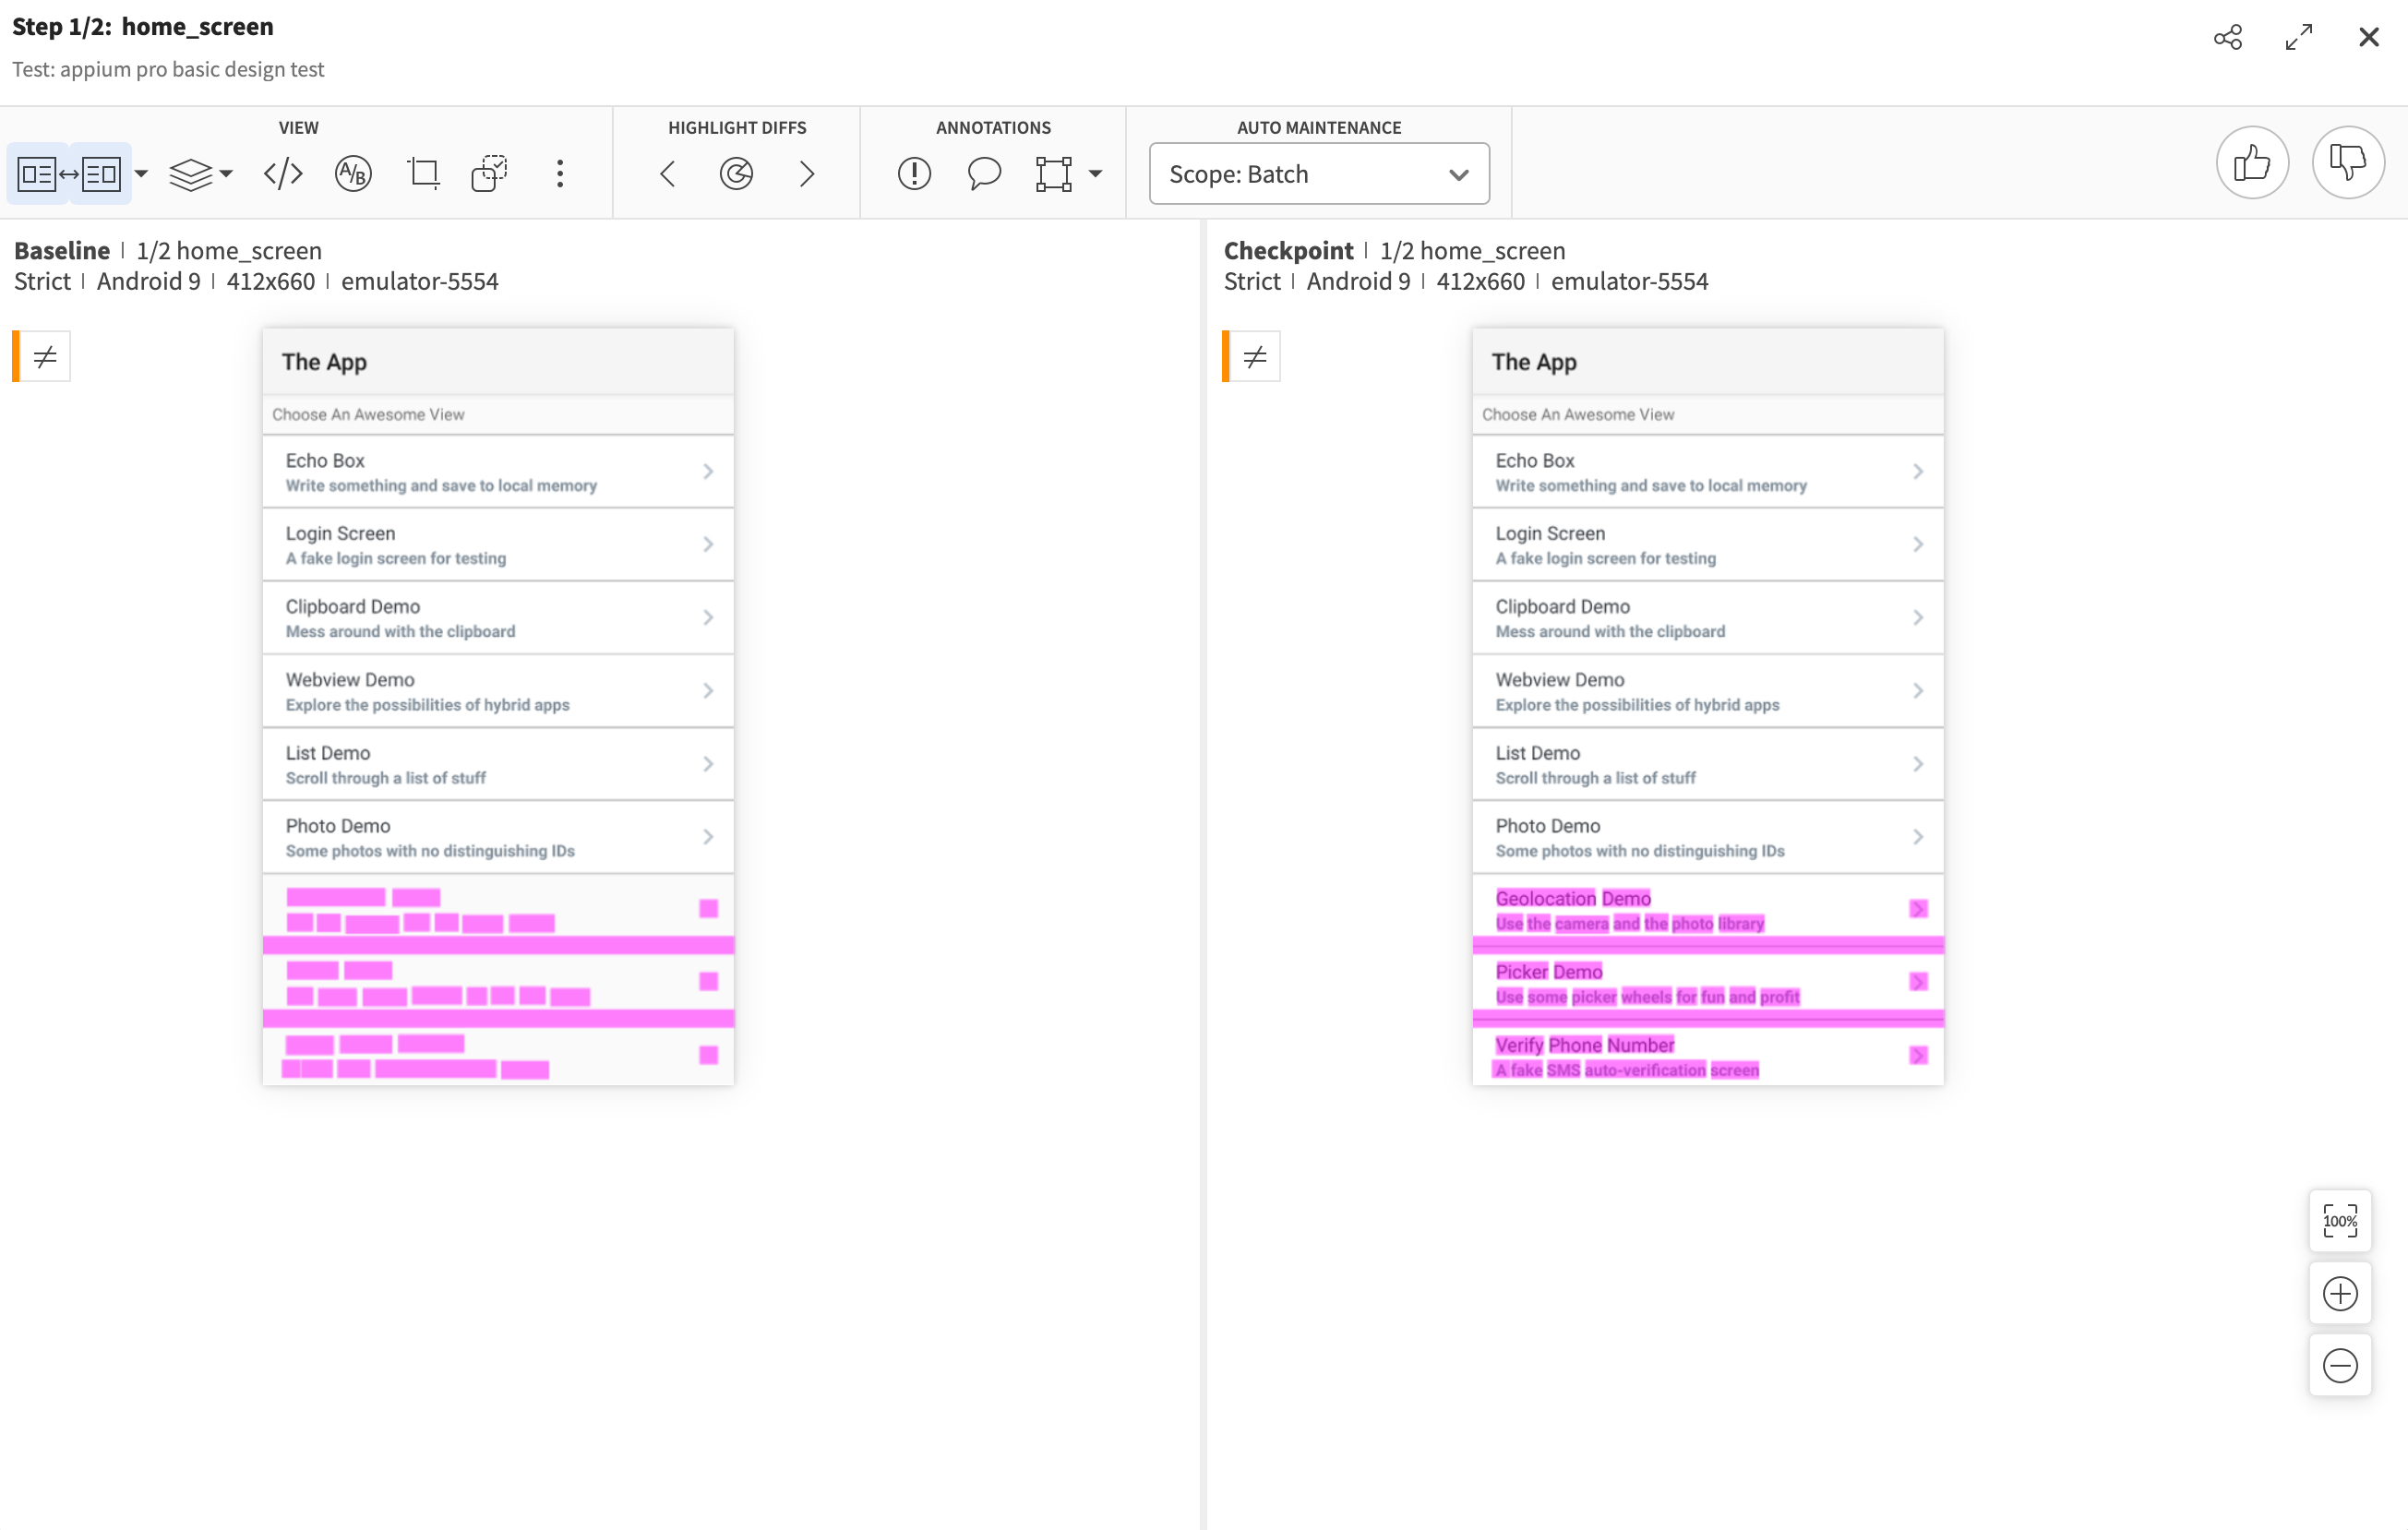
Notice first of all that there are no device status bars or clock times in these images. They don’t matter to the app and so they aren’t included at all. With this visual difference, it’s pretty easy to tell what happened–the second version of the app added some list items! So this is not actually a regression, just a difference that’s actually fine. I can let the tool know that this is all nominal by clicking the “thumbs up” button at the top right.
The next difference is a little more nasty:
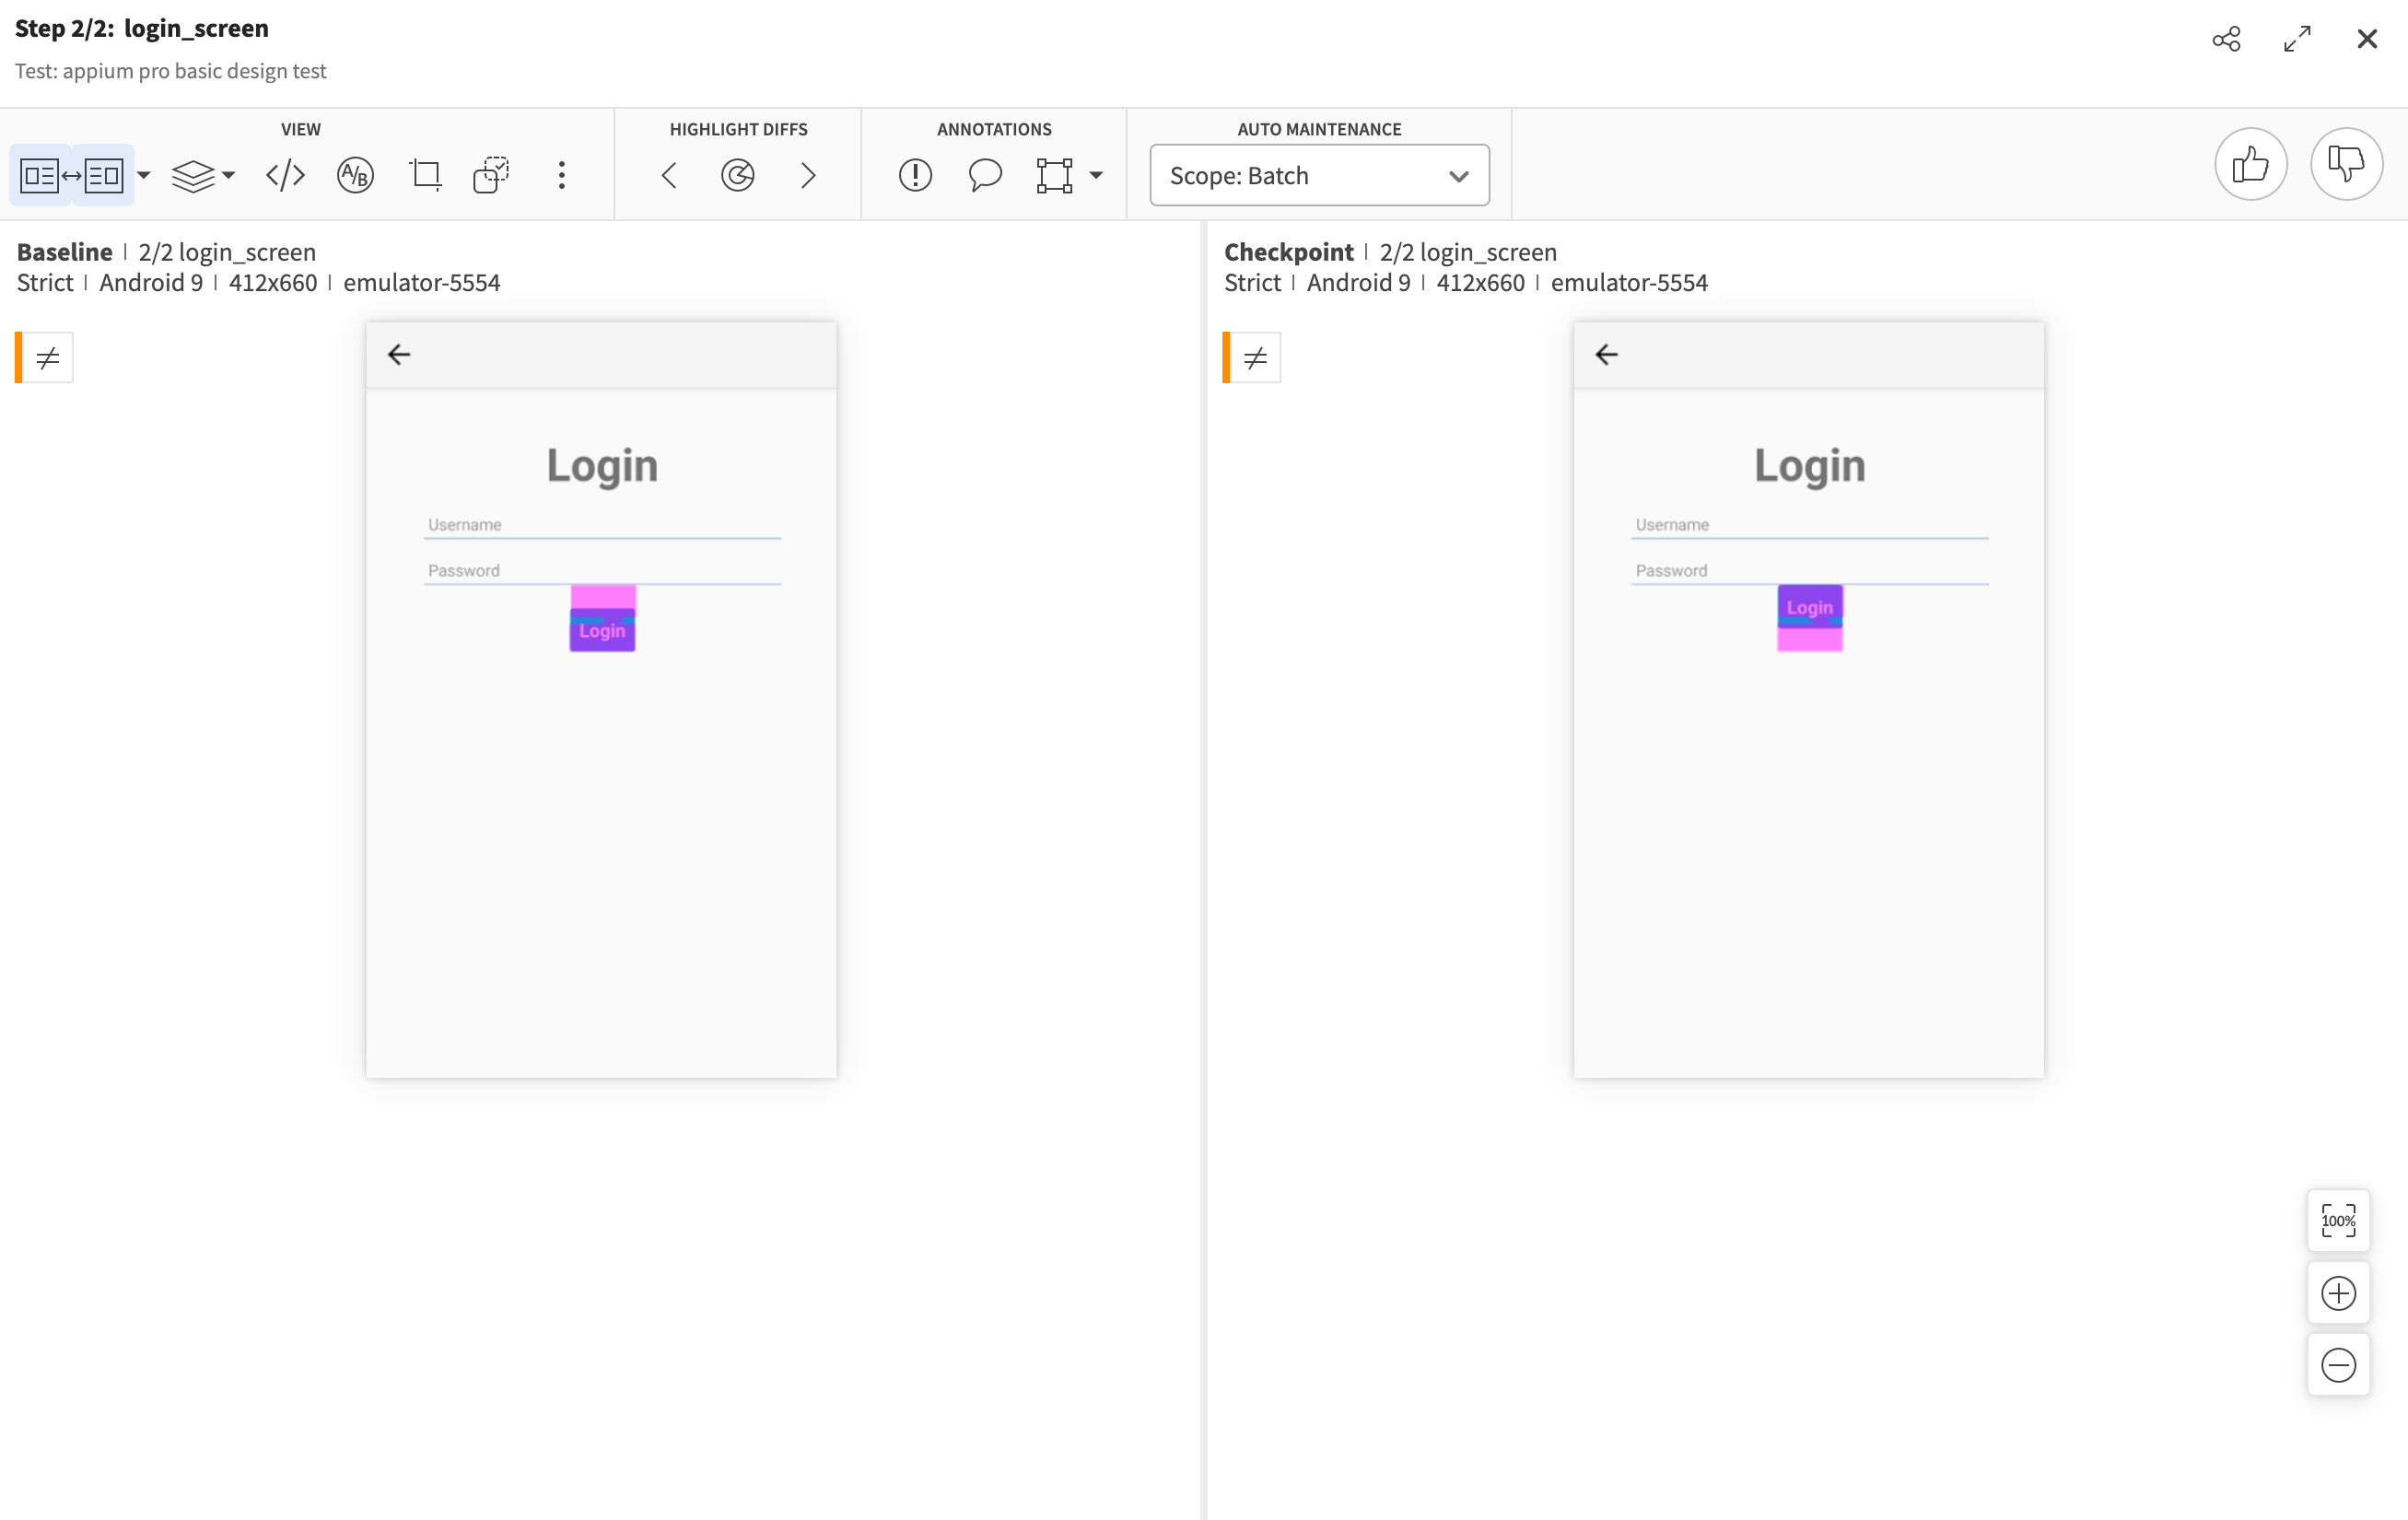
We can see here that a button has moved up. This doesn’t look as good, so it’s probably a visual regression. I can therefore click the “thumbs down” button, and the check as well as the overall visual test will be marked as failed. This is good because it accurately reflects the state of the app’s quality. I can of course send this failure report immediately to my design or development team. Once they provide a new build, we can re-run the exact same test code, and verify that the new version is visually similar enough to the original baseline.
That’s all there is to it! Now that I’m done walking through all the detected differences, I can simply save my choices, and Applitools will consider the new home screen image as the baseline for all future comparisons. Stay tuned for the next and final installment of this series, where we explore some advanced techniques that help solve even more of the problematic issues we described above about our original framework.
