Allure2报告定制化的应用场景
在实际测试过程中,针对不同的项目可能需要对测试报告展示的效果进行定制,比如修改页面的 logo、修改项目的标题或者添加一些定制的功能等等,Allure 为用户提供了方便的定制化方法。
## 定制页面 Logo
1.修改allure.yml,添加logo插件 - custom-logo-plugin( 在 allure 安装路径下,可以通过 where allure 或者which allure 查看 allure 安装路径)
plugins:
  - junit-xml-plugin
  - xunit-xml-plugin
  - trx-plugin
  - behaviors-plugin
  - packages-plugin
  - screen-diff-plugin
  - xctest-plugin
  - jira-plugin
  - xray-plugin
  - custom-logo-plugin
2.编辑styles.css文件(目录一般是在 ..\allure-2.32.0\plugins\custom-logo-plugin\static)
.side-nav__brand {
  background: url("logo.png") no-repeat left center !important;
  margin-left: 10px;
  height: 40px;
  background-size: contain !important;
}
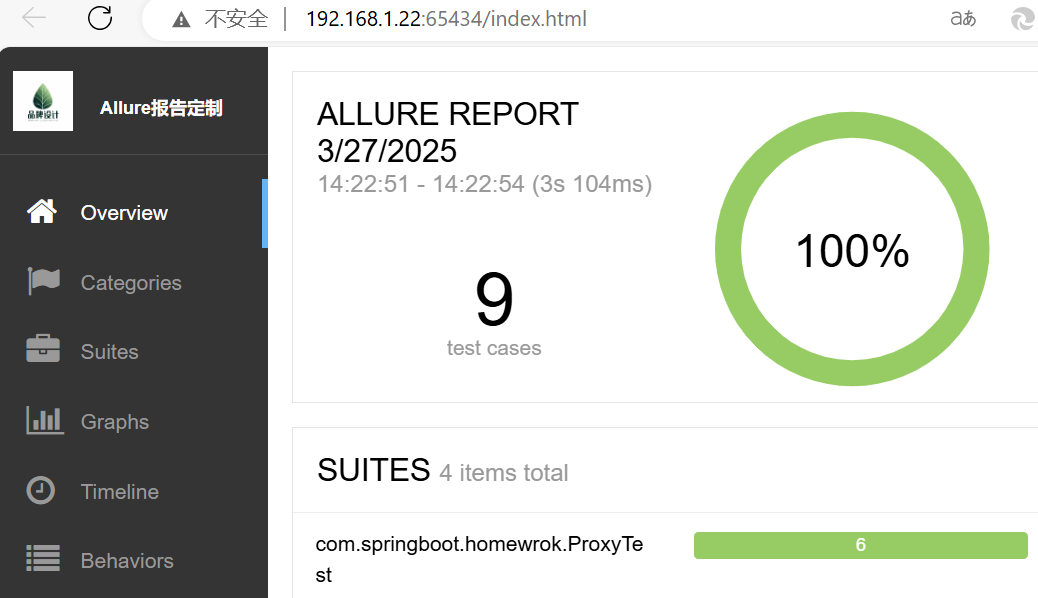
定制页面标题
编辑styles.css 文件,添加修改标题对应的代码
/* 去掉图片后边 allure 文本 */
.side-nav__brand-text {
  display: none;
}

/* 设置logo 后面的字体样式与字体大小 */
.side-nav__brand:after {
  content: "Allure报告定制";
  margin-left: 18px;
  height: 20px;
  font-family: Arial;
  font-size: 12px;
}
在IDEA使用新样式运行生成allure报告和查看的步骤:
1.mvn 命令运行测试用例文件 mvn clean test
2.将target目录下生成的allure-results生成allure-report 到同目录下
allure generate target/allure-results -o ./allure-report --clean
3.打开allure-report: allure open allure-report
最终效果展示