一, 构造测试用例页面
1.1 vue ui 初始化项目
-
(1)安装 vue 脚手架工具:
npm install -g @vue/cli -
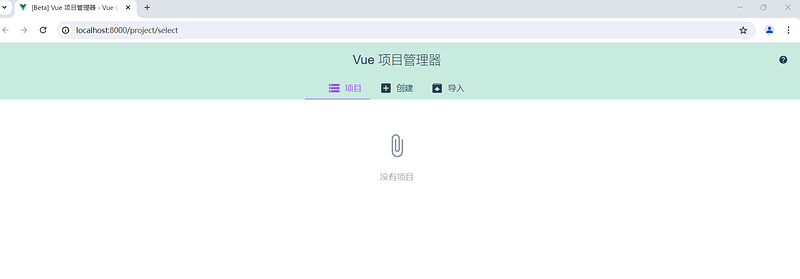
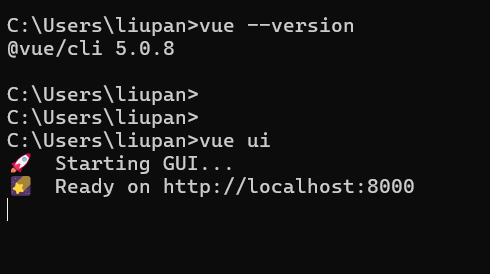
(2)启动 vue ui:
vue ui
-
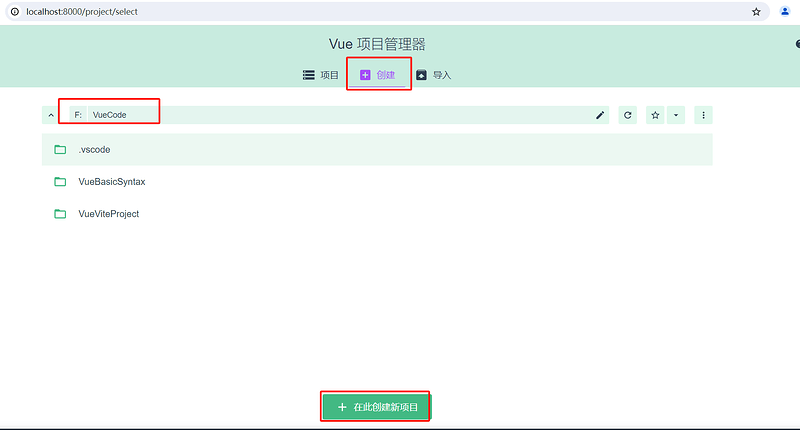
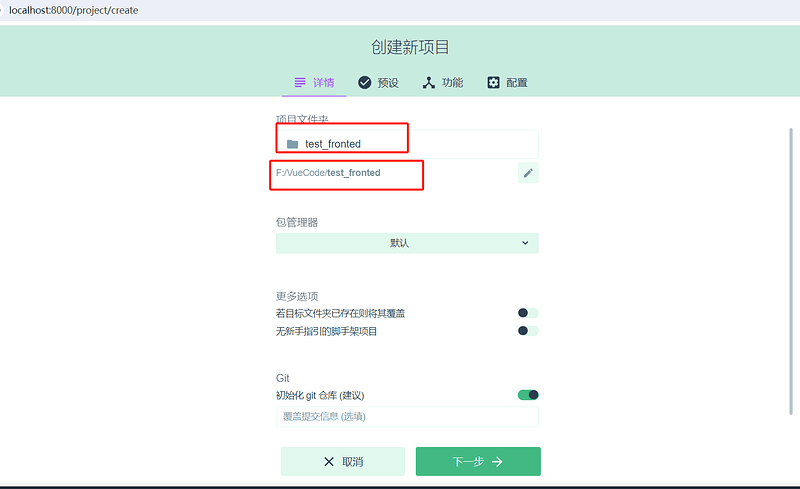
(3)新建项目:test_fronted
-
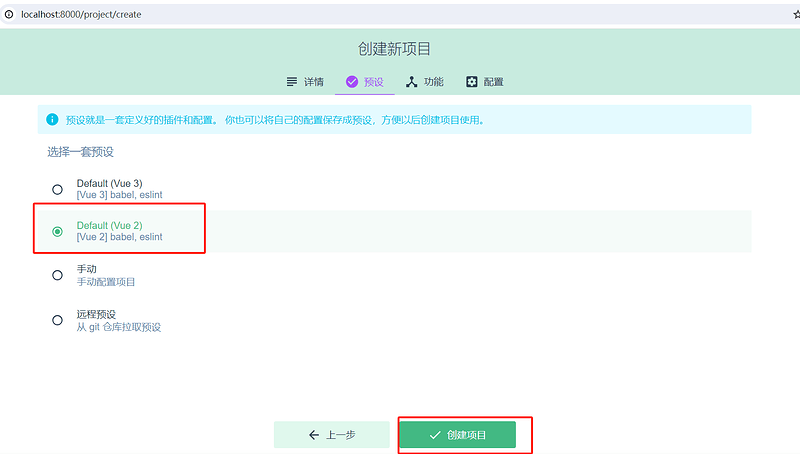
(4)配置项目:选择默认
-
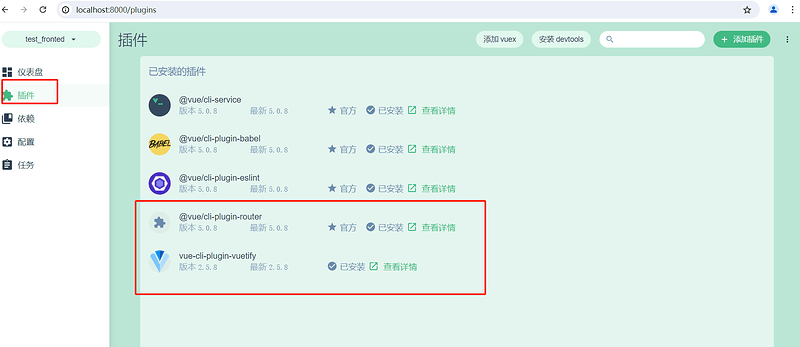
(5)安装插件:router和vuetify
-
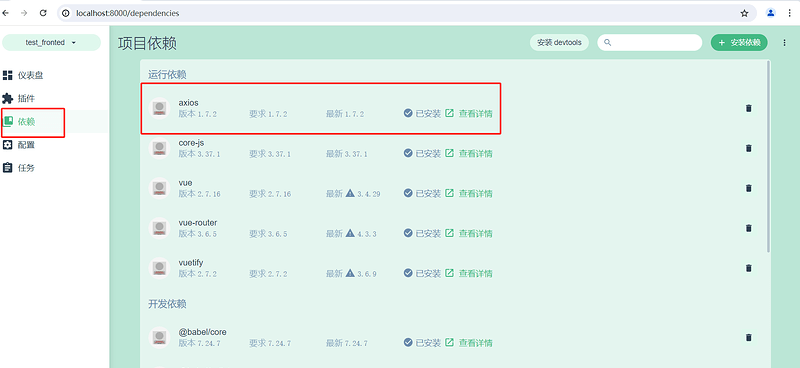
(6)安装依赖:axios
-
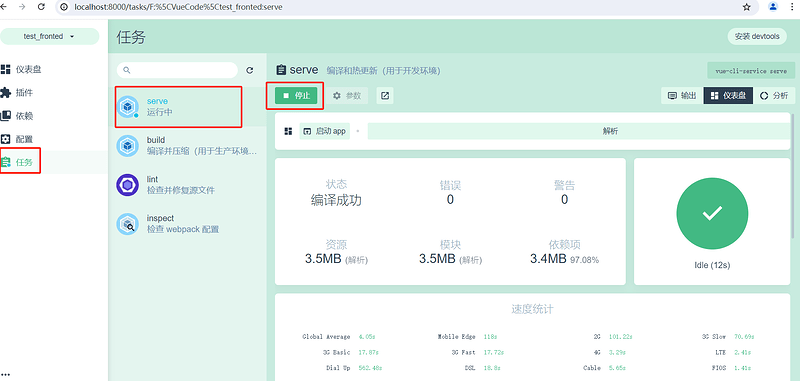
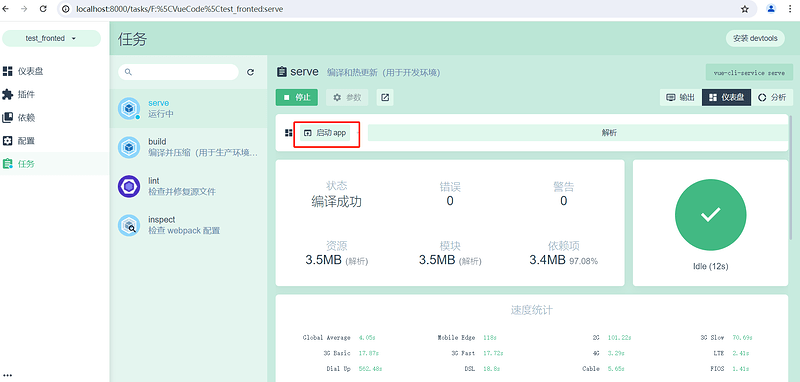
(7)运行和编译
-
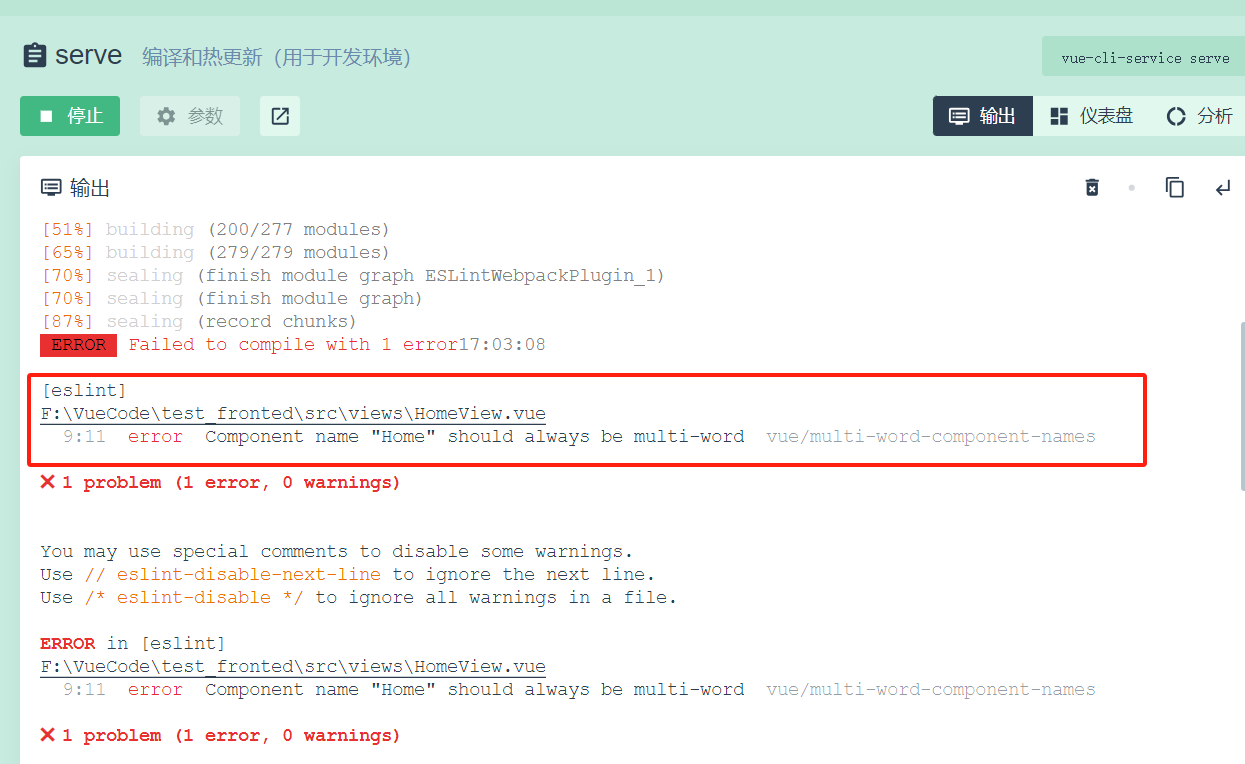
如果遇到下记报错,更该vue.config.js文件后再重新运行即可
-
修改文件为:
-
const { defineConfig } = require('@vue/cli-service')
module.exports = defineConfig({
  transpileDependencies: true,
  lintOnSave: false
})
- (8)点击启动App,跳转到vuetify页面
1.2 Vuetify 搭建主界面 Layout
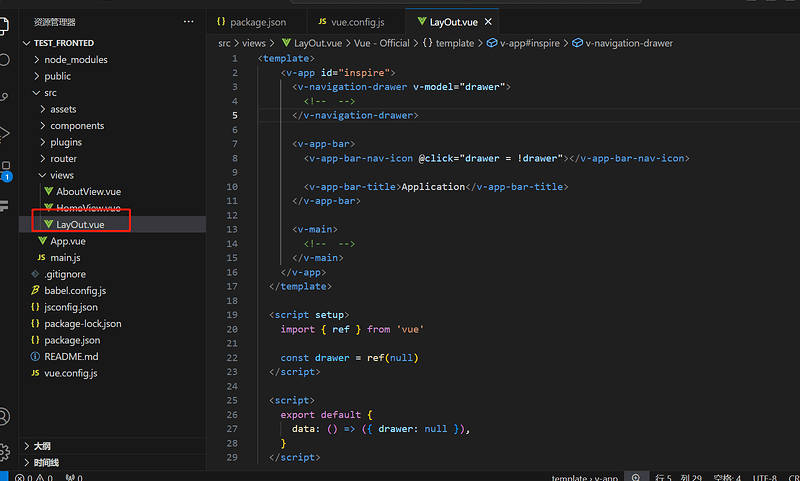
- (1)新建 LayOut.vue组件
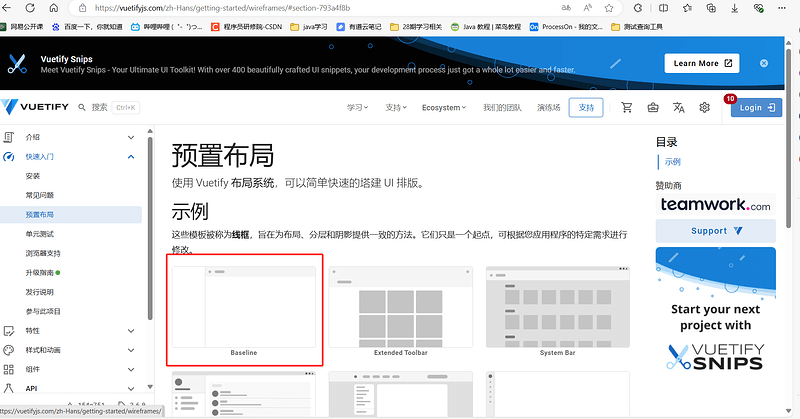
- 在vuetify官网选择合适的布局模板,将对应的代码copy到组件里。
- 在vuetify官网选择合适的布局模板,将对应的代码copy到组件里。
<template>
    <v-app id="inspire">
      <!-- 侧边栏 -->
      <v-navigation-drawer
        v-model="drawer"
        app
      >
      </v-navigation-drawer>

      <!-- 顶部栏 -->
      <v-app-bar app>
        <v-app-bar-nav-icon
          @click="drawer = !drawer">
        </v-app-bar-nav-icon>
        <!-- 修改布局title展示内容 -->
        <v-toolbar-title>霍格沃兹测试平台</v-toolbar-title>
      </v-app-bar>

      <v-main>
        <!--主界面内容 -->
      </v-main>
    </v-app>
  </template>

  <script>
    export default {
      data: () => ({ drawer: null }),
    }
  </script>
- (2)在router文件夹下的index.js文件中添加路由
import LayOut from '../views/LayOut.vue'

const routes = [
  {
    path: '/',
    name: 'home',
    component: HomeView
  },
  {
    path: '/layout',
    name: 'layout',
    component: LayOut
  },
  {
    path: '/about',
    name: 'about',
    // route level code-splitting
    // this generates a separate chunk (about.[hash].js) for this route
    // which is lazy-loaded when the route is visited.
    component: () => import(/* webpackChunkName: "about" */ '../views/AboutView.vue')
  }
]
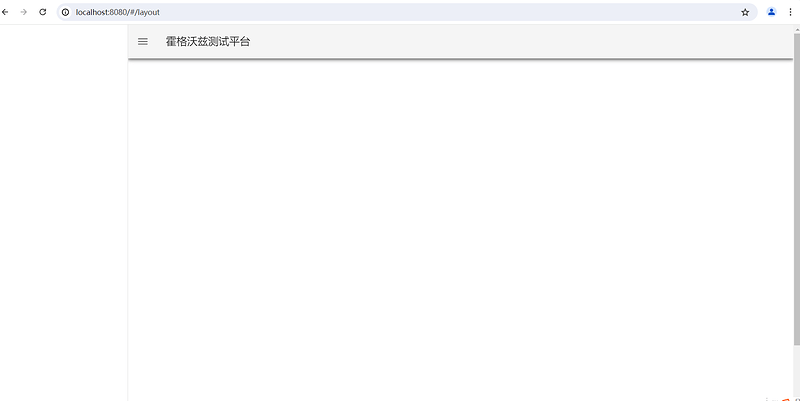
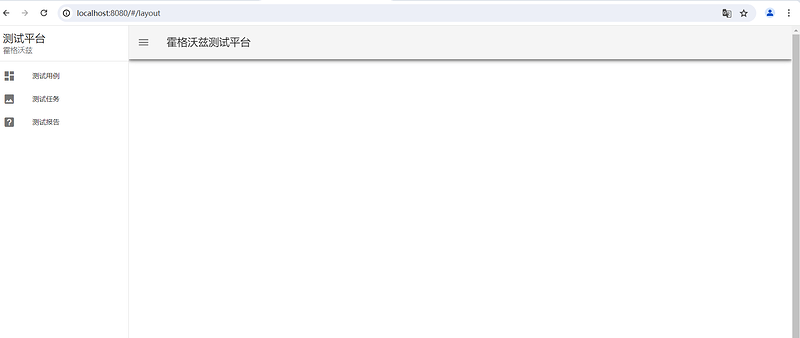
- (3)通过路由接口访问对应的布局页面
1.3 Vuetify 搭建测试用例界面
-
(1)测试用例模板
- 选择 UI 组件
- 选择 Tables(表格)
- 找到符合需求的表格
-
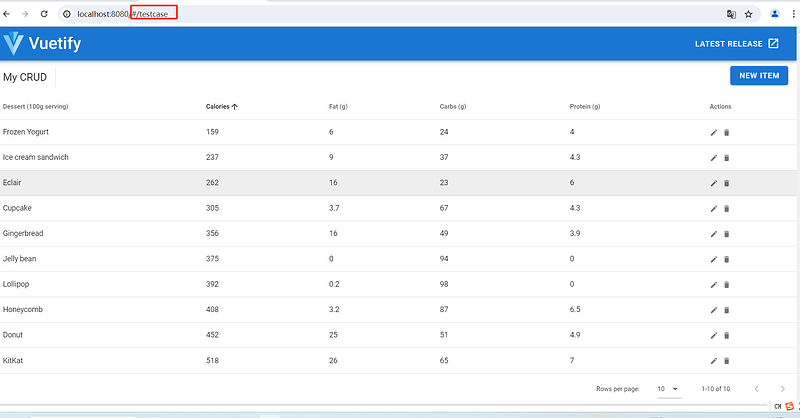
(2)新建 TestCase.vue,将选择的模板代码copy到组件内
<template>
    <v-data-table :headers="headers"  :items="desserts"  sort-by="calories"  class="elevation-1">
        <template v-slot:top>
            <v-toolbar flat color="white">
                <v-toolbar-title>My CRUD</v-toolbar-title>
                <v-divider class="mx-4"  inset  vertical></v-divider>
                <v-spacer></v-spacer>
                <v-dialog v-model="dialog" max-width="500px">
                    <template v-slot:activator="{ on }">
                        <v-btn color="primary" dark class="mb-2" v-on="on">New Item</v-btn>
                    </template>
                    <v-card>
                        <v-card-title>
                            <span class="headline">{{ formTitle }}</span>
                        </v-card-title>
                        <v-card-text>
                            <v-container>
                            <v-row>
                                <v-col cols="12" sm="6" md="4">
                                <v-text-field v-model="editedItem.name" label="Dessert name"></v-text-field>
                                </v-col>
                                <v-col cols="12" sm="6" md="4">
                                <v-text-field v-model="editedItem.calories" label="Calories"></v-text-field>
                                </v-col>
                                <v-col cols="12" sm="6" md="4">
                                <v-text-field v-model="editedItem.fat" label="Fat (g)"></v-text-field>
                                </v-col>
                                <v-col cols="12" sm="6" md="4">
                                <v-text-field v-model="editedItem.carbs" label="Carbs (g)"></v-text-field>
                                </v-col>
                                <v-col cols="12" sm="6" md="4">
                                <v-text-field v-model="editedItem.protein" label="Protein (g)"></v-text-field>
                                </v-col>
                            </v-row>
                            </v-container>
                        </v-card-text>
                        <v-card-actions>
                            <v-spacer></v-spacer>
                            <v-btn color="blue darken-1" text @click="close">Cancel</v-btn>
                            <v-btn color="blue darken-1" text @click="save">Save</v-btn>
                        </v-card-actions>
                    </v-card>
                </v-dialog>
            </v-toolbar>
        </template>
        <template v-slot:item.actions="{ item }">
            <v-icon small class="mr-2"  @click="editItem(item)">mdi-pencil </v-icon>
            <v-icon small  @click="deleteItem(item)" > mdi-delete</v-icon>
        </template>
        <template v-slot:no-data>
            <v-btn color="primary" @click="initialize">Reset</v-btn>
        </template>
    </v-data-table>
</template>

<script>
    export default {
        data: () => ({
            dialog: false,
            headers: [
                {
                    text: 'Dessert (100g serving)',
                    align: 'start',
                    sortable: false,
                    value: 'name',
                },
                { text: 'Calories', value: 'calories' },
                { text: 'Fat (g)', value: 'fat' },
                { text: 'Carbs (g)', value: 'carbs' },
                { text: 'Protein (g)', value: 'protein' },
                { text: 'Actions', value: 'actions', sortable: false },
            ],
            desserts: [],
            editedIndex: -1,
            editedItem: {
                name: '',
                calories: 0,
                fat: 0,
                carbs: 0,
                protein: 0,
            },
            defaultItem: {
                name: '',
                calories: 0,
                fat: 0,
                carbs: 0,
                protein: 0,
            },
        }),
        computed: {
            formTitle () {
            return this.editedIndex === -1 ? 'New Item' : 'Edit Item'
            },
        },
        watch: {
            dialog (val) {
            val || this.close()
            },
        },
        created () {
            this.initialize()
        },

        methods: {
            initialize () {
                this.desserts = [
                    {
                        name: 'Frozen Yogurt',
                        calories: 159,
                        fat: 6.0,
                        carbs: 24,
                        protein: 4.0,
                    },
                    {
                        name: 'Ice cream sandwich',
                        calories: 237,
                        fat: 9.0,
                        carbs: 37,
                        protein: 4.3,
                    },
                    {
                        name: 'Eclair',
                        calories: 262,
                        fat: 16.0,
                        carbs: 23,
                        protein: 6.0,
                    },
                    {
                        name: 'Cupcake',
                        calories: 305,
                        fat: 3.7,
                        carbs: 67,
                        protein: 4.3,
                    },
                    {
                        name: 'Gingerbread',
                        calories: 356,
                        fat: 16.0,
                        carbs: 49,
                        protein: 3.9,
                    },
                    {
                        name: 'Jelly bean',
                        calories: 375,
                        fat: 0.0,
                        carbs: 94,
                        protein: 0.0,
                    },
                    {
                        name: 'Lollipop',
                        calories: 392,
                        fat: 0.2,
                        carbs: 98,
                        protein: 0,
                    },
                    {
                        name: 'Honeycomb',
                        calories: 408,
                        fat: 3.2,
                        carbs: 87,
                        protein: 6.5,
                    },
                    {
                        name: 'Donut',
                        calories: 452,
                        fat: 25.0,
                        carbs: 51,
                        protein: 4.9,
                    },
                    {
                        name: 'KitKat',
                        calories: 518,
                        fat: 26.0,
                        carbs: 65,
                        protein: 7,
                    },
                ]
            },
            editItem (item) {
                this.editedIndex = this.desserts.indexOf(item)
                this.editedItem = Object.assign({}, item)
                this.dialog = true
            },
            deleteItem (item) {
                const index = this.desserts.indexOf(item)
                confirm('Are you sure you want to delete this item?') && this.desserts.splice(index, 1)
            },
            close () {
                this.dialog = false
                this.$nextTick(() => {
                    this.editedItem = Object.assign({}, this.defaultItem)
                    this.editedIndex = -1
                })
            },
            save () {
                if (this.editedIndex > -1) {
                    Object.assign(this.desserts[this.editedIndex], this.editedItem)
                } else {
                    this.desserts.push(this.editedItem)
                }
                this.close()
            },
        },
    }
</script>
- (3)新建路由关系,并通过接口访问页面
1.4 Vuetify 搭建侧边栏
-
(1)侧边栏模板
- 选择 UI 组件
- 选择 Navigation drawers(导航抽屉)
- 找到符合需求的侧边栏
- 模板代码参考: Groups(组) - Navigation drawers(导航抽屉) - 《Vuetify.js 2.2.26 使用教程》 - 书栈网 · BookStack
-
(2)复制示例代码
- 将侧边栏的部分代码复制到LayOut.vue组件的侧边栏内容处
-
(3)修改对应的功能
<template>
    <v-app id="inspire">
      <!-- 侧边栏 -->
        <v-navigation-drawer v-model="drawer"  app>
            <v-list-item>
                <v-list-item-content>
                <v-list-item-title class="title"> 测试平台</v-list-item-title>
                <v-list-item-subtitle>霍格沃兹</v-list-item-subtitle>
                </v-list-item-content>
            </v-list-item>
            <v-divider></v-divider>
            <v-list  dense nav>
                <v-list-item  v-for="item in items"  :key="item.title"  link>
                    <v-list-item-icon>
                        <v-icon>{{ item.icon }}</v-icon>
                    </v-list-item-icon>
                    <v-list-item-content>
                        <v-list-item-title>{{ item.title }}</v-list-item-title>
                    </v-list-item-content>
                </v-list-item>
            </v-list>
        </v-navigation-drawer>

      <!-- 顶部栏 -->
        <v-app-bar app>
            <v-app-bar-nav-icon  @click="drawer = !drawer"> </v-app-bar-nav-icon>
            <!-- 修改布局title展示内容 -->
            <v-toolbar-title>霍格沃兹测试平台</v-toolbar-title>
        </v-app-bar>

        <v-main>
            <!--主界面内容 -->
        </v-main>
    </v-app>
</template>

<script>
    export default {
        data: () => ({
            drawer: null,
            items: [
                { title: '测试用例', icon: 'mdi-view-dashboard' },
                { title: '测试任务', icon: 'mdi-image' },
                { title: '测试报告', icon: 'mdi-help-box' },
            ],
            right: null
        }),
    }
</script>
- (4)页面展示效果
二, 使用 router 构造系统路由跳转
2.1 配置父子路由
- index.js 中配置主界面 layout 的子路由
import Vue from 'vue'
import VueRouter from 'vue-router'
import LayOut from '../views/LayOut.vue'
import TestCase from '../views/TestCase.vue'
import TestTask from '../views/TestTask.vue'
import TestReport from '../views/TestReport.vue'

Vue.use(VueRouter)

const routes = [
  {
    path: '/',
    // 重定向路由,当访问/ 的时候,就会访问到重定向的路由信息
    redirect: '/layout'
  },
  {
    path: '/layout',
    name: 'layout',
    component: LayOut,
      // 通过children 关键字添加子路由
      // children 是数组内嵌套对象,因为可能有多个子路由
    children: [
      {
        path: 'testCase',
        name: 'testCase',
        component: TestCase
      },
      {
        path: 'task',
        name: 'task',
        component: TestTask
      },
      {
        path: 'report',
        name: 'report',
        component: TestReport
      },
    ]
  },
]

const router = new VueRouter({
  routes
})

export default router
2.2 侧边栏路由跳转
- layout.vue 中配置路由跳转
<template>
    <v-app id="inspire">
      <!-- 侧边栏 -->
        <v-navigation-drawer v-model="drawer"  app>
            <v-list-item>
                <v-list-item-content>
                <v-list-item-title class="title"> 测试平台</v-list-item-title>
                <v-list-item-subtitle>霍格沃兹</v-list-item-subtitle>
                </v-list-item-content>
            </v-list-item>
            <v-divider></v-divider>
            <v-list  dense nav>
                <!-- 通过href绑定跳转路由 -->
                <v-list-item  v-for="item in items"  :key="item.title"  link :href="item.link">
                    <v-list-item-icon>
                        <v-icon>{{ item.icon }}</v-icon>
                    </v-list-item-icon>
                    <v-list-item-content>
                        <v-list-item-title>{{ item.title }}</v-list-item-title>
                    </v-list-item-content>
                </v-list-item>
            </v-list>
        </v-navigation-drawer>

      <!-- 顶部栏 -->
        <v-app-bar app>
            <v-app-bar-nav-icon  @click="drawer = !drawer"> </v-app-bar-nav-icon>
            <!-- 修改布局title展示内容 -->
            <v-toolbar-title>霍格沃兹测试平台</v-toolbar-title>
        </v-app-bar>

        <v-main>
            <!--主界面内容 -->
            <router-view></router-view>
        </v-main>
    </v-app>
</template>

<script>
    export default {
        data: () => ({
            drawer: null,
            // 添加跳转路由
            items: [
                { title: '测试用例', icon: 'mdi-view-dashboard', link:'#/layout/testcase'},
                { title: '测试任务', icon: 'mdi-image', link:'#/layout/task'},
                { title: '测试报告', icon: 'mdi-help-box', link:'#/layout/report'},
            ],
            right: null
        }),
    }
</script>
三, axios 实现后端联调
3.1 构建 axios 基础配置
- (1)封装全局配置模块 http.js
- 在src目录下新建api文件夹,然后新建http.js文件
// 完成http请求的基本配置
// 导入axios
import axios from 'axios'

// 创建axios实例
const instance = axios.create({
    baseURL:'http://39.102.48.202:6099',
    timeout:5000,
    headers:{
        'Content-Type': 'application/json',
    }
})

export default instance
- (2)封装测试用例模块接口
- 在api目录下新建testcase.js文件
// 用例增删改查接口管理

// 导入axios实例instance
import instance from './http'

const testcaseApi = {
    // 获取用例信息
    getTestCase(prams){
        return instance({
            method: 'GET',
            url: '/testcase',
            // 如果涉及传递拼接在url中的参数,要用params
            params: prams
        })
    },
    // 新增用例
    addTestCase(data){
        return instance({
            method: 'POST',
            url: '/testcase',
            data: data
        })
    },
    // 删除用例
    deleteTestCase(data){
        return instance({
            method: 'DELETE',
            url: '/testcase',
            data: data
        })
    },
    // 修改用例
    updateTestCase(data){
        return instance({
            method: 'PUT',
            url: '/testcase',
            data: data
        })
    }
}

export default testcaseApi
- (3)整合模块接口 api.js
// 所有接口的入口,相当于目录
import testcaseApi from './testcase'

const api = {
    testcaseApi
}

export defalut api
- (4)将api挂载到main.js文件
import Vue from 'vue'
import App from './App.vue'
import router from './router'
import vuetify from './plugins/vuetify'
import api from './api/api'

Vue.prototype.$api = api
Vue.config.productionTip = false

new Vue({
  router,
  vuetify,
  render: h => h(App)
}).$mount('#app')
- (5)优化页面展示形式,在App.vue组件删除多余的代码
<template>
  <!-- 删除多余代码,设置id属性完成挂载属性 -->
  <v-app id="app">
      <router-view/>
  </v-app>
</template>

<script>

export default {
  name: 'App',

  data: () => ({
    //
  }),
};
</script>
- (6) 接口数据结合平台展示
- 请求接口数据
- 数据绑定页面
- TestCase.vue组件内容最终展示
<template>
    <v-data-table :headers="headers"  :items="desserts"  sort-by="calories"  class="elevation-1">
        <template v-slot:top>
            <v-toolbar flat color="white">
                <v-toolbar-title>测试用例</v-toolbar-title>
                <v-divider class="mx-4"  inset  vertical></v-divider>
                <v-spacer></v-spacer>
                <v-dialog v-model="dialog" max-width="500px">
                    <template v-slot:activator="{ on }">
                        <v-btn color="primary" dark class="mb-2" v-on="on">新增用例</v-btn>
                    </template>
                    <v-card>
                        <v-card-title>
                            <span class="headline">{{ formTitle }}</span>
                        </v-card-title>
                        <v-card-text>
                            <v-container>
                                <v-row>
                                    <v-col cols="12" sm="6" md="4">
                                    <v-text-field v-model="editedItem.id" label="用例id"></v-text-field>
                                    </v-col>
                                    <v-col cols="12" sm="6" md="4">
                                    <v-text-field v-model="editedItem.case_title" label="用例标题"></v-text-field>
                                    </v-col>
                                    <v-col cols="12" sm="6" md="4">
                                    <v-text-field v-model="editedItem.remark" label="备注"></v-text-field>
                                    </v-col>
                                </v-row>
                            </v-container>
                        </v-card-text>
                        <v-card-actions>
                            <v-spacer></v-spacer>
                            <v-btn color="blue darken-1" text @click="close">取消</v-btn>
                            <v-btn color="blue darken-1" text @click="save">保存</v-btn>
                        </v-card-actions>
                    </v-card>
                </v-dialog>
                <v-dialog v-model="dialogDelete" max-width="500px">
                    <v-card>
                        <v-card-title class="text-h5">确认删除用例?</v-card-title>
                        <v-card-actions>
                            <v-spacer></v-spacer>
                            <v-btn color="blue darken-1" text  @click="closeDelete">取消 </v-btn>
                            <v-btn color="blue darken-1" text  @click="deleteItemConfirm"> 确认</v-btn>
                            <v-spacer></v-spacer>
                        </v-card-actions>
                    </v-card>
                </v-dialog>
            </v-toolbar>
        </template>
        <template v-slot:item.actions="{ item }">
            <v-icon small class="mr-2"  @click="editItem(item)">mdi-pencil </v-icon>
            <v-icon small  @click="deleteItem(item)" > mdi-delete</v-icon>
        </template>
        <template v-slot:no-data>
            <v-btn color="primary" @click="initialize">刷新</v-btn>
        </template>
    </v-data-table>
</template>

<script>
    export default {
        data: () => ({
            dialog: false,
            dialogDelete: false,
            headers: [
                { text: '用例ID', align: 'start', sortable: false, value: 'id'},
                { text: '用例标题', value: 'case_title' },
                { text: '备注', value: 'remark' },
                { text: '操作', value: 'actions', sortable: false },
            ],
            desserts: [],
            editedIndex: -1,
            editedItem: {
                id: 0,
                case_title: '',
                remark: '',
            },
            defaultItem: {
                id: 0,
                case_title: '',
                remark: '',
            },
        }),
        computed: {
            formTitle () {
            return this.editedIndex === -1 ? '新增用例' : '编辑用例'
            },
        },
        watch: {
            dialog (val) {
                val || this.close()
            },
            dialogDelete (val) {
                val || this.closeDelete()
            },
        },
        created () {
            this.initialize()
        },

        methods: {
            initialize () {
                this.$api.testcaseApi.getTestCase().then((result) =>{
                    console.log("getTestCase",result),
                    this.desserts = result.data
                }).catch((err) =>{
                    console.log(err)
                })
            },
            editItem (item) {
                this.editedIndex = this.desserts.indexOf(item)
                this.editedItem = Object.assign({}, item)
                this.dialog = true
            },
            deleteItem (item) {
                this.editedIndex = this.desserts.indexOf(item)
                this.editedItem = Object.assign({}, item)
                this.dialogDelete = true
            },

            deleteItemConfirm(){
                // desserts.value.splice(editedIndex.value, 1)
                // 获取对应的用例id
                // console.log(this.editedItem.id)
                // 调用删除接口,将id 作为query (url参数)传递给后端服务
                this.$api.testcaseApi.deleteTestCase({'id': this.editedItem.id})
                   .then((result) =>{
                            if(result.data.code ===0){
                                console.log("deleteTestCase",result)
                                this.initialize()
                            }else{
                                console.log("用例删除失败")
                                console.log("deleteTestCase",result)
                            }
                        }).catch((err) =>{
                             console.log(err)
                        })
                this.closeDelete()
            },
            close () {
                this.dialog = false
                this.$nextTick(() => {
                    this.editedItem = Object.assign({}, this.defaultItem)
                    this.editedIndex = -1
                })
            },
            closeDelete () {
                this.dialogDelete = false
                this.$nextTick(() => {
                    this.editedItem = Object.assign({}, this.defaultItem)
                    this.editedIndex = -1
                })
            },
            save () {
                if (this.editedIndex > -1) {
                    // 编辑用例 - 调用更新用例接口
                    // console.log('this.editedItem', this.editedItem)
                    this.$api.testcaseApi.updateTestCase(this.editedItem)
                        .then((result) =>{
                            // 如果用例更新成功,则调用initialize函数对应的查询接口,页面则自动更新数据
                            if(result.data.code ===0){
                                this.initialize()
                            }else{
                                console.log("用例更新失败")
                                console.log("updateTestCase",result)
                            }
                        }).catch((err) =>{
                             console.log(err)
                        })
                } else {
                    // 新增用例 - 调用新增用例接口
                    this.$api.testcaseApi.addTestCase(this.editedItem)
                        .then((result) =>{
                            if(result.data.code ===0){
                                this.initialize()
                            }else{
                                console.log("用例新增失败")
                                console.log("addTestCase",result)
                            }
                        }).catch((err) =>{
                             console.log(err)
                        })
                }
                this.close()
            },
        },
    }
</script>
