一、Pytest结合数据驱动-yaml
1.1 数据驱动的定义
-
数据驱动就是数据的改变,从而驱使自动化测试的执行,最终引起测试结果的改变。
-
简单来说,就是参数化的应用。数据量小的测试用例可以使用代码的参数化来实现数据驱动,数据量大的情况下需要使用一种结构化的文件,如yaml,json等,来对数据进行存储,然后在测试用例中读取。
1.2 数据驱动的应用
- APP、Web、接口自动化测试
- 测试步骤的数据驱动
- 测试数据的数据驱动
- 配置的数据驱动
1.3 yaml文件介绍
- 对象:键值对的集合,用冒号":"表示
- 数组:一组按次序排列的值,前缀"-"
- 纯量:单个的、不可再分的值
- 字符串
- 布尔值
- 整数
- 浮点数
- Null
- 时间
- 日期
举个例子:
# 编程语言
languages:
  - PHP
  - Java
  - Python
book:
  Python入门: # 书籍名称
    price: 55.5
    author: Lily
    available: True
    repertory: 20
    date: 2018-02-17
  Java入门:
    price: 60
    author: Lily
    available: False
    repertory: Null
    date: 2018-05-11
1.3 yaml文件使用
- 查看yaml文件
pycharmtxt记事本
- 读取yaml文件
- 安装:
pip install pyyaml - 方法:
yaml.safe_load(f) - 方法:
yaml.safe_dump(f)
- 安装:
file_path = './my.yaml'
with open(file_path, 'r', encoding='utf-8') as f:
        data = yaml.safe_load(f)
1.4 工程目录结构
- data目录:存放yaml数据文件
- func目录:存放被测函数文件
- testcase目录:存放测试用例文件
# 工程目录结构
.
├── data
│   └── data.yaml
├── func
│   ├── __init__.py
│   └── operation.py
└── testcase
    ├── __init__.py
    └── test_add.py
1.5 测试准备
- 被测对象:operation.py
- 测试用例:test_add.py
- 测试数据:data.yaml
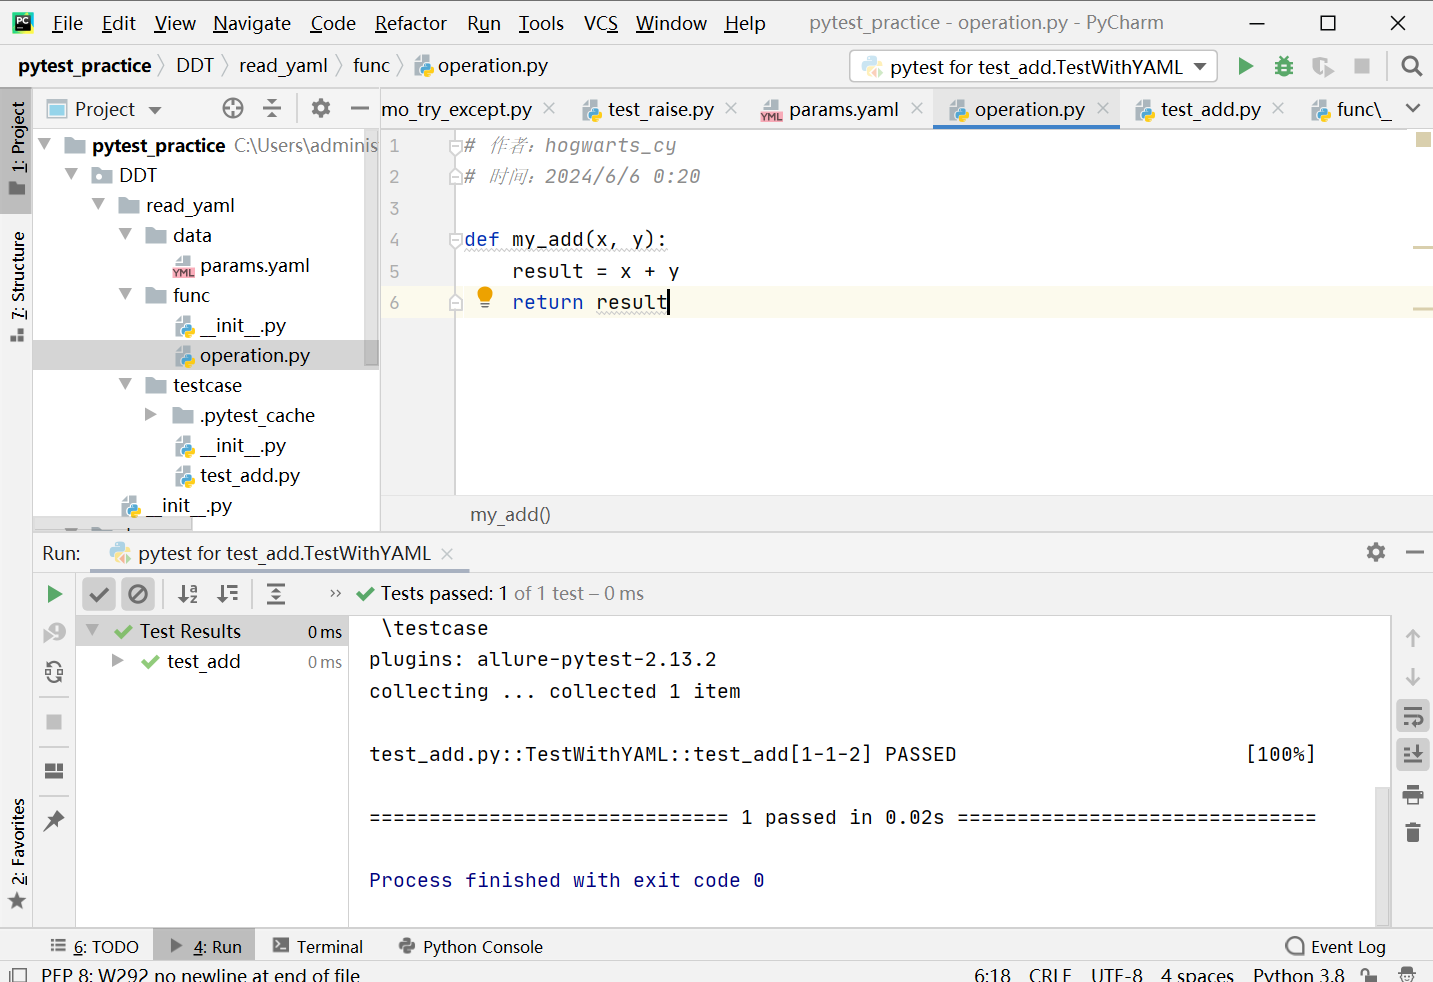
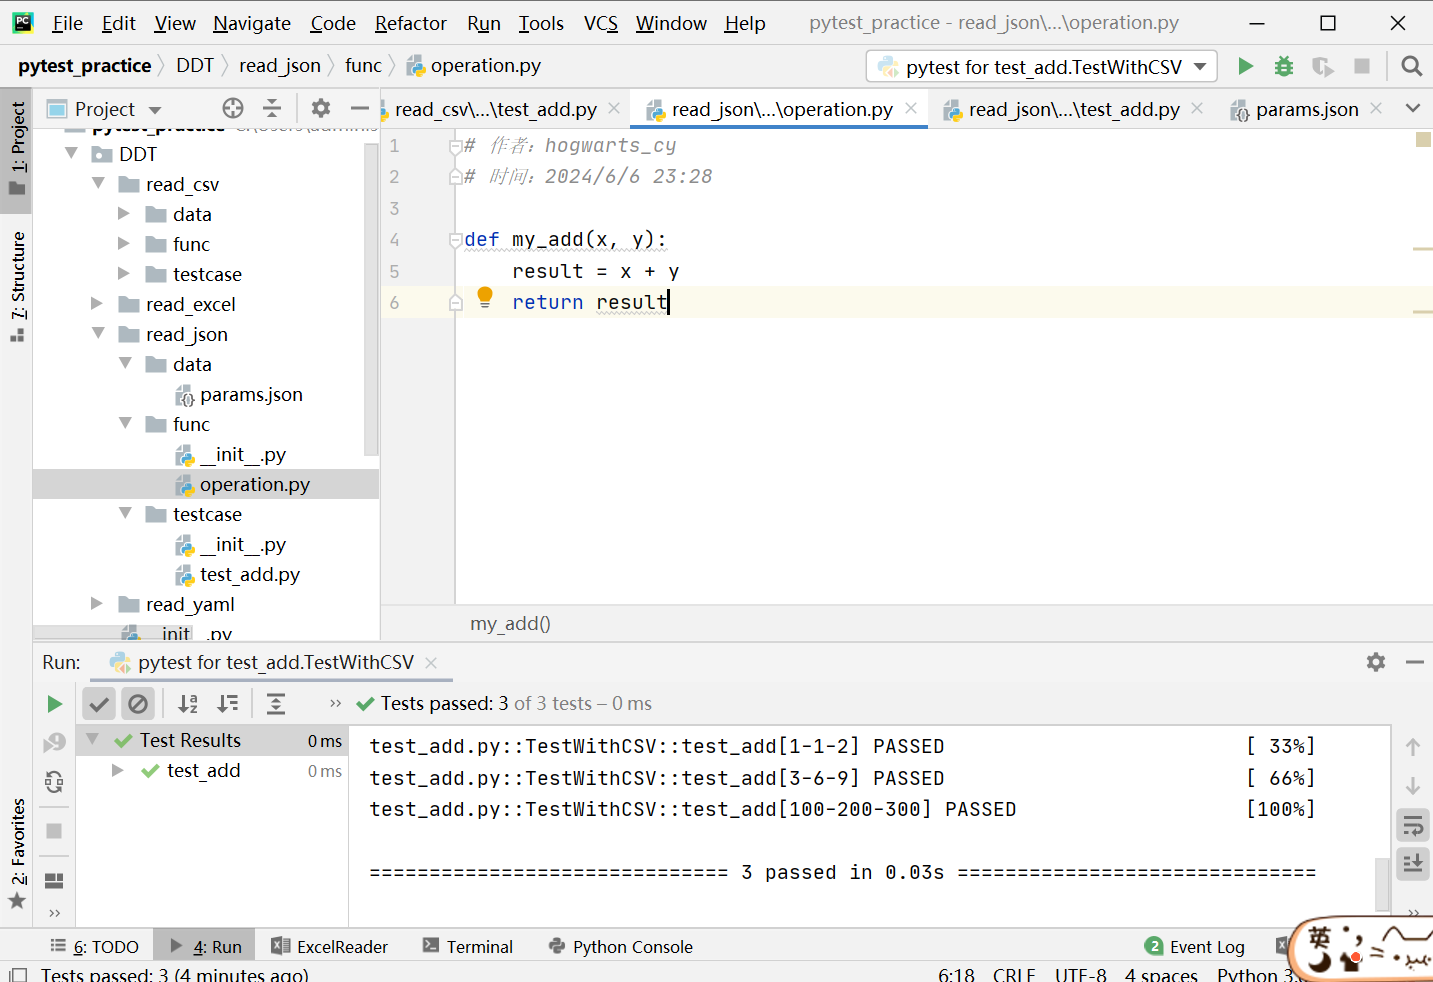
# operation.py 文件内容
def my_add(x, y):
    result = x + y
    return result
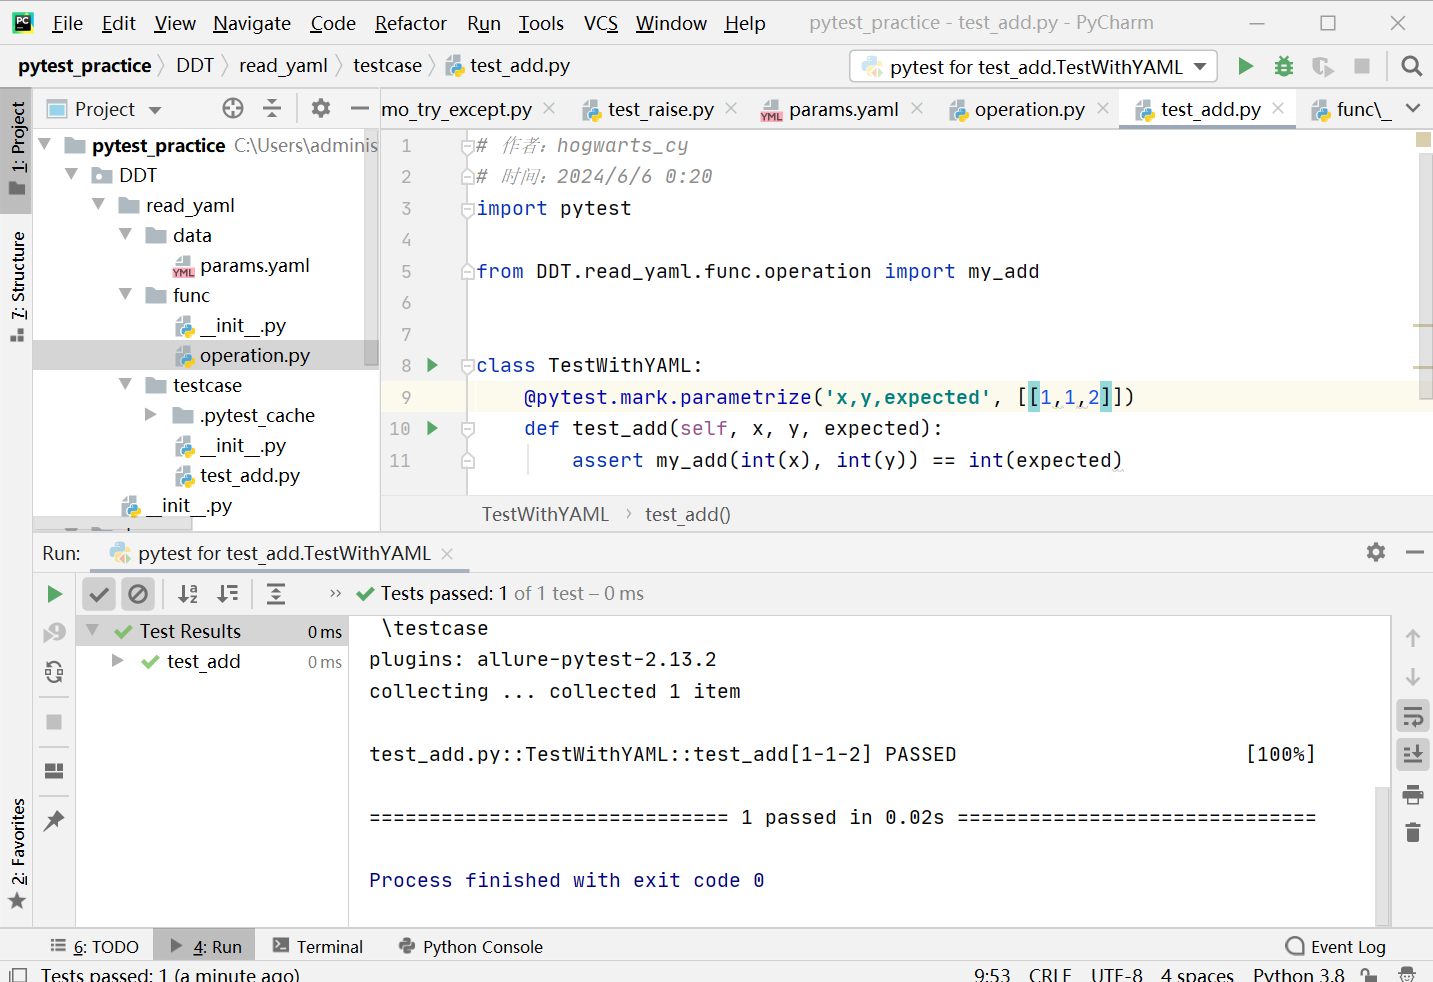
# test_add.py 文件内容
class TestWithYAML:
  @pytest.mark.parametrize('x,y,expected', [[1, 1, 2]])
  def test_add(self, x, y, expected):
    assert my_add(int(x), int(y)) == int(expected)
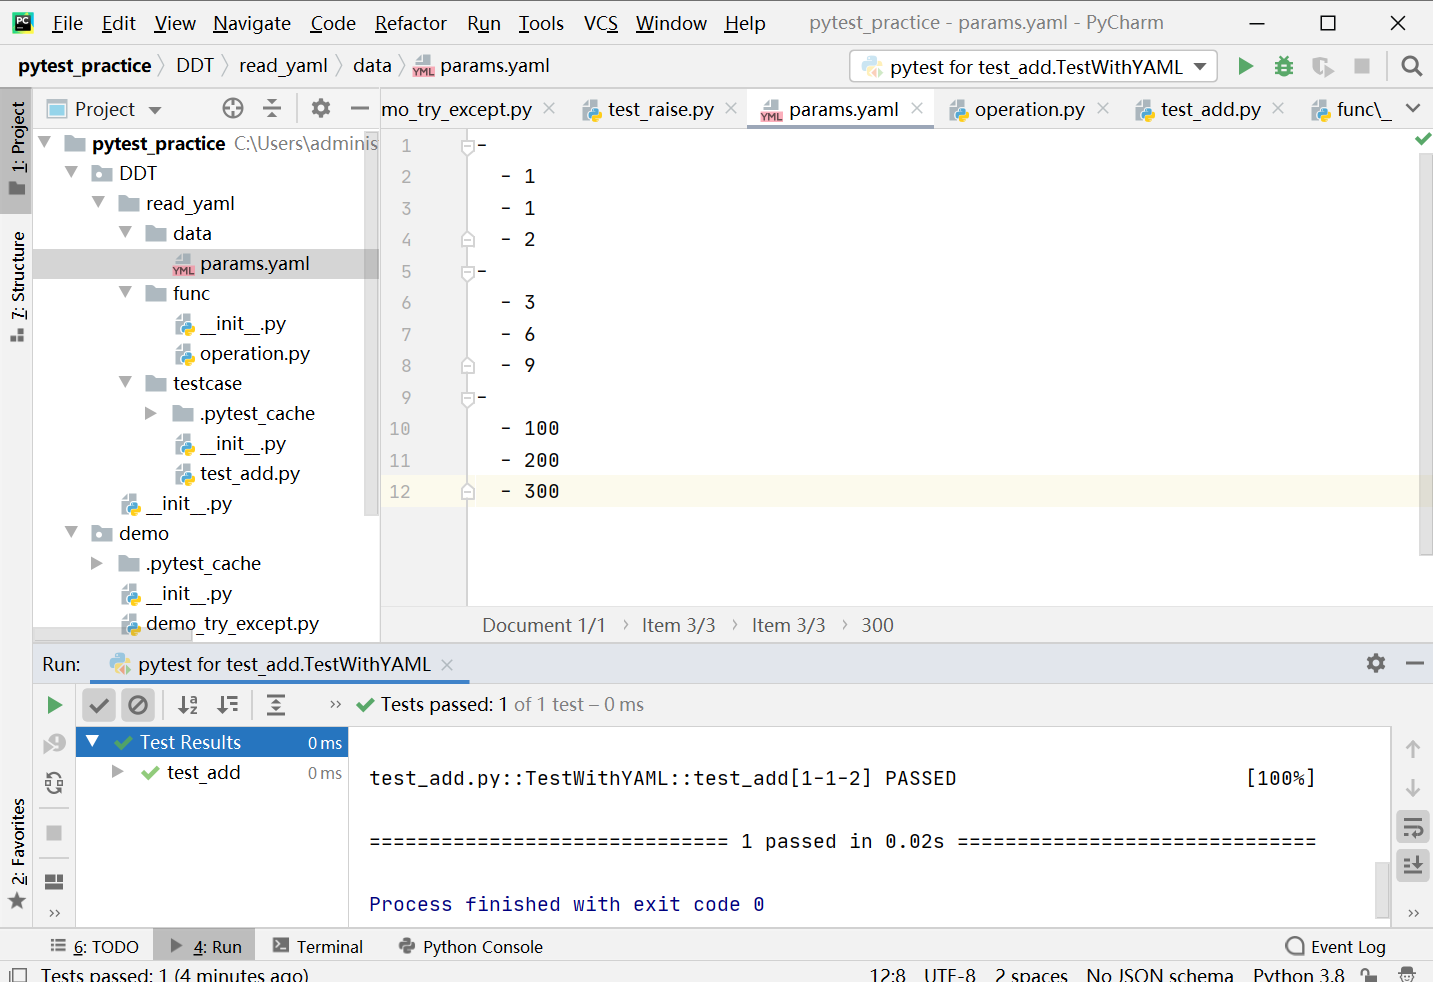
# data.yaml 文件内容
-
  - 1
  - 1
  - 2
-
  - 3
  - 6
  - 9
-
  - 100
  - 200
  - 300
1.6 实际运用
def get_yaml():
    """
    获取yaml数据
    :return: 返回数据的结构:[[1, 1, 2], [3, 6, 9], [100, 200, 300]]
    """
    with open('../datas/data.yaml', 'r') as f:
        data = yaml.safe_load(f)
        return data
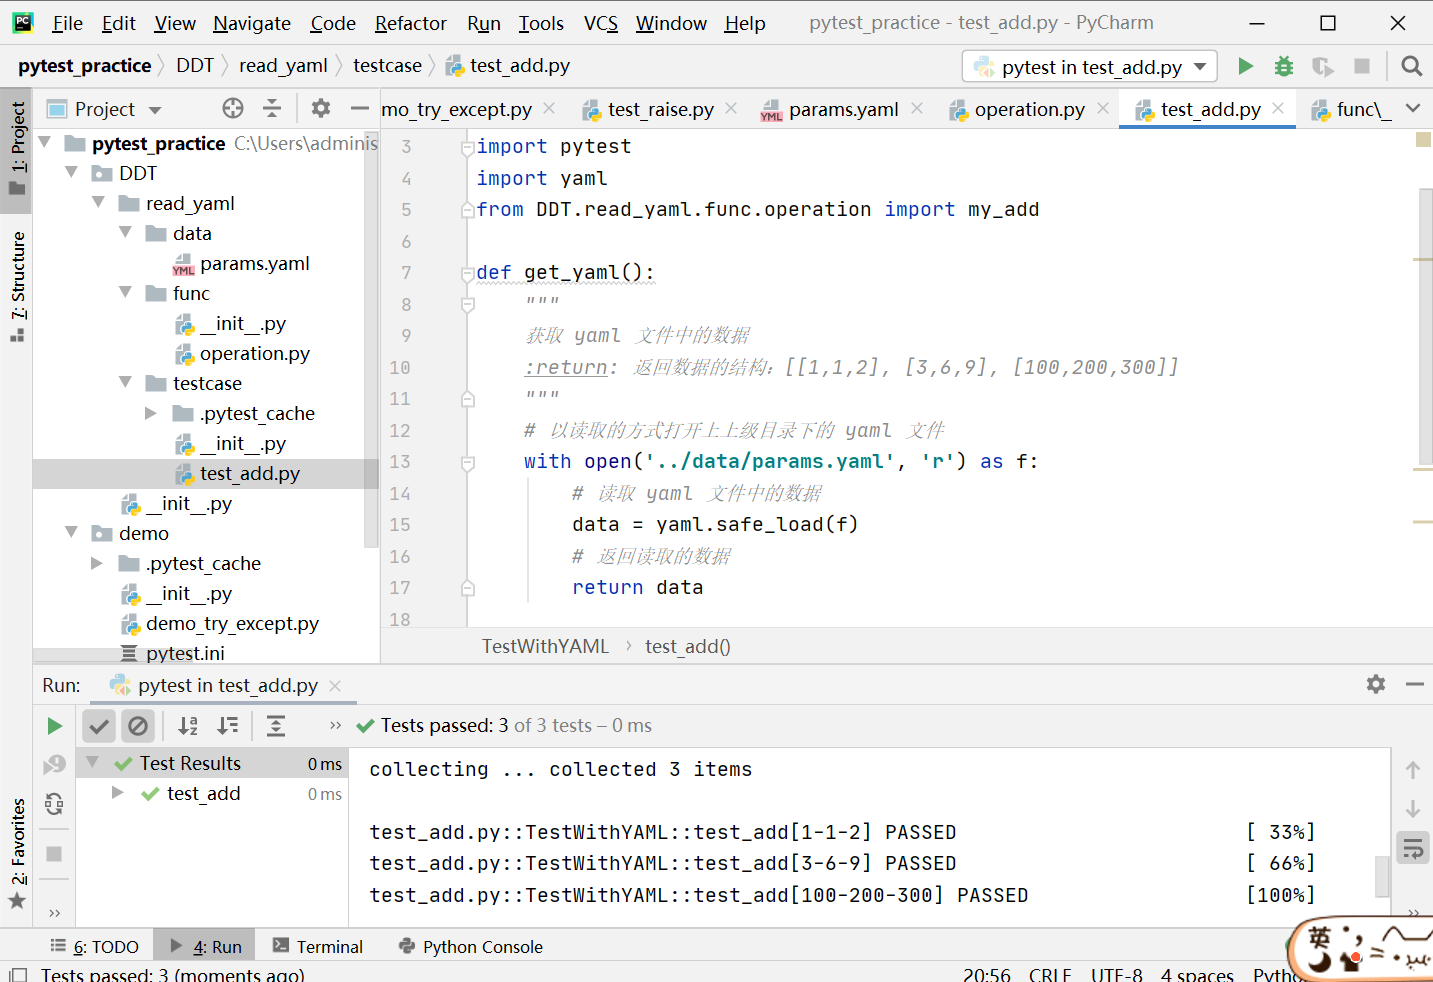
源码:
import pytest
import yaml
from DDT.read_yaml.func.operation import my_add

def get_yaml():
    """
    获取 yaml 文件中的数据
    :return: 返回数据的结构:[[1,1,2], [3,6,9], [100,200,300]]
    """
    # 以读取的方式打开上上级目录下的 yaml 文件
    with open('../data/params.yaml', 'r') as f:
        # 读取 yaml 文件中的数据
        data = yaml.safe_load(f)
        # 返回读取的数据
        return data

class TestWithYAML:
    @pytest.mark.parametrize('x,y,expected', get_yaml())
    def test_add(self, x, y, expected):
        assert my_add(int(x), int(y)) == int(expected)
二、Pytest结合数据驱动-excel
2.1 读取Excel文件
- 第三方库
- xlrd
- xlwings
- pandas
- openpyxl
2.2 openyxl库的安装
- 安装:pip install openpyxl
- 导入:import openpyxl
2.3 openpyxl库的操作
- 读取工作簿
- 读取工作表
- 读取单元格
import openpyxl

# 获取工作簿
book = openpyxl.load_workbook('../data/params.xlsx')

# 读取工作表
sheet = book.active

# 读取单个单元格
cell_a1 = sheet['A1']
cell_a3 = sheet.cell(column=1, row=3)  # A3

# 读取多个连续单元格
cells = sheet["A1":"C3"]

# 获取单元格的值
cell_a1.value
2.4 工程目录结构
- data 目录:存放 excel 数据文件
- func 目录:存放被测函数文件
- testcase 目录:存放测试用例文件
# 工程目录结构
.
├── data
│   └── params.xlsx
├── func
│   ├── __init__.py
│   └── operation.py
└── testcase
    ├── __init__.py
    └── test_add.py
2.5 测试准备
- 被测对象:operation.py
- 测试用例:test_add.py
- 测试数据:params.xlsx
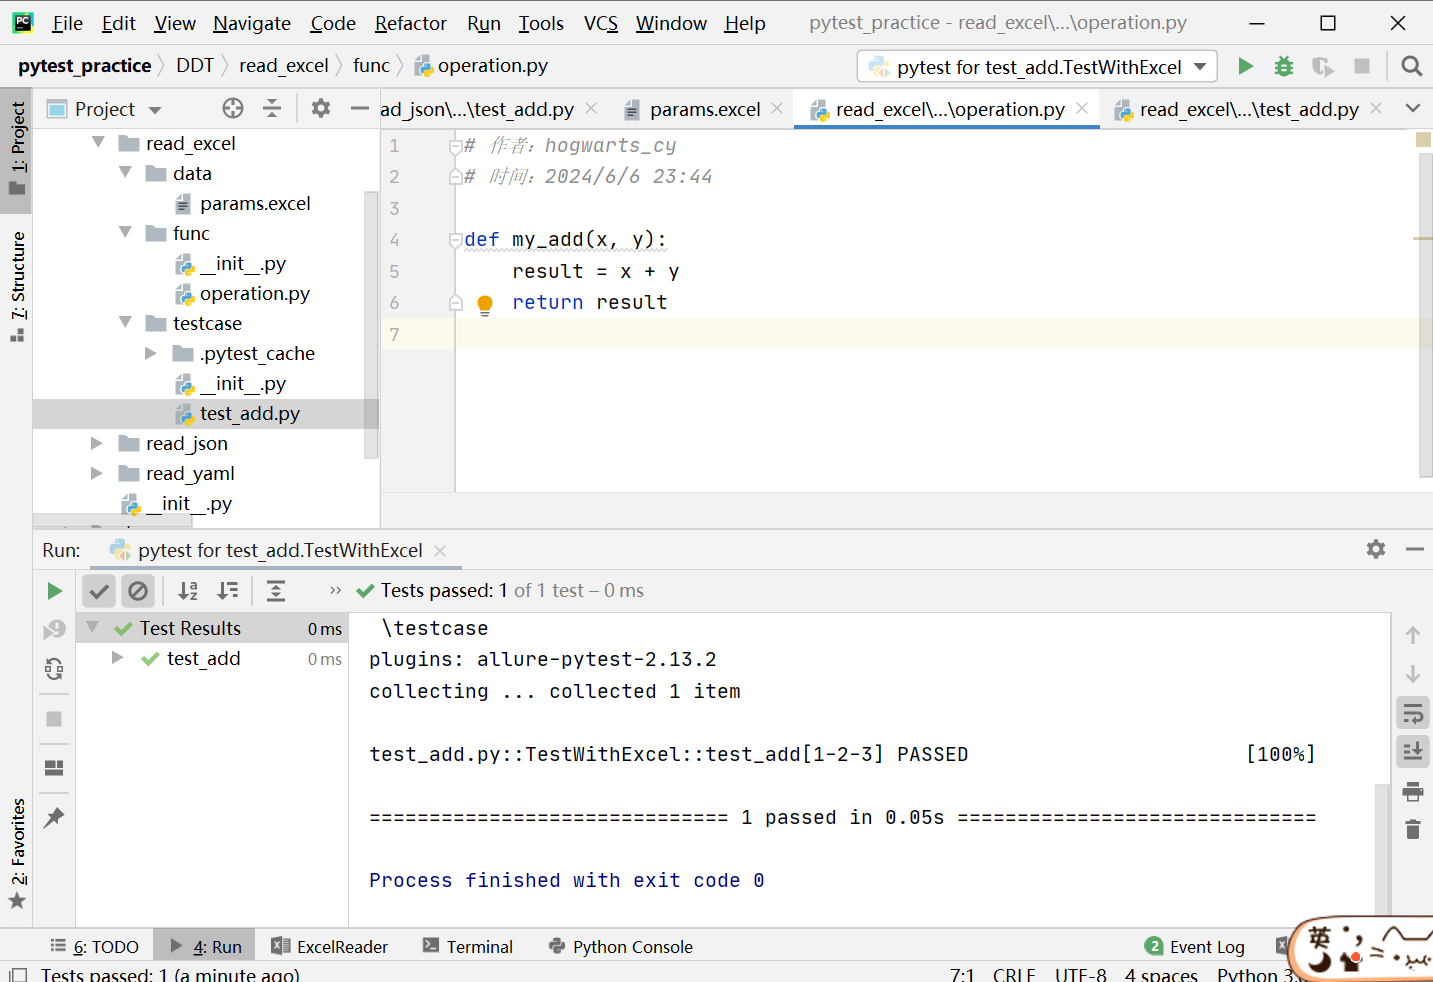
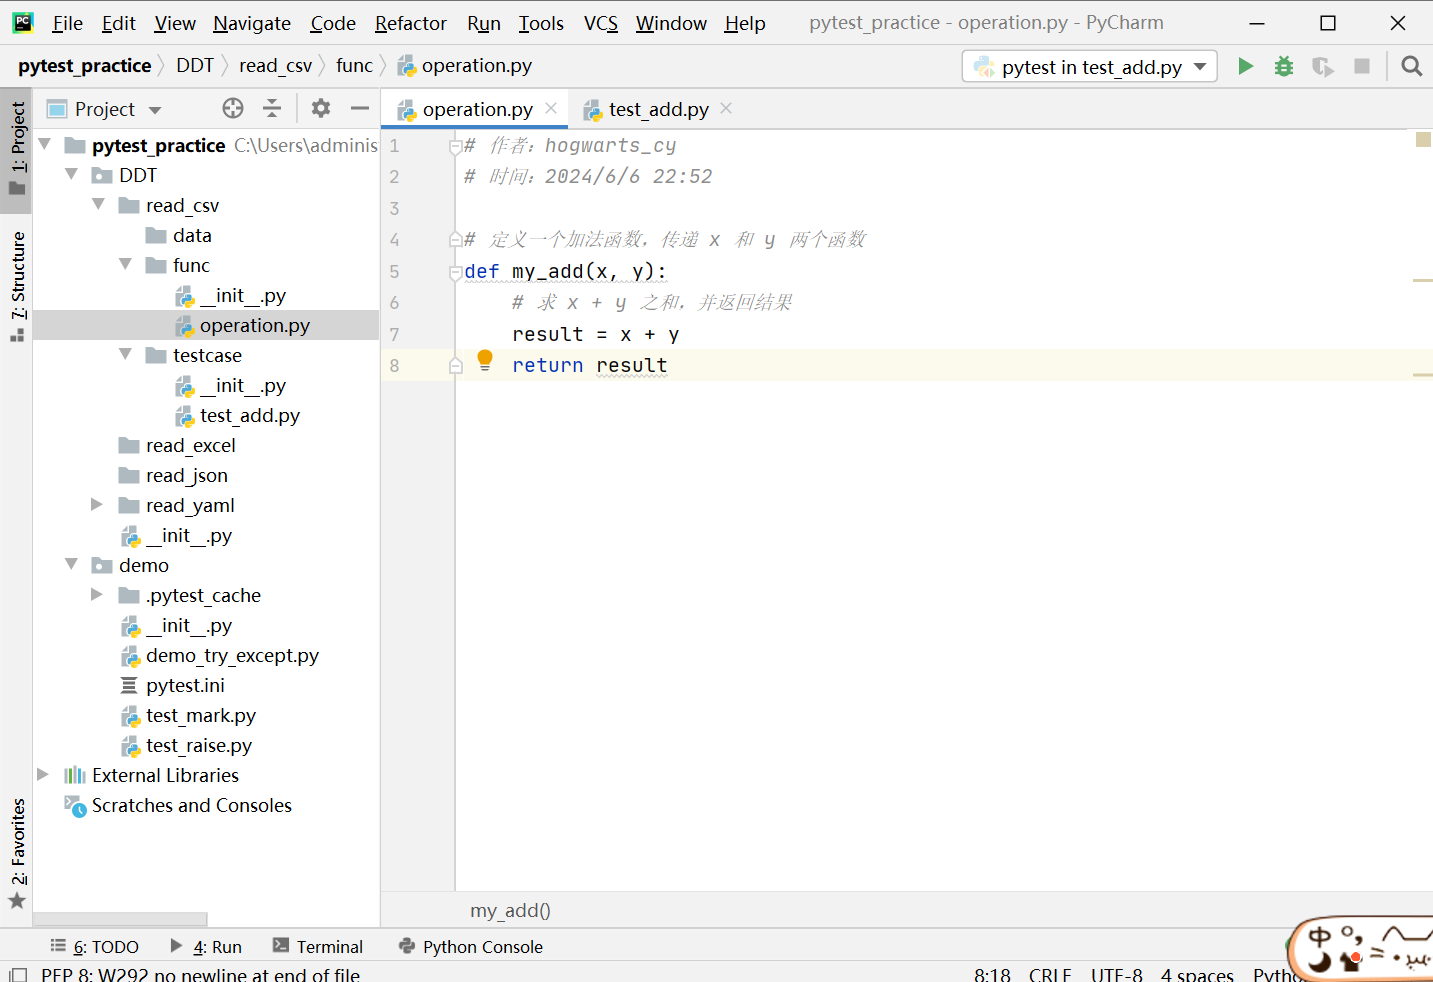
# operation.py 文件内容
def my_add(x, y):
    result = x + y
    return result
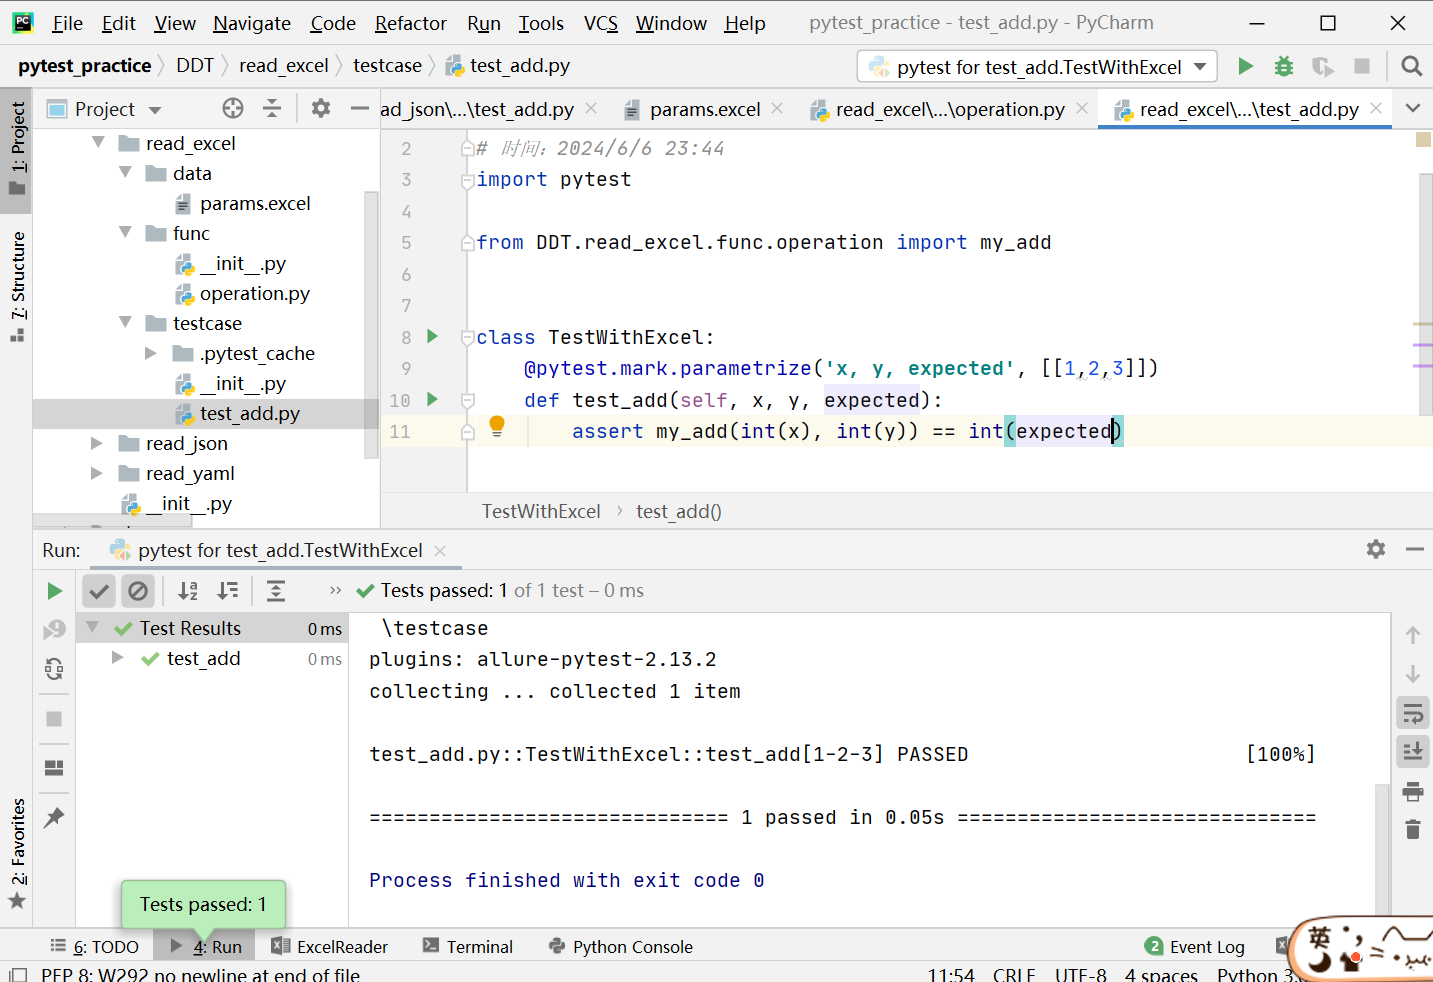
# test_add.py 文件内容
class TestWithEXCEL:
    @pytest.mark.parametrize('x,y,expected', get_excel())
    def test_add(self, x, y, expected):
        assert my_add(int(x), int(y)) == int(expected)

2.6 实际运用
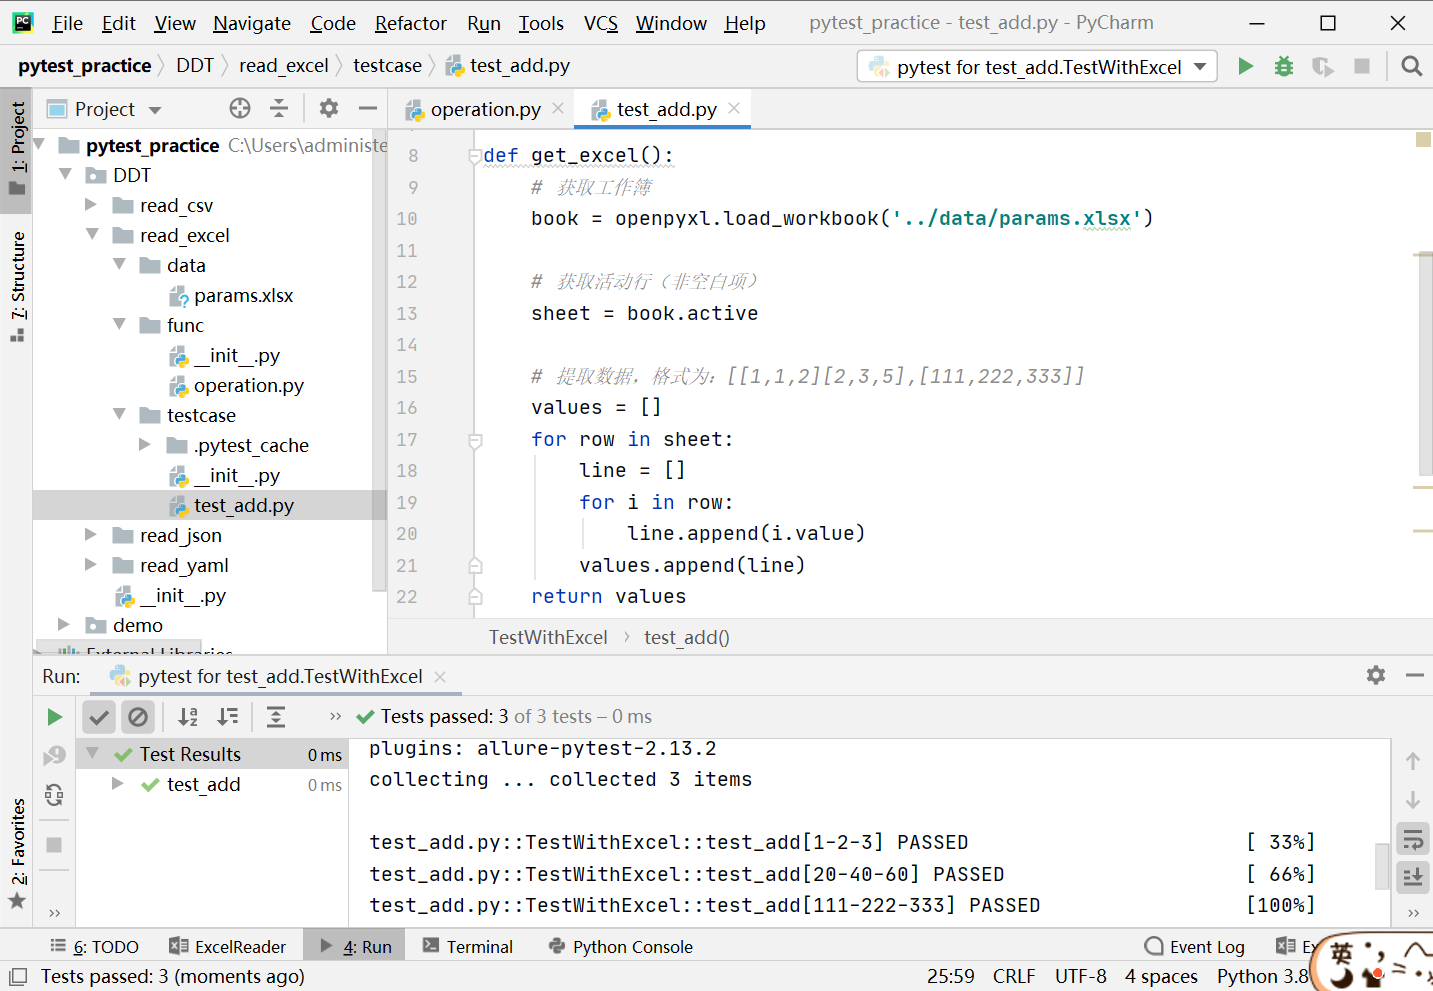
# 读取Excel文件
import openpyxl
import pytest

def get_excel():
    # 获取工作簿
    book = openpyxl.load_workbook('../data/params.xlsx')

    # 获取活动行(非空白的)
    sheet = book.active

    # 提取数据,格式:[[1, 2, 3], [3, 6, 9], [100, 200, 300]]
    values = []
    for row in sheet:
        line = []
        for cell in row:
            line.append(cell.value)
        values.append(line)
    return values
源码:
import pytest
import openpyxl
from DDT.read_excel.func.operation import my_add

def get_excel():
    # 获取工作簿
    book = openpyxl.load_workbook('../data/params.xlsx')

    # 获取活动行(非空白项)
    sheet = book.active

    # 提取数据,格式为:[[1,1,2][2,3,5],[111,222,333]]
    values = []
    for row in sheet:
        line = []
        for i in row:
            line.append(i.value)
        values.append(line)
    return values

class TestWithExcel:
    @pytest.mark.parametrize('x, y, expected', get_excel())
    def test_add(self, x, y, expected):
        assert my_add(int(x), int(y)) == int(expected)
三、Pytest结合数据驱动-csv
3.1 csv文件介绍
- csv:逗号分割值
- 是Comma-Separated Value的缩写
- 以纯文本形式存储数字和文本
- 文件由任意数目的记录组成
- 每行记录由多个字段组成
Linux从入门到高级,linux,¥5000
web自动化测试进阶,python,¥3000
app自动化测试进阶,python,¥6000
Docker容器化技术,linux,¥5000
测试平台开发与实战,python,¥8000
3.2 csv文件使用
- 读取数据
- 内置函数:open()
- 内置模块:csv
- 方法:csv.reader(iterable)
- 参数:iterable,文件或列表对象
- 返回:迭代器,每次迭代会返回一行数据
# 读取csv文件内容

def get_csv():
    with open('demo.csv', 'r') as file:
        raw = csv.reader(file)

        for line in raw:
            print(line)
3.3 工程目录结构
- data目录:存放csv数据文件
- func目录:存放被测函数文件
- testcase目录:存放测试用例文件
# 工程目录结构
.
├── data
│   └── params.csv
├── func
│   ├── __init__.py
│   └── operation.py
└── testcase
    ├── __init__.py
    └── test_add.py
3.4 测试准备
- 被测对象:operation.py
- 测试用例:test_add.py
- 测试数据:params.csv
# operation.py 文件内容
def my_add(x, y):
    result = x + y
    return result
# test_add.py 文件内容
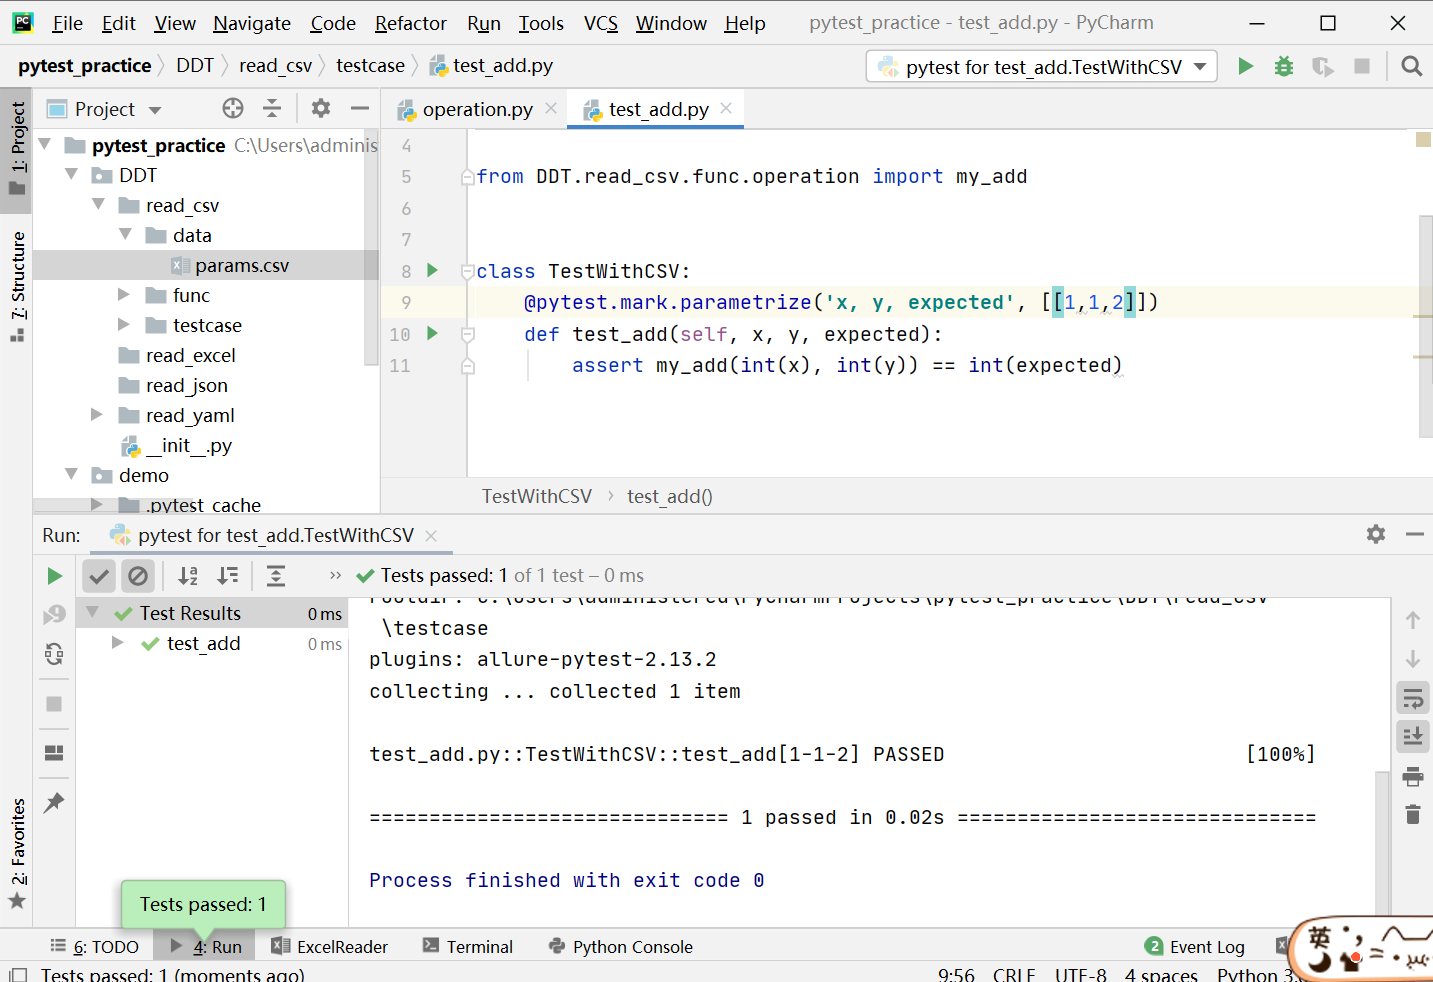
class TestWithCSV:
@pytest.mark.parametrize('x,y,expected', [[1, 1, 2]])
def test_add(self, x, y, expected):
assert my_add(int(x), int(y)) == int(expected)
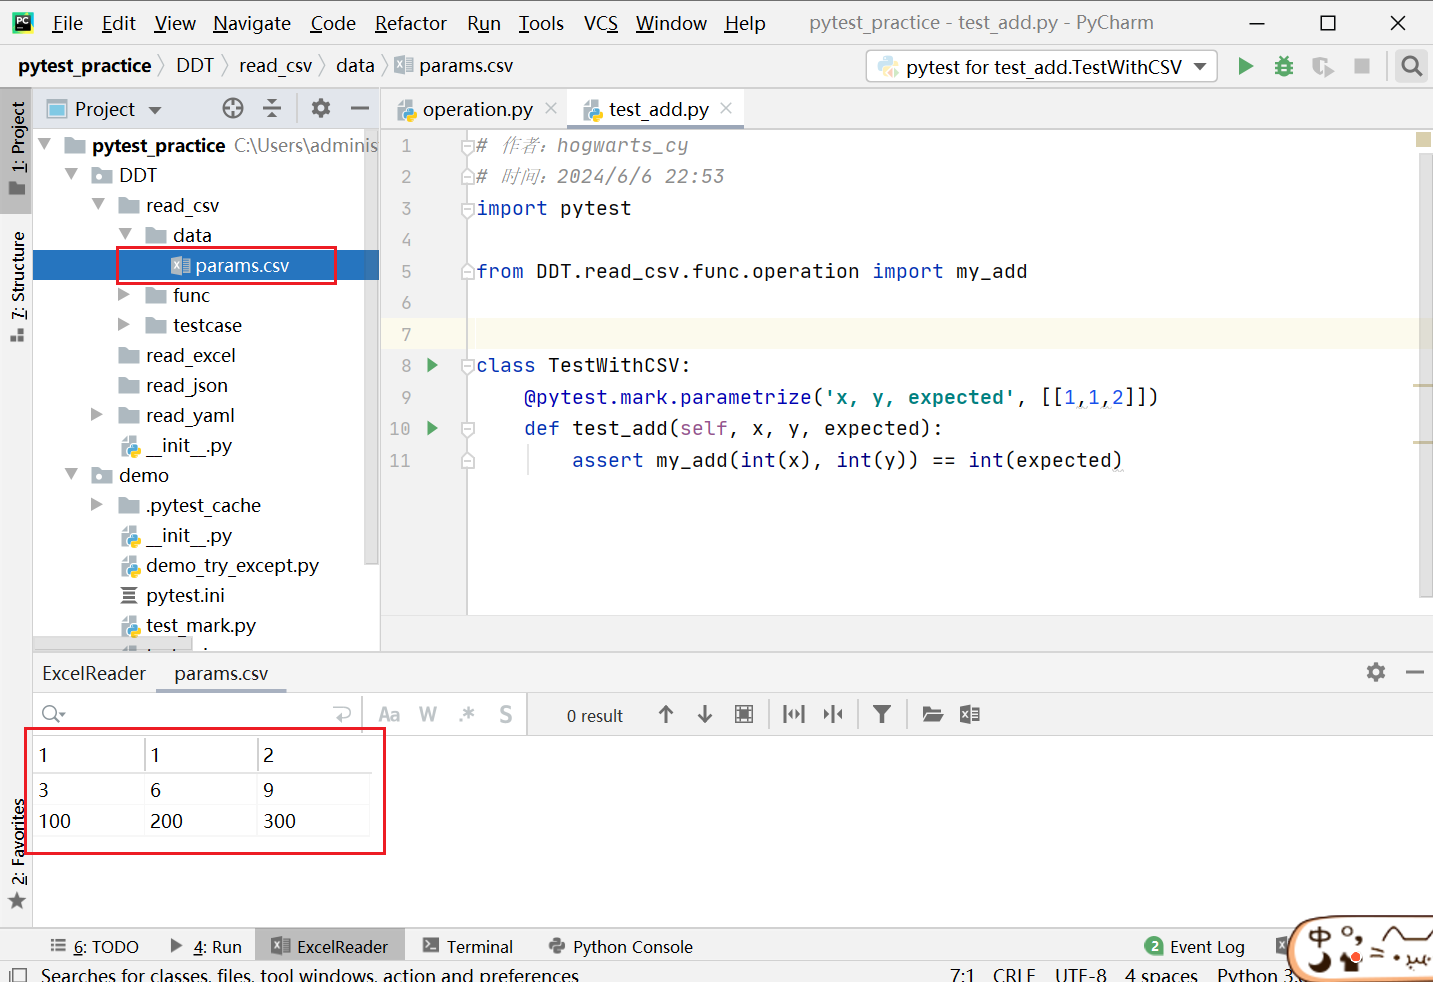
# params.csv 文件内容
1,1,2
3,6,9
100,200,300
3.5 实际运用
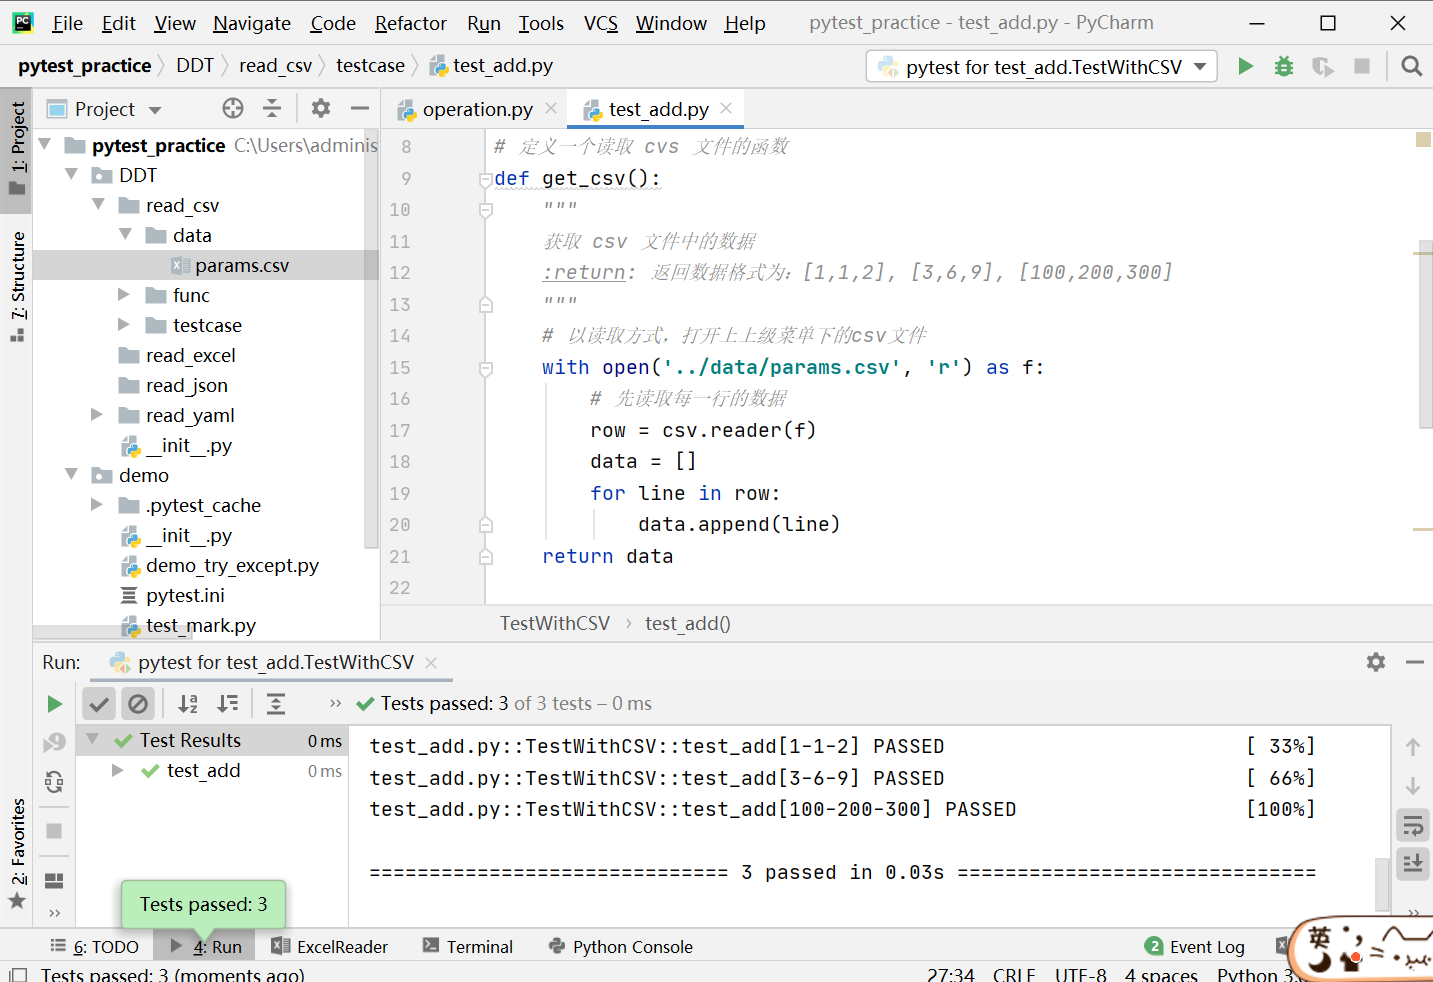
# 读取 data目录下的 params.csv 文件
import csv

def get_csv():
    """
    获取csv数据
    :return: 返回数据的结构:[[1, 1, 2], [3, 6, 9], [100, 200, 300]]
    """
    with open('../data/params.csv', 'r') as file:
        raw = csv.reader(file)
        data = []
        for line in raw:
            data.append(line)
    return data
源码:
import csv
import pytest
from DDT.read_csv.func.operation import my_add

# 定义一个读取 cvs 文件的函数
def get_csv():
    """
    获取 csv 文件中的数据
    :return: 返回数据格式为:[1,1,2], [3,6,9], [100,200,300]
    """
    # 以读取方式,打开上上级菜单下的csv文件
    with open('../data/params.csv', 'r') as f:
        # 先读取每一行的数据
        row = csv.reader(f)
        data = []
        for line in row:
            data.append(line)
    return data


# 创建一个类
class TestWithCSV:
    # 使用 pytest 参数化
    @pytest.mark.parametrize('x, y, expected', get_csv())
    # 定义一个函数
    def test_add(self, x, y, expected):
        # 断言
        assert my_add(int(x), int(y)) == int(expected)
四、Pytest结合数据驱动-json
4.1 json文件介绍
- json是JS对象
- 全称是JavaScript Object Notation
- 是一种轻量级的数据交换格式
- json结构:
- 对象:
{"key":value} - 数组:[value1, value2 …]
- 对象:
{
  "name:": "hogwarts ",
  "detail": {
    "course": "python",
    "city": "北京"
  },
  "remark": [1000, 666, 888]
}
4.2 json文件的使用
- 查看json文件
Pycharmtxt记事本
- 读取json文件
- 内置函数 open()
- 内置库 json
- 方法:json.loads()
- 方法:json.dumps()
# 读取json文件内容
def get_json():
    with open('demo.json', 'r') as f:
        data = json.loads(f.read())
        print(data)
4.3 工程目录结构
- data目录:存放json数据文件
- func目录:存放被测函数文件
- testcase目录:存放测试用例文件
# 工程目录结构
.
├── data
│   └── params.json
├── func
│   ├── __init__.py
│   └── operation.py
└── testcase
    ├── __init__.py
    └── test_add.py
4.4 测试准备
- 被测对象:
operation.py - 测试用例:
test_add.py - 测试数据:
params.json
# operation.py 文件内容
def my_add(x, y):
    result = x + y
    return result
# test_add.py 文件内容
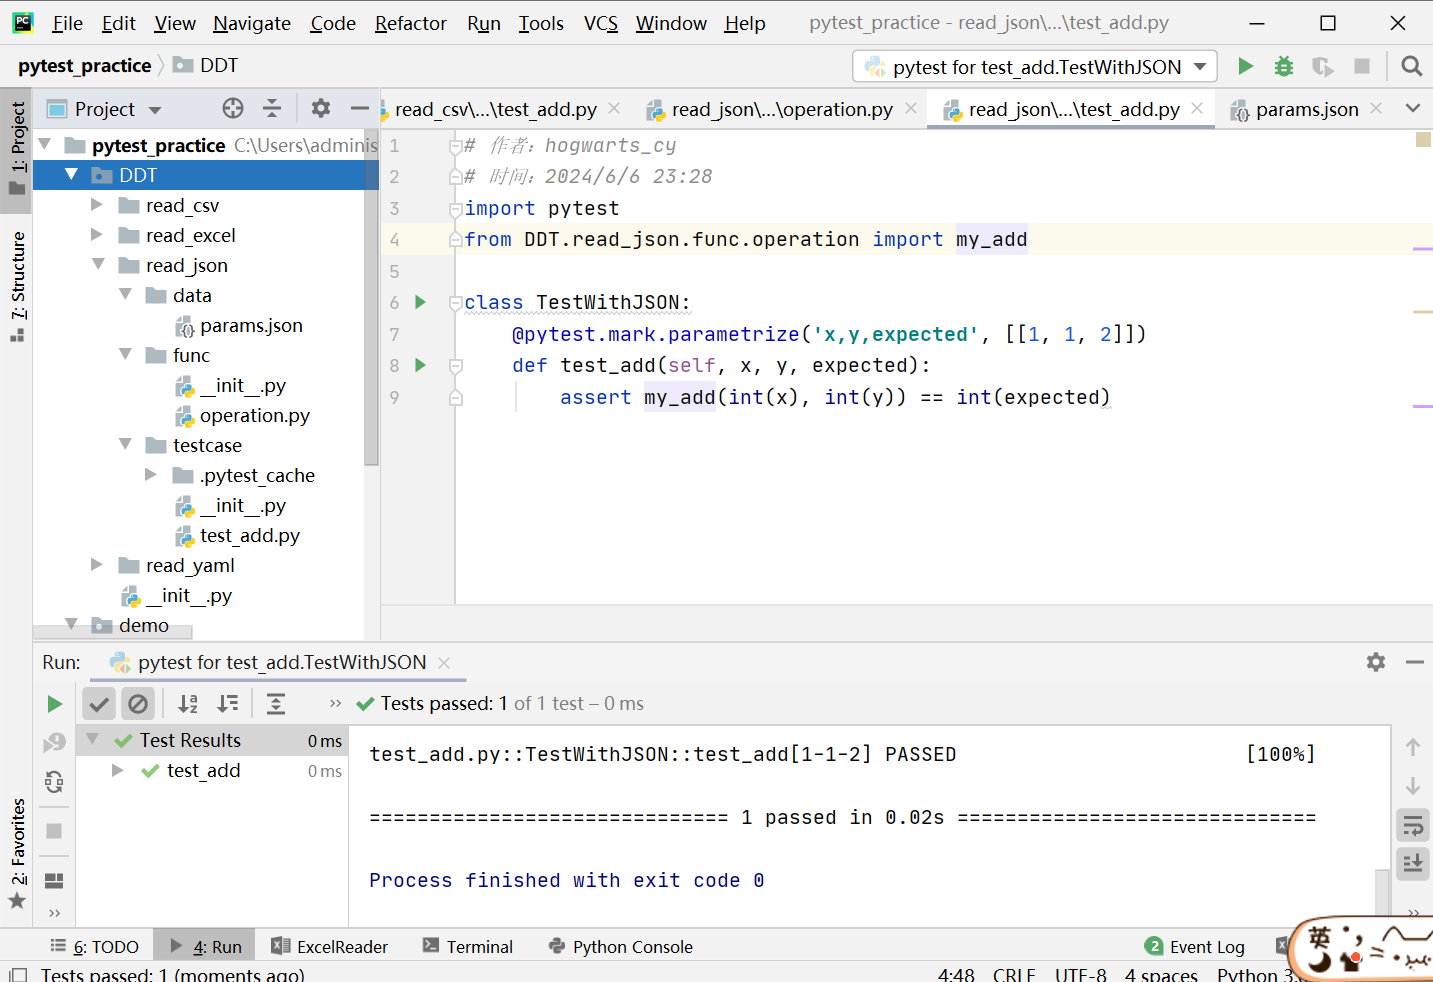
class TestWithJSON:
@pytest.mark.parametrize('x,y,expected', [[1, 1, 2]])
def test_add(self, x, y, expected):
assert my_add(int(x), int(y)) == int(expected)
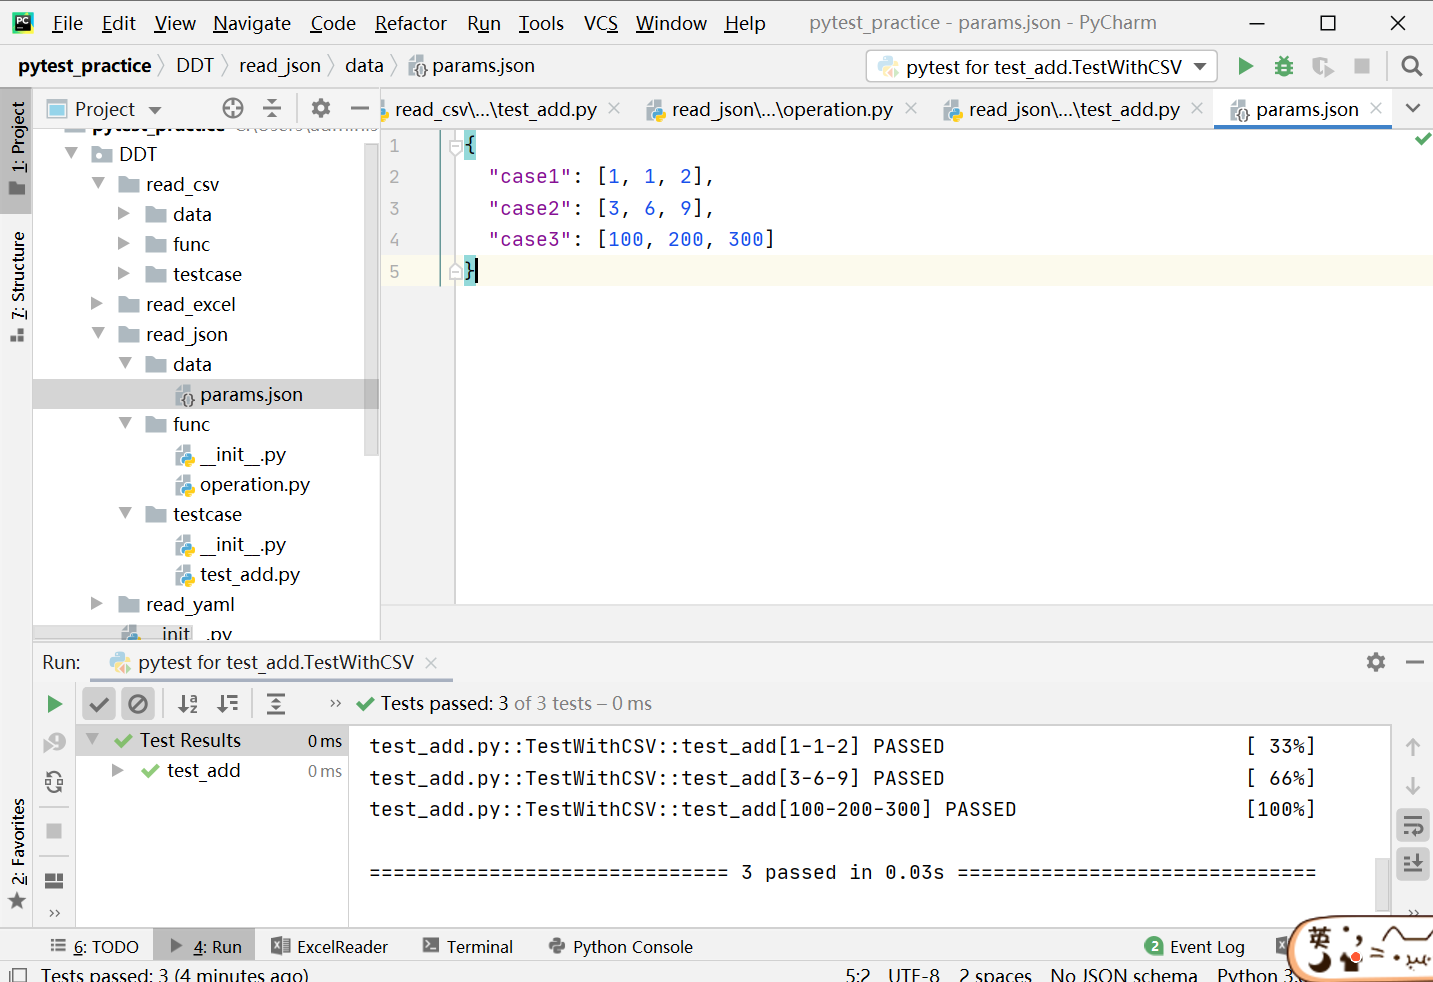
# params.json 文件内容
{
  "case1": [1, 1, 2],
  "case2": [3, 6, 9],
  "case3": [100, 200, 300]
}
4.5 实际运用
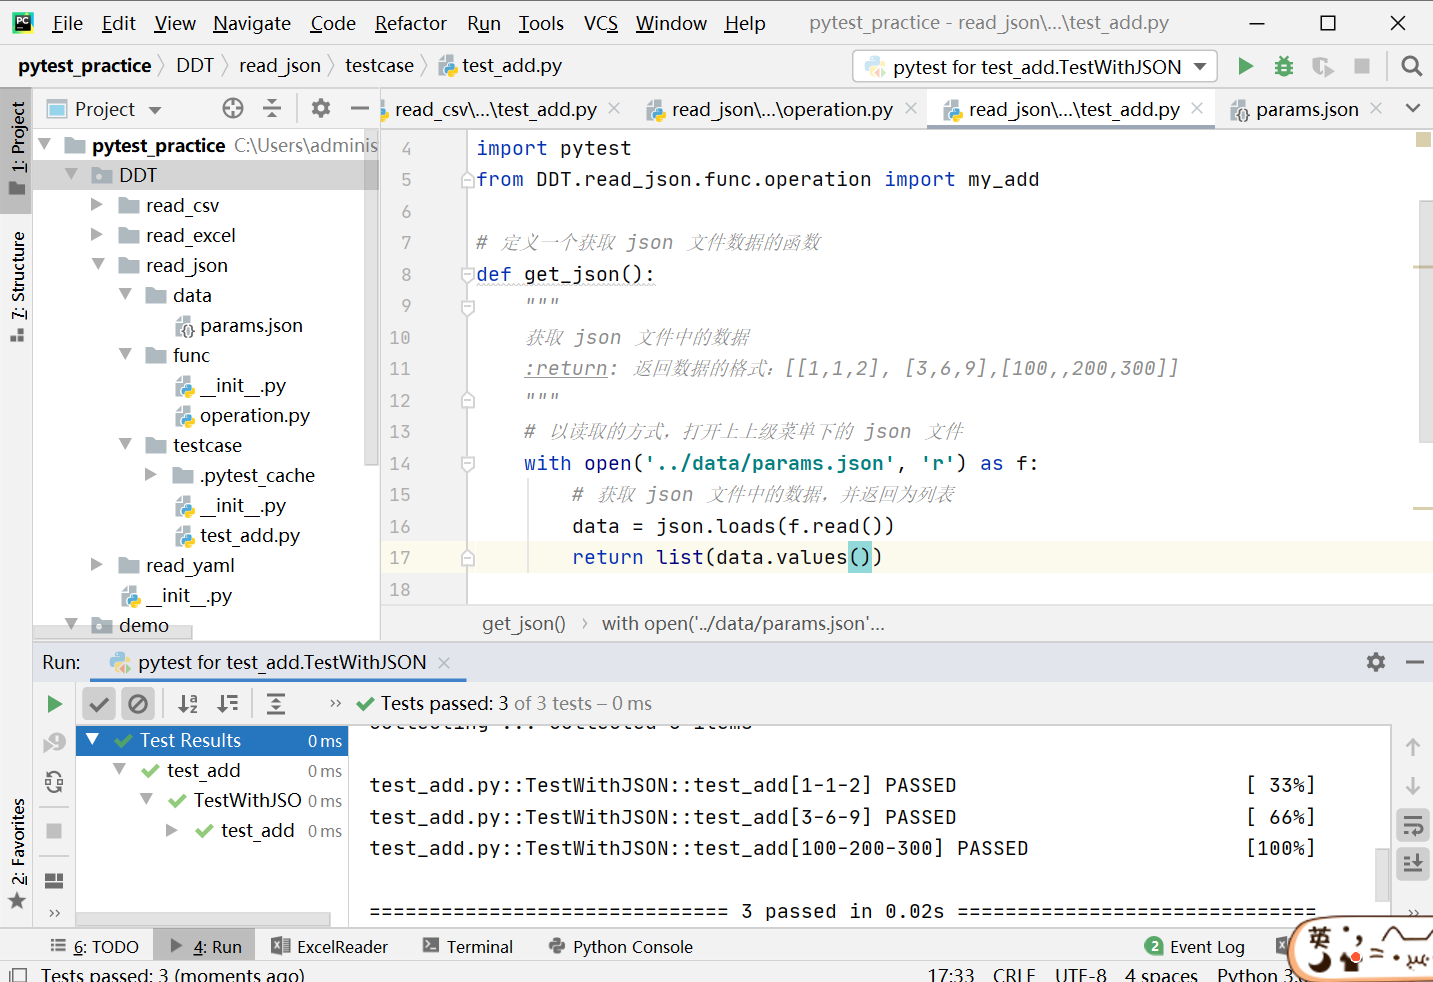
# 读取json文件
def get_json():
    """
    获取json数据
    :return: 返回数据的结构:[[1, 1, 2], [3, 6, 9], [100, 200, 300]]
    """
    with open('../data/params.json', 'r') as f:
        data = json.loads(f.read())
        return list(data.values())
源码:
import json
import pytest
from DDT.read_json.func.operation import my_add

# 定义一个获取 json 文件数据的函数
def get_json():
    """
    获取 json 文件中的数据
    :return: 返回数据的格式:[[1,1,2], [3,6,9],[100,,200,300]]
    """
    # 以读取的方式,打开上上级菜单下的 json 文件
    with open('../data/params.json', 'r') as f:
        # 获取 json 文件中的数据,并返回为列表
        data = json.loads(f.read())
        return list(data.values())


class TestWithJSON:
    @pytest.mark.parametrize('x,y,expected', get_json())
    def test_add(self, x, y, expected):
        assert my_add(int(x), int(y)) == int(expected)
