一,Vue项目构建
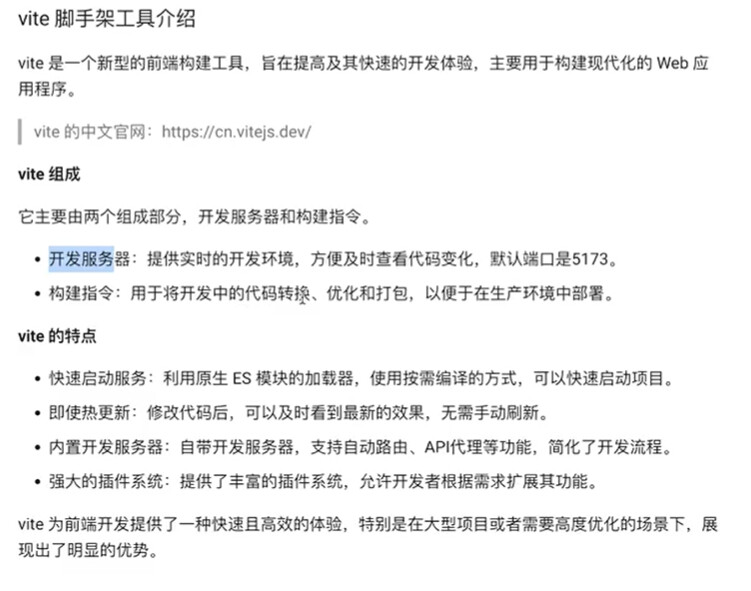
1.1 vite脚手架工具介绍
- 介绍:
1.2 vite安装
-
vite下载安装教程: Home | Vite (vitejs.net)
-
步骤
- 下载安装 nodeJs: Node.Js中文网 (p2hp.com)
- 检查环境是否配置成功:

1.3 创建项目
-
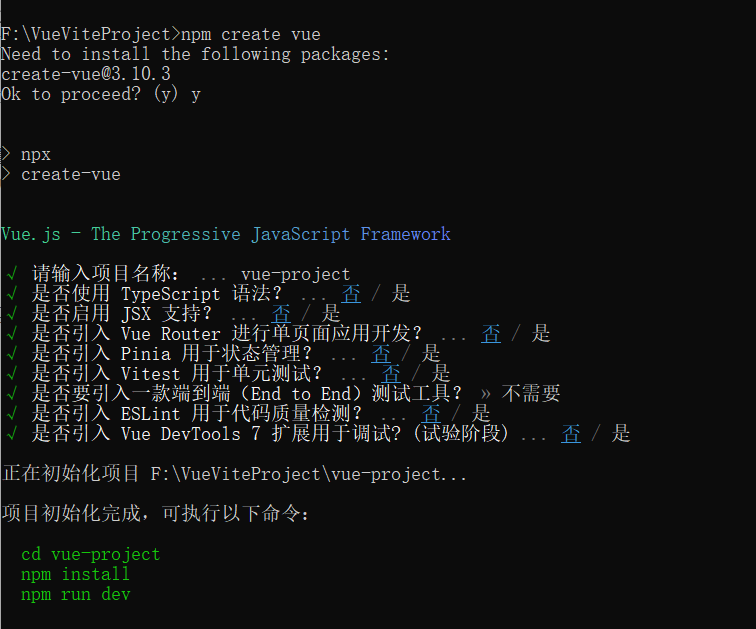
使用vite初始化vue项目,在空目录中执行
npm create vue:
-
进入新建的项目目录,依次执行下记命令,最终生成vite项目。
 cd vue-project
 npm install                     (安装相关依赖)
 npm run dev                     (启动开发服务器)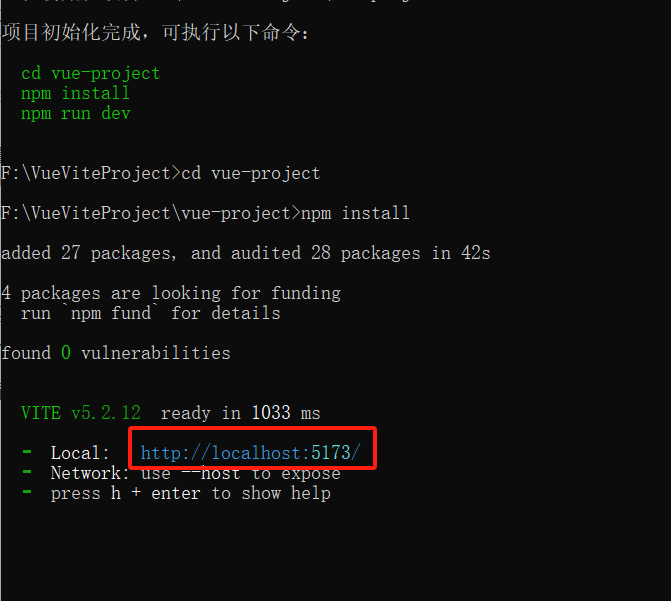
-
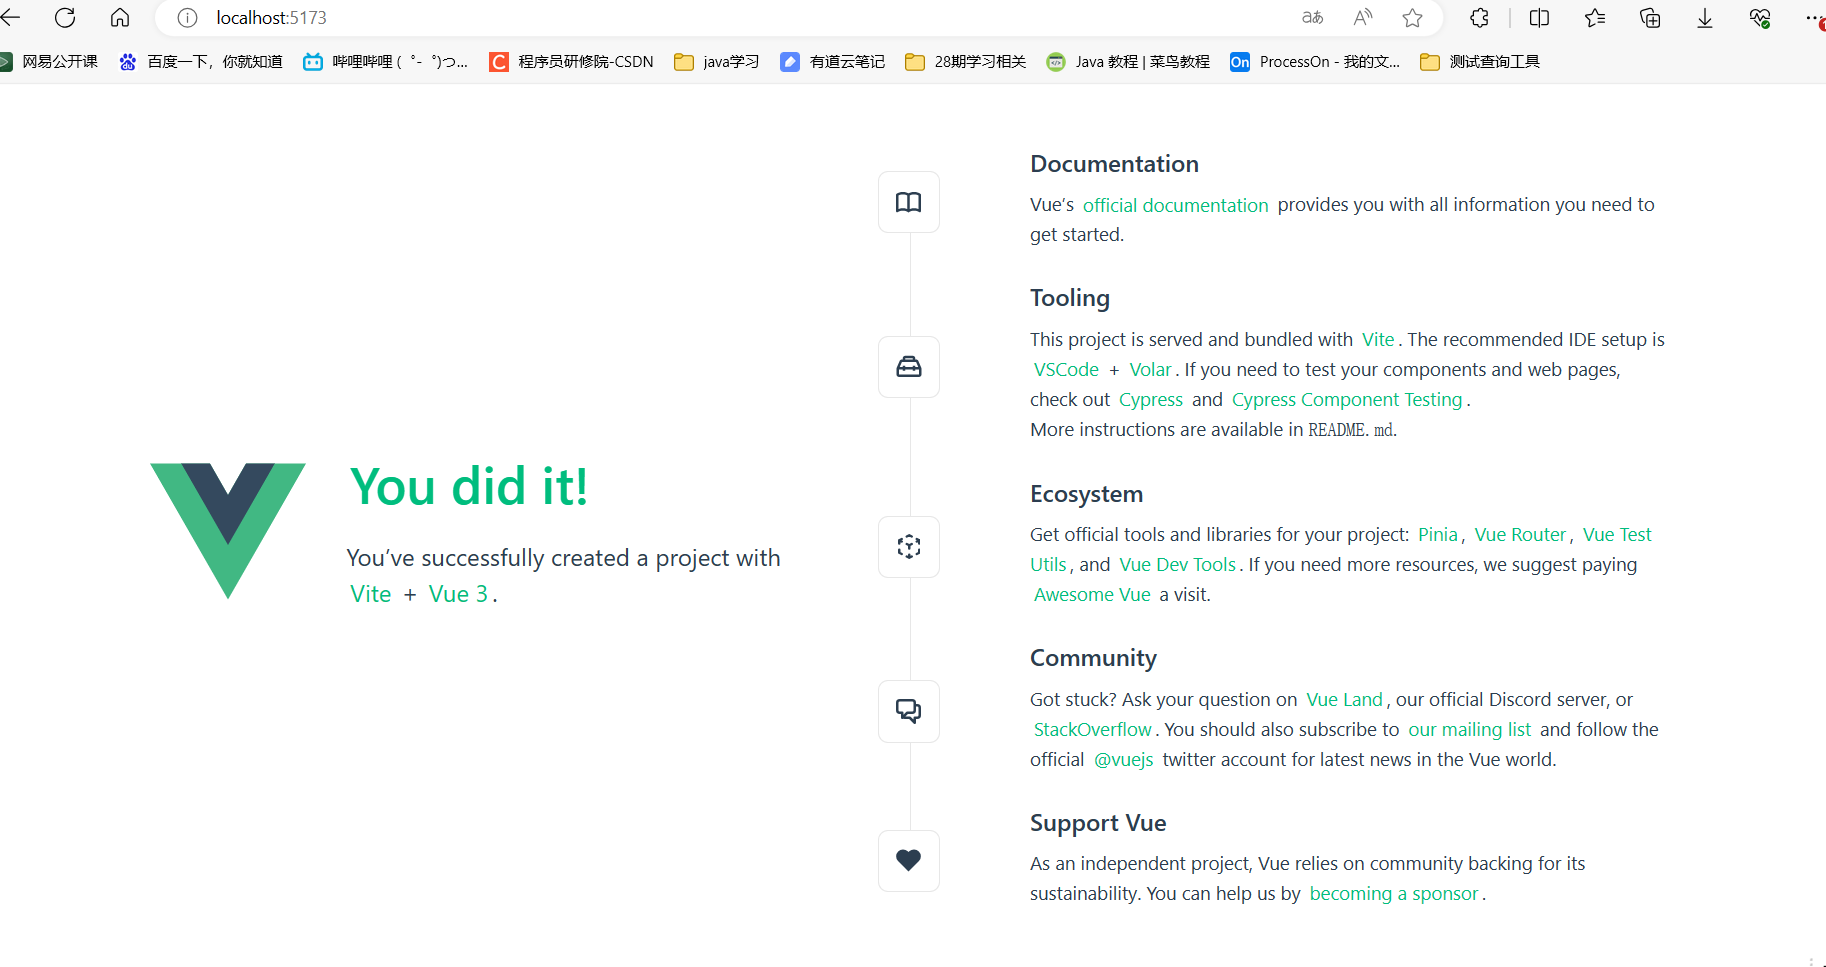
浏览器打开对应的网址(http://localhost:5173/)
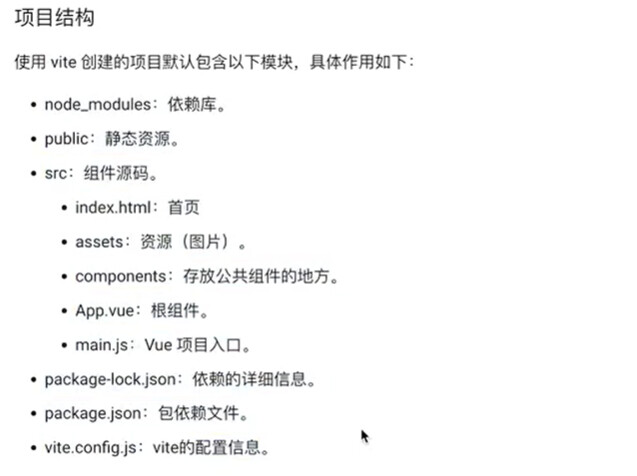
1.4 项目结构
二,Vue 组件管理
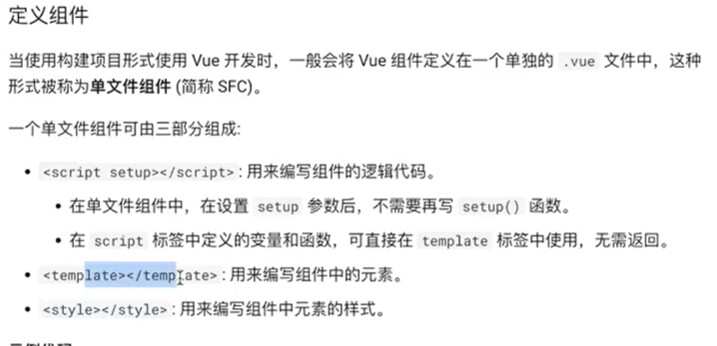
2.1 定义组件
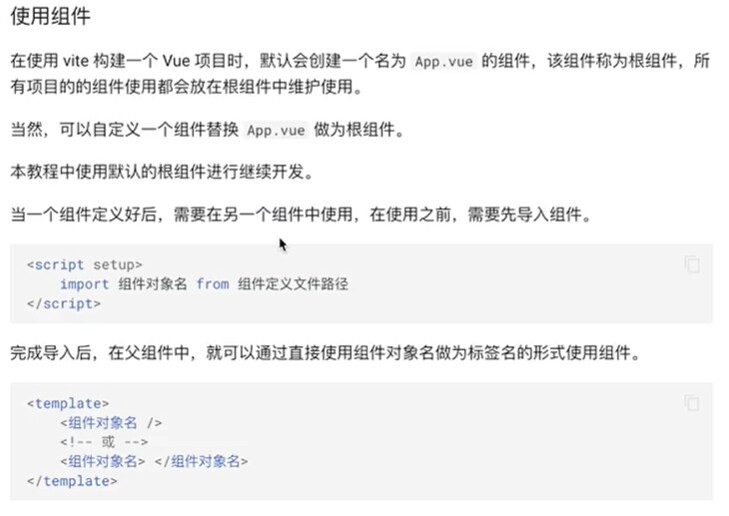
2.2 使用组件
- 新建一个vue项目:
<script setup>
// 写js代码
    import {ref} from "vue"

    const msg = ref("Hello Vue!!!")
    const fcolor = ref("color:red;")
    function changeColor(){
        fcolor.value = "color:blue;"
    }
</script>

<template>
<!-- 写UI结构的位置 -->
    <div>
        <p :style="fcolor">{{msg}}</p>
        <button @click="changeColor">修改字体颜色</button>
    </div>
</template>

<style scoped>
/* 写样式,scoped表示只作用于当前组件的样式 */
    p{
        font-size :50px;
    }
    button{
        font-size :30px;
    }

</style>
- 在App.vue根组件中,导入组件并使用
<script setup>
import Hello from './components/views/Hello.vue'
</script>

<template>
<!-- 使用组件 -->
    <Hello />
<!-- 或者: -->
    <Hello></Hello>
</template>
2.3 组件布局
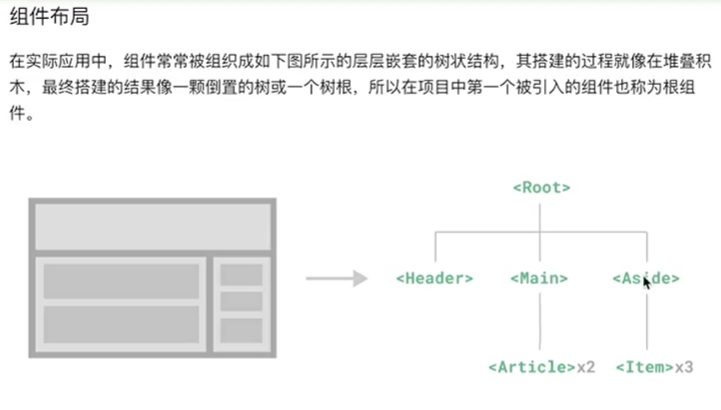
-
优点
- 组件可以将页面UI划分为独立的,可重用的部分,并且可以对每个部分进行单独的思考和设计。
- 组件有script , template , style三部分组成。
- 组件使用需要提前导入。
- 通过组件可以进行页面的布局,可重用代码,提高代码效率。
-
代码示例
- Item.vue
<script setup>
    import {ref} from "vue"

    const imsg = ref("Item")
</script>

<template>
    <div class = "item">
        {{imsg}}
    </div>
</template>

<style scoped>
    .item{
        width:220px;
        height: 160px;
        margin-block:15px;
        background:green;
    }
</style>
- Aside.vue
<script setup>
    import {ref} from "vue"
    import Item from "./Item.vue"

    const amsg = ref("Aside")
</script>

<template>
    <div class = "aside">
        {{amsg}}
        <Item></Item>
        <Item></Item>
        <Item></Item>
    </div>
</template>

<style scoped>
    .aside{
        width:220px;
        height: 625px;
        margin-block:15px;
        margin-left:15px;
        padding:15px;
        background:purple;
    }
</style>
- Article.vue
<script setup>
    import {ref} from "vue"

    const artiMsg = ref("Article")
</script>

<template>
    <div class = "article">
        {{artiMsg}}
    </div>
</template>

<style scoped>
    .article{
        width: 870px;
        height: 250px;
        margin-bottom: 15px;
        background:orange;
        border:1px solid #000;
    }
</style>
- Main.vue
<script setup>
    import {ref} from "vue"
    import Article from "./Article.vue"

    const mainMsg = ref("Main")
</script>

<template>
    <div class = "main">
        {{mainMsg}}
        <Article></Article>
        <Article></Article>
    </div>
</template>

<style scoped>
    .main{
        width:900px;
        height: 625px;
        margin-top:15px;
        padding:15px;
        background:yellow;
    }
</style>
- Header.vue
<script setup>
    import {ref} from "vue"

    const hmsg = ref("Header")
</script>

<template>
    <div class = "header">
        {{hmsg}}
    </div>
</template>

<style scoped>
    .header{
        width:1170px;
        height: 100px;
        background:red;
    }
</style>
- App.vue
<script setup>
    // import Hello from './views/Hello.vue'
    import Header from "./views/Header.vue";
    import Main from "./views/Main.vue";
    import Aside from "./views/Aside.vue";

</script>

<template>
<!-- 使用组件 -->
    <!-- <Hello /> -->
<!-- 或者: -->
    <!-- <Hello></Hello> -->

    <!-- 组件布局  -->
    <div class=root>
        <Header></Header>
        <div class=rmain>
            <Main></Main>
            <Aside></Aside>

        </div>
    </div>
</template>

<style>
    .root {
        width:1200px;
        height: 800px;
        background:burlywood;
        margin:0 auto;
        padding:15px;
        box-sizing: border-box;
        line-height: 100px;
        text-align: center;
        font-size: 30px;
    }
    .rmain{
        display: flex;
    }
</style>
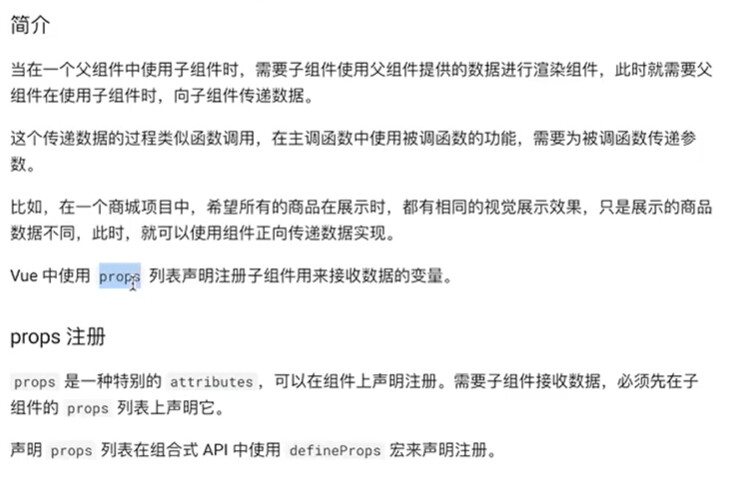
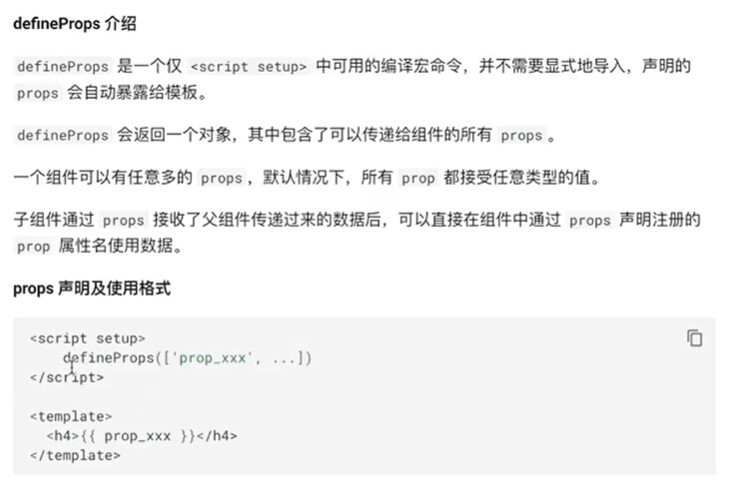
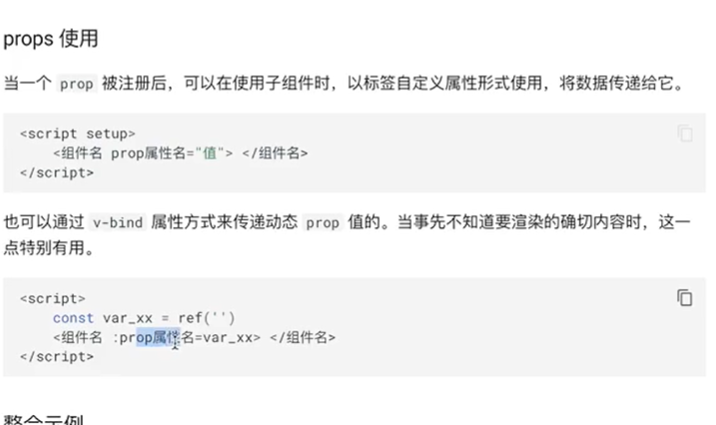
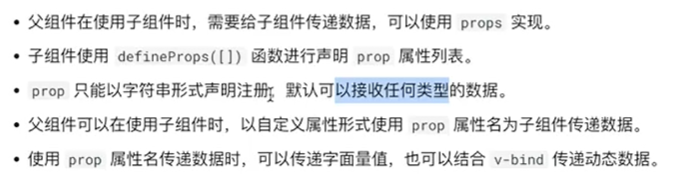
三,Vue 组件正向数据传递
3.1 介绍
3.2 代码示例
- 子组件SC.vue
<script setup>
    defineProps(["title","content"])
</script>

<template>
    <div>
        <h1>{{title}}</h1>
        <p>{{content}}</p>
    </div>
</template>
- 父组件 FC.vue
<script setup>
    import SC from "./SC.vue"
    import {ref} from "vue"

    const content = ref("这是父组件传递给子组件的动态数据")
    function change(){
        content.value = "父组件的内容被修改!!!"
    }
</script>

<template>
    <div>
        <h1>这是父组件的数据</h1>
        <p>下面是子组件的内容</p>
        <p>Content:{{content}}</p>
        <button @click="change">点击修改父组件的content内容</button>
        <hr>
    //三种传值方式
        <SC />
        <hr>
        <SC title="这是给title子组件的使用方式"></SC>
        <hr>
        <SC title="这是给title子组件的使用方式" :content="content"></SC>
    </div>
</template>
- 根组件App.vue
<script setup>
    import FC from "./views/FC.vue"
</script>

<template>
    <FC />
</template>

<style>
</style>
3.3 总结
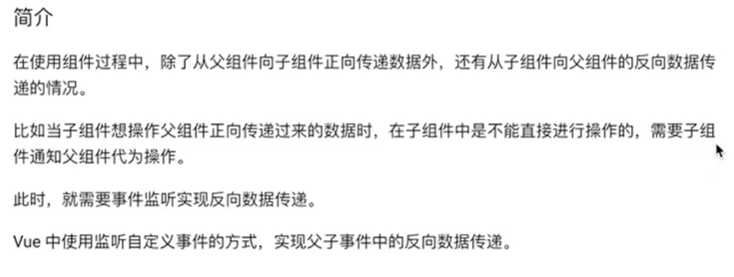
四,Vue 组件反向数据传递
4.1 介绍

4.2 代码示例
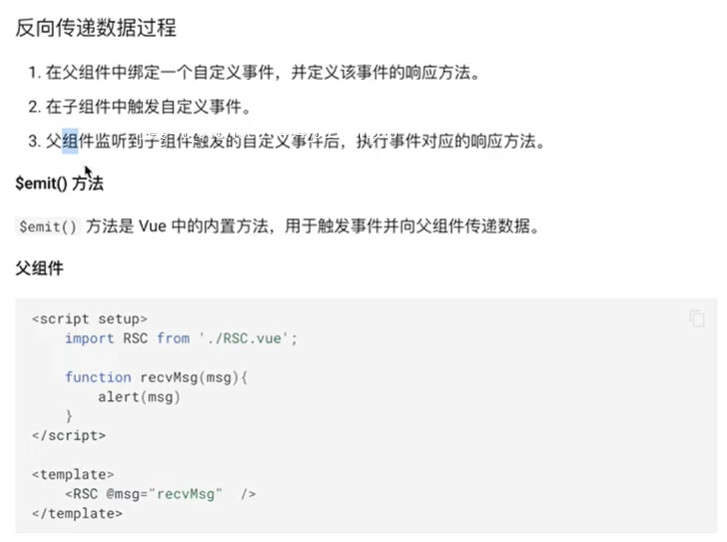
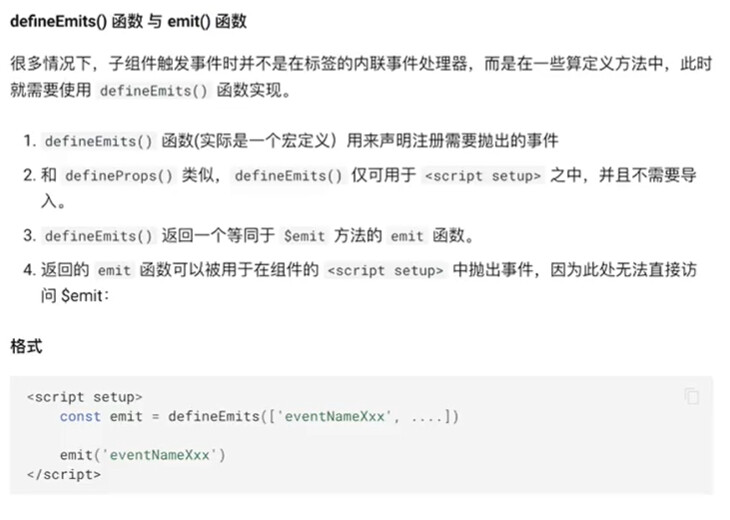
- 子组件 RSC.vue
<script setup>
    // 定义用来接收数据的属性
    defineProps(["data"])
    // 定义自定义属性
    const emit = defineEmits(["delData"])
    // 删除数据的响应方法
    function delCurrentData(item){
        // 子组件无法直接删除父组件传递过来的数据,需要向父组件发送一个事件,让父组件代为删除
        emit("delData",item)
    }
</script>

<template>
    <div class=rsc>
        <table>
            <tr>
                <th>编号</th>
                <th>姓名</th>
                <th>年龄</th>
                <th>操作</th>
            </tr>
            <tr v-for="item in data" :key="item.sid">
                <td>{{item.sid}}</td>
                <td>{{item.name}}</td>
                <td>{{item.age}}</td>
                <td><button @click="delCurrentData(item)">删除按钮</button></td>
                <!-- 使用内置方法在子组件删除数据 -->
                <!-- <td><button @click="$emit("delData",item)">删除按钮</button></td> -->
            </tr>
        </table>
    </div>
</template>
- 父组件 RFC.vue
<script setup>
  import { ref } from 'vue'
  import RSC from "./RSC.vue"

  const sData = ref([
    {"sid":"s01", "name":"Tom" , "age":25},
    {"sid":"s02", "name":"Jerry", "age":30},
    {"sid":"s03", "name":"Lily", "age":28}
  ])
    // 定义一个删除数据的方法
  function delDataAction(item){
    const idx = sData.value.indexOf(item)
    sData.value.splice(idx,1)
  }
</script>

<template>
    <h1>这是父组件中的标题</h1>
    <RSC :data="sData" @delData="delDataAction"></RSC>
</template>
- 根组件App.vue
<script setup>
    import RFC from "./views/RFC.vue"

</script>

<template>
    <RFC />
</template>

<style>

</style>
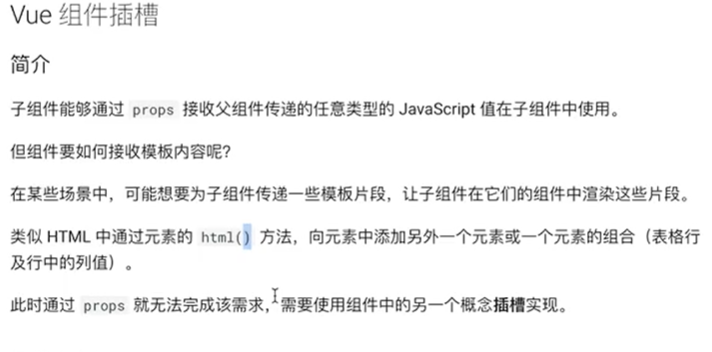
四,Vue 组件插槽
4.1 介绍
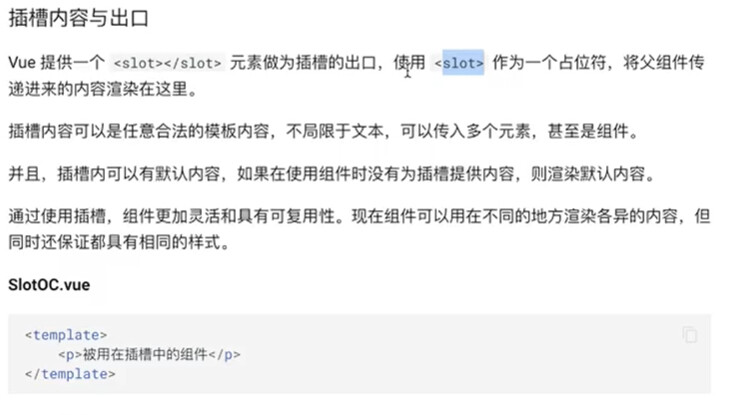
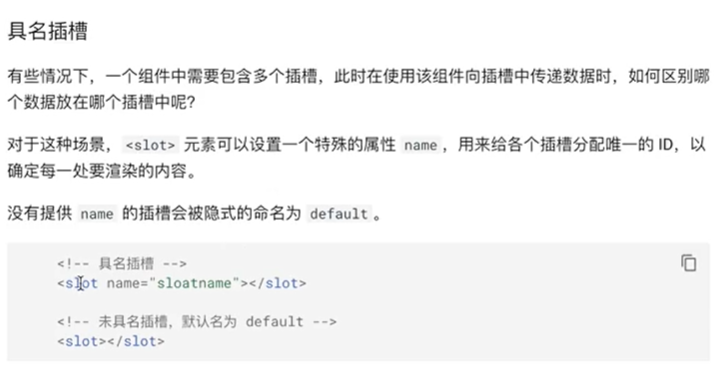
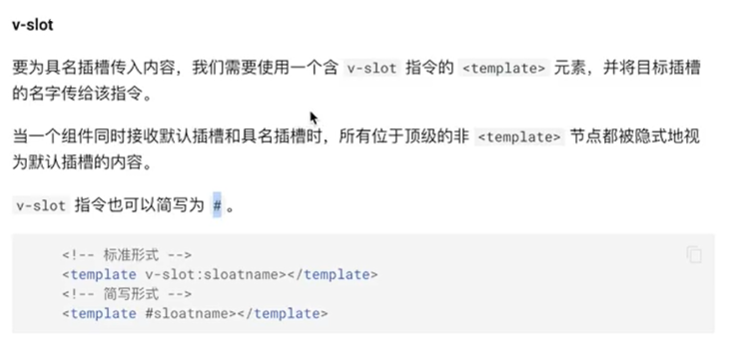
4.2 代码示例
- 子组件 SlotNameSC.vue
<template>
    <h1>这是一个具名插槽的组件,下面是插槽的内容</h1>
    <div>
        <header>
            <slot name="header"></slot>
        </header>
        <main>
            <slot></slot>
        </main>
        <footer>
            <slot name="footer"></slot>
        </footer>
    </div>

</template>
- 父组件 SlotNameFC.vue
<script setup>
    import SlotNameSC from "./SlotNameSC.vue"
</script>

<template>
  <h1>这是父组件的内容</h1>
  <SlotNameSC>
    <template v-slot:header>
        <h1>这是标题</h1>
    </template>
    <template #default>
        <p>这是内容</p>
        <p>这是内容</p>
    </template>
    <template #footer>
        <h3>这是页脚</h3>
    </template>
  </SlotNameSC>
</template>
- 根组件 App.vue
<script setup>
    import SlotNameFC from "./views/SlotNameFC.vue"
</script>

<template>
    <SlotNameFC />
</template>

<style>
</style>
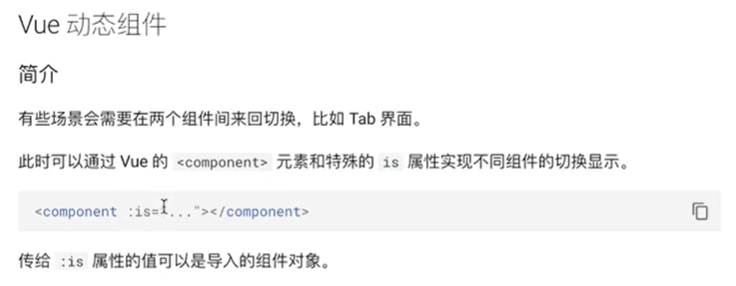
五,Vue 动态组件
- 定义两个子组件 home 和about组件
<template>
    <h1>home 组件</h1>
    <p>home组件的内容</p>
</template>
- 父组件DynamicFC.vue
<script setup>
    import home from "./DynamicHomeSC.vue"
    import about from "./DynamicAboutSC.vue"
    import { ref } from "vue"

    const currentTab = ref("home")
    const tabs = {
        // DynamicHomeSC,
        // DynamicAboutSC
        home,
        about
    }
</script>

<template>
    <div class="main">
        <button v-for="(value, tab) in tabs" :key="tab" :class="{ active: currentTab === tab }" @click="currentTab = tab">{{ tab }}</button>
        <component :is="tabs[currentTab]" />
    </div>
</template>

<style>
   .active{
    background: red;
   }
</style>
