背景:
由于Cloud之前负责多个站点的开发和维护,并且希望和主站脱离关系。所以需要前端web界面中不能有一些和主站关联性的代码。为此需要人为的去做检查。
为了减少这部分的人工投入,就想着用一些工具来达到自动化检测,这便是工具诞生的原始原因。
实现方案:
以上描述的需求,当人工去检测的时候,其实就是按照一下步骤:
- 浏览器打开network控制面板,浏览器输入想要检测的网址
- 在对应的请求中,搜索关键字,并记录(包括Document、后端接口请求)
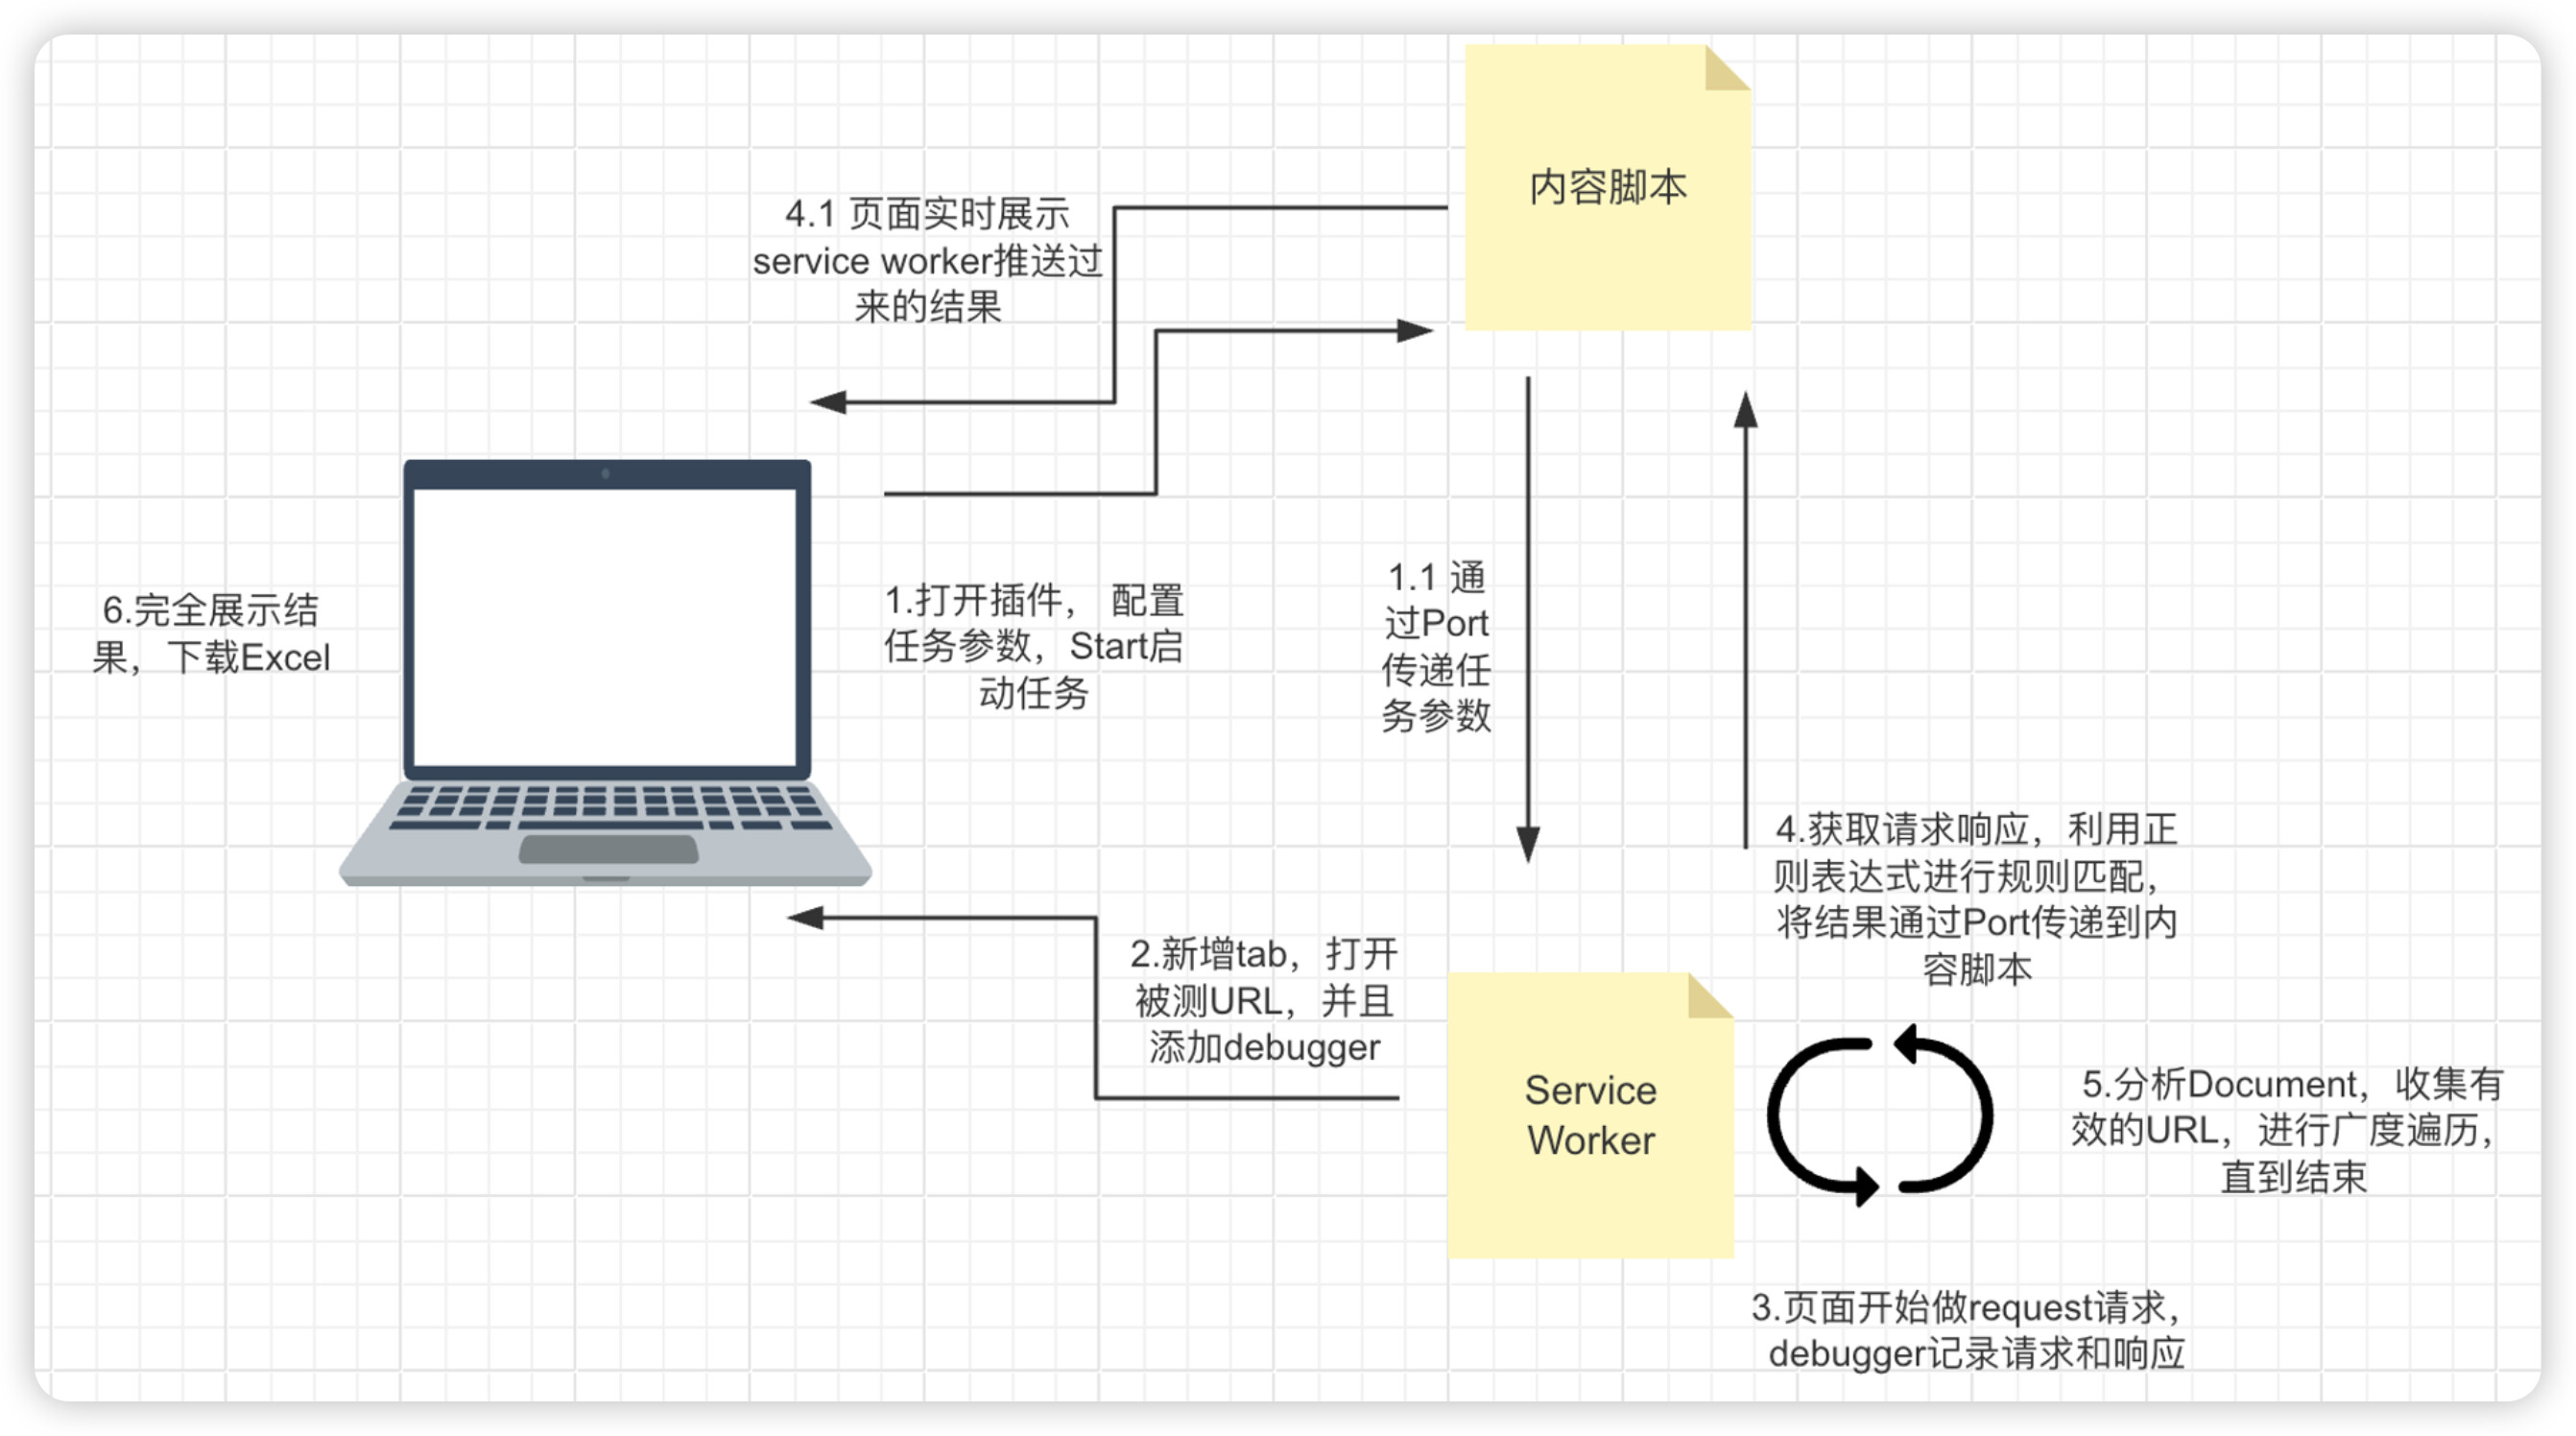
所以从上述步骤中我们可以发现,其实对要素的检查都是通过Chrome 的Debug 控制面板来完成测试的。
而Chrome又对外有提供了相应的API,为了能以更友好的方式让使用者使用,就选择了使用Chrome Plugin插件形式来实现,具体的检测逻辑使用Chrome Debugger的API来完成。
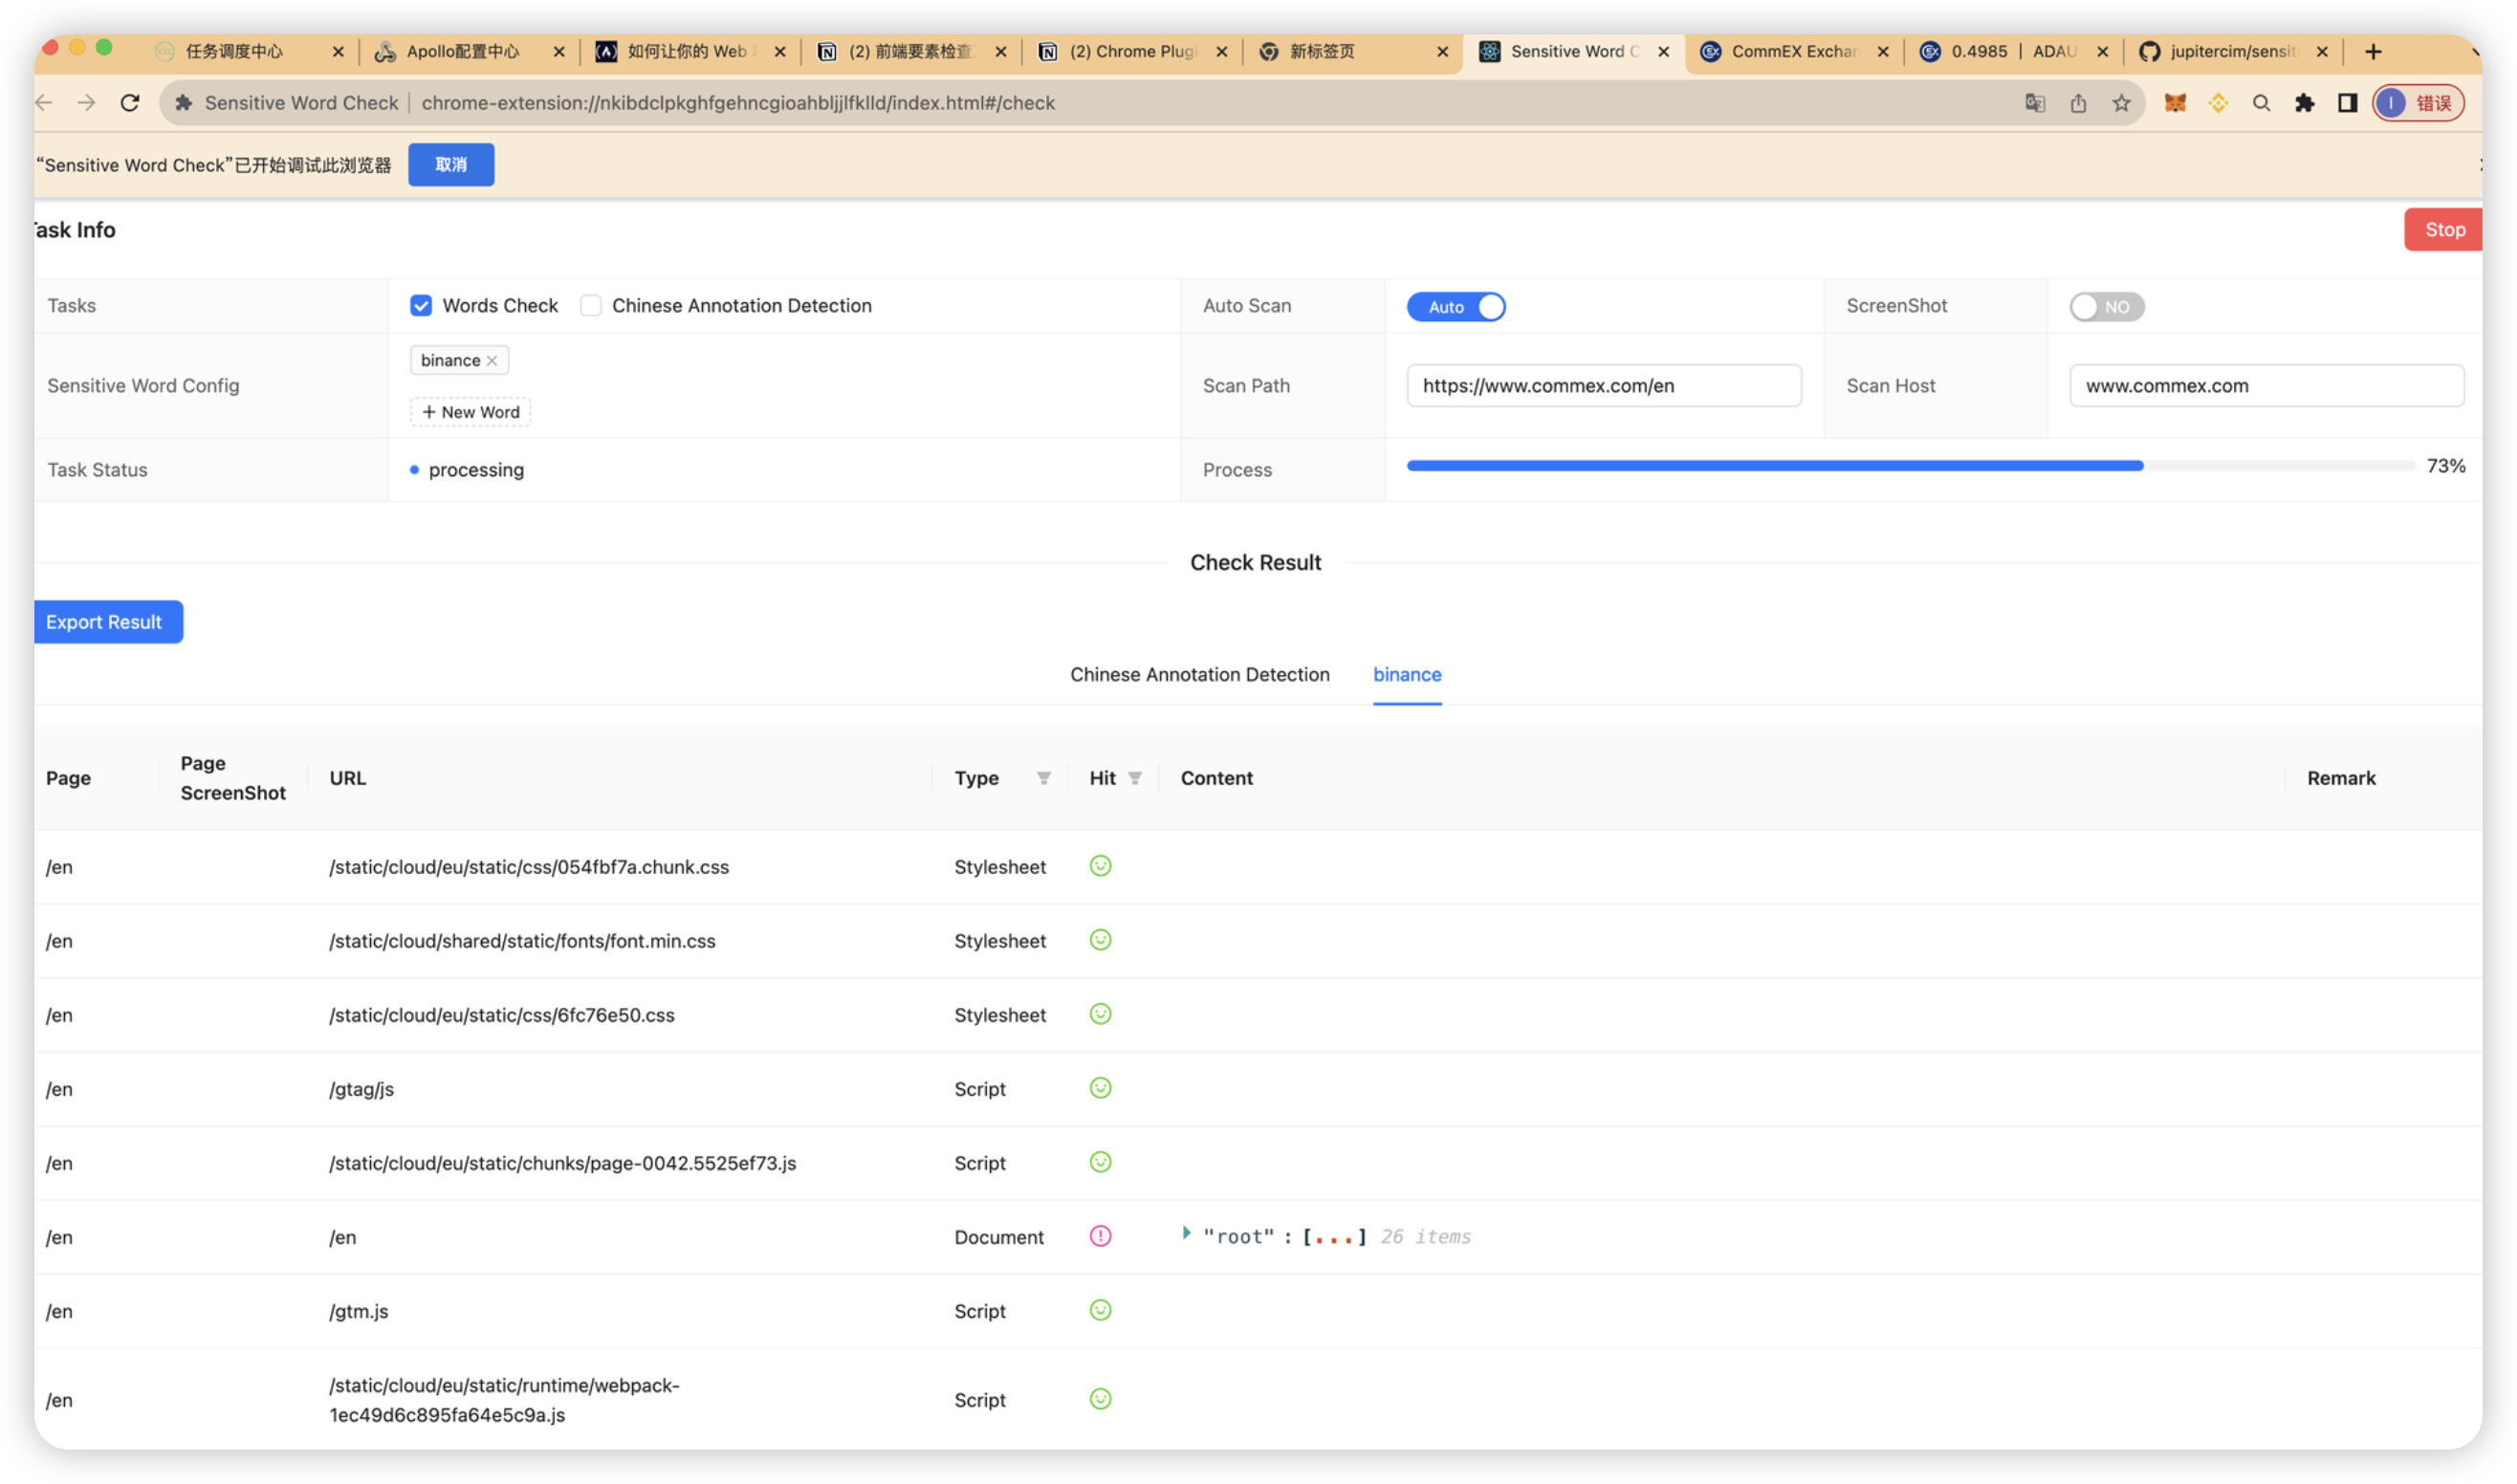
效果截图:
代码关键逻辑
-
给浏览器tab添加debugger,并且开启Network检测
chrome.debugger.attach({tabId: tab.id}, '1.2', function() { if (chrome.runtime.lastError) { port.postMessage({"error": chrome.runtime.lastError}); } else { // Debugger attached, now do something with it chrome.debugger.sendCommand({tabId: tab.id}, 'Network.enable'); } }); -
记录request索引: 当有相关network请求,debugger就会触发对应的事件,所以我们需要增加事件监听。由于检测结果是在通过debugger发送Network.getResponseBody来获取,所以首先要在Network.responseReceived方法时记录requestId
chrome.debugger.onEvent.addListener(async function (source, method, params) { if (method === 'Network.responseReceived') { if (checkTypes.includes(params.type.toLowerCase())) { pendingRequests[params.requestId] = { status: true, type: params.type, url: params.response.url }; } } else if ( method === 'Network.loadingFinished' && pendingRequests[params.requestId] !== undefined ) { if (checkResult[index] !== undefined) { return; }else{ dealResponseBody(source.tabId, params.requestId, pendingRequests[params.requestId]) } delete pendingRequests[params.requestId]; }else{ } }); -
通过request索引获取响应:然后在数据加载完成时通过requestId来获取响应值
async function dealResponseBody(tabId, requestId, requestInfo) { chrome.debugger.sendCommand( {tabId: tabId}, 'Network.getResponseBody', {requestId: requestId}, async function (response) { if(response.body===undefined){ // Todo } const body = response.body; if(sensitiveWordDetectionFlag){ await checkV2(tabId, requestInfo.url, body, sensitiveWordList, requestInfo.type); } if(chineseAnnotationDetectionFlag){ await checkChineseAnnotation(tabId, requestInfo.url, body, requestInfo.type); } }); } -
通过正则表达式分析关键词
let searchTerm = word ; let regex = new RegExp(".{0,5}" + searchTerm + ".{0,5}", "ig"); let matches = content.match(regex); -
将结果发送给页面,进行展示: 在我们打开插件页面的时候,我们和backgroud.js就会建立一个双工的通信通道,所以任务发起和结果反馈都是通过这个通道进行传递
// 前端脚本页面, 创建port进行通信
const port = chrome.runtime.connect({name: "autoScan"});

// service.js 添加Connect来接收和处理AutoScan的消息
chrome.runtime.onConnect.addListener(function(port){})

// service.js 通过port发送信息到前端脚本页面
autoPort.postMessage({"action": "checkResult", "checkResult": returnResult});
参考文档
https://developer.chrome.com/docs/extensions/develop?hl=en#core-concepts
