appium无法关闭app应用
driver.close(), driver.closeApp(), driver.quit(),这些都无法实现。
使用dir(driver)查看一下driver的命令,发现有个:self.driver.terminate_app()
需要一个参数:appID,这个appID可以是app的package名
    def terminate_app(self, app_id: str, **options: Any) -> bool:
        """Terminates the application if it is running.

        Args:
            app_id: the application id to be terminates

        Keyword Args:
            `timeout` (int): [Android only] how much time to wait for the uninstall to complete.
                500ms by default.

        Returns:
            True if the app has been successfully terminated
        """
        ext_name = 'mobile: terminateApp'
        try:
            return self.assert_extension_exists(ext_name).execute_script(
                ext_name,
                {
                    'appId': app_id,
                    'bundleId': app_id,
                    **(options or {}),
                },
            )
        except (UnknownMethodException, InvalidArgumentException):
            # TODO: Remove the fallback
            data: Dict[str, Any] = {'appId': app_id}
            if options:
                data.update({'options': options})
            return self.mark_extension_absence(ext_name).execute(Command.TERMINATE_APP, data)['value']
在配置流水线的git仓库时,拉取不下来github仓库代码
原以为是配置的git工具地址有误,后来发现就是没挂代理,github拉取失败了。所以才会出现时好时坏。
解决
将先将老师的github仓库fork一份到自己的github仓库中,然后再将自己的gitee仓库和github仓库关联起来:
关联操作:

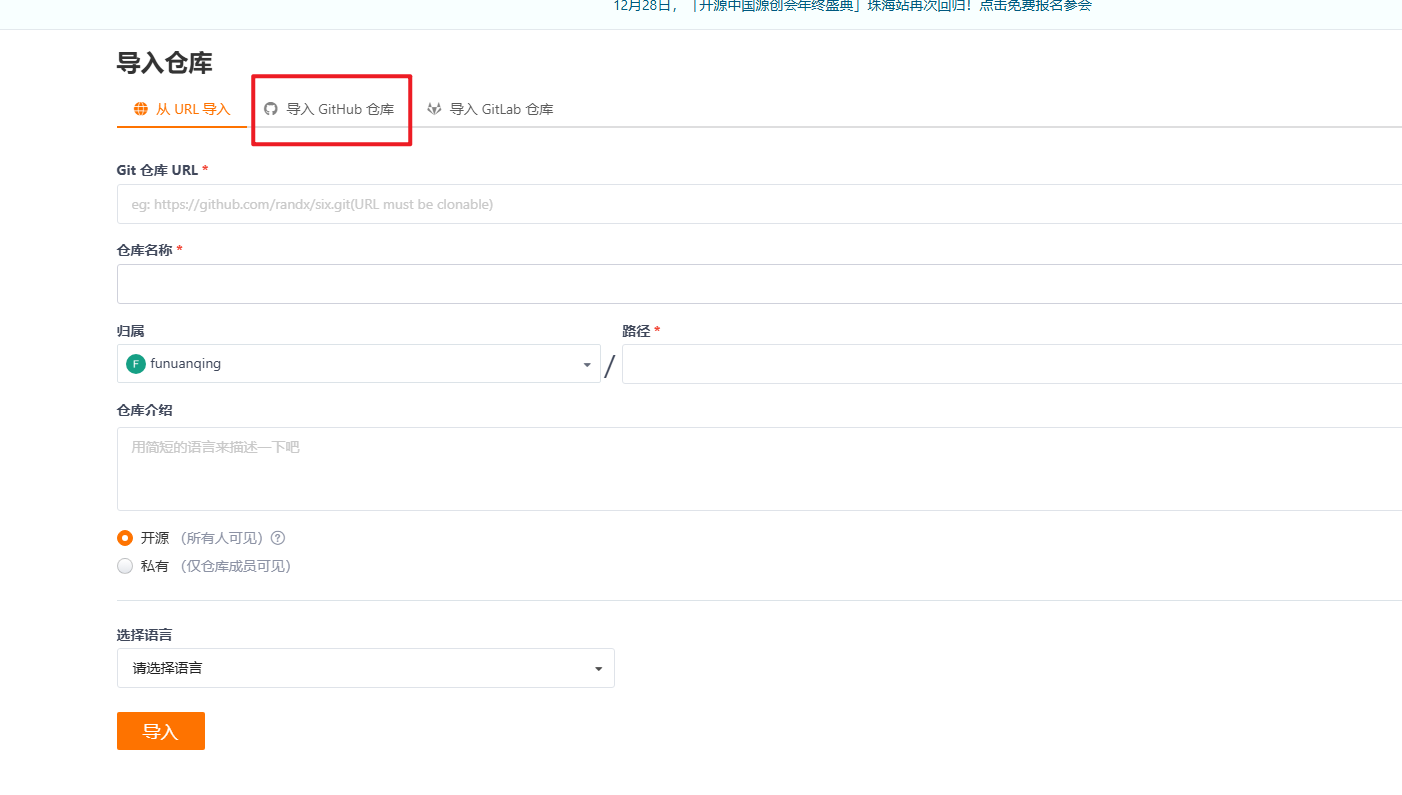
我这个是已经将GitHub和gitee绑定了,所以页面不同,第一次点击进去是要求登录github进行绑定
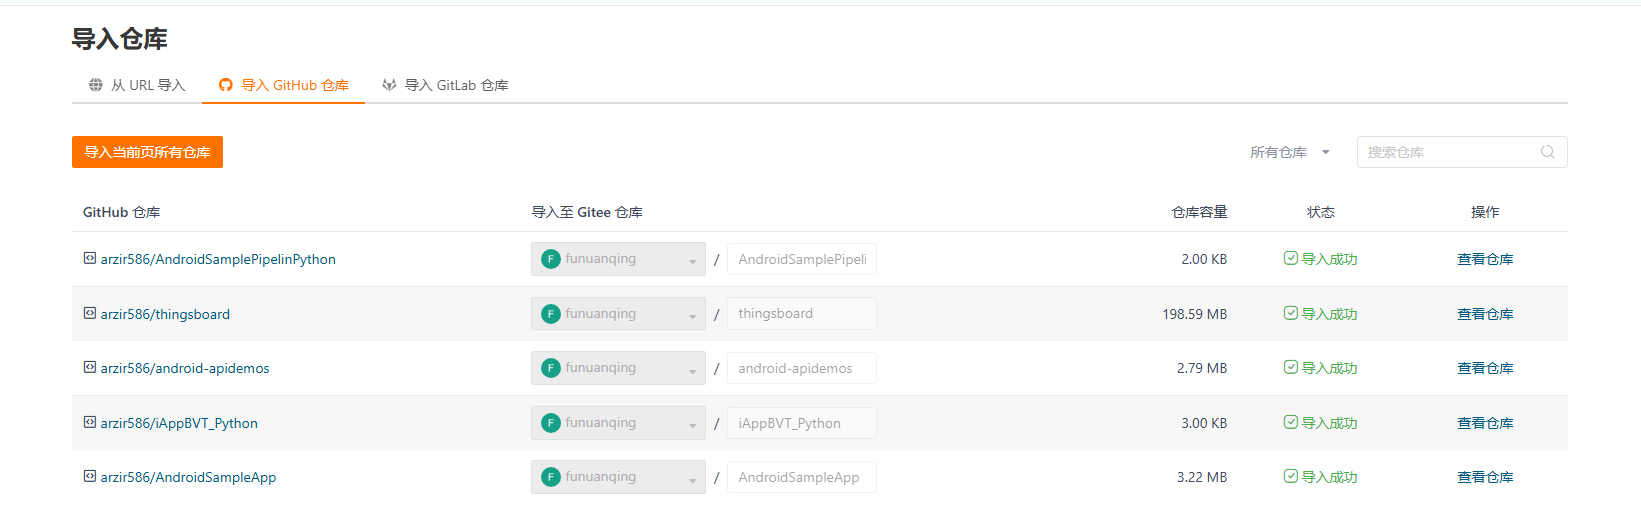
导入后,流水线直接拉取gitee那里的仓库即可
app自动化流水线部署的基本流程
- 选择流水线项目
pipeline - 选择
Pipeline script from SCM - 然后就是正常填写拉取的仓库链接:这个仓库主要作为存放
jenkins file文件的地址 - 选择分支,填写
Jenkins file文件的位置androidSamplePython_seq_win,这里因为直接在根目录下,所以直接填写jenkins file文件的名称即可 - 然后就是在
Jenkins file文件中填写过程
win系统
pipeline {
    agent {
        label 'xianzhe_win'
    }
    tools {
        jdk 'JDK11'
    }

    stages {
        stage('安卓程序源码同步') {
            steps {
                bat '''
                    if not exist AndroidSampleApp (mkdir AndroidSampleApp)
                '''
                dir("AndroidSampleApp") {
                    git branch: 'master', url: 'https://gitee.com/funuanqing/AndroidSampleApp.git'
                }
            }
        }


        stage('安卓编译打包') {
            steps {
                bat '''

                    cd AndroidSampleApp
                    call gradlew clean assembleDebug
                '''
            }
        }

        stage('安卓部署') {
            steps {
                bat '''
                    cd AndroidSampleApp
                    set apk=app\\build\\outputs\\apk\\debug\\app-debug.apk

                    rem 尝试卸载现有的安卓app
                    adb uninstall com.appsflyer.androidsampleapp || (
                        echo no com.appsflyer.androidsampleapp package
                    )
                    timeout /t 5

                    rem 安装安卓app
                    adb install %apk%
                '''
            }
        }

        stage('自动测试程序源码同步') {
            steps {
                bat '''
                    if not exist iAppBVT_Python (mkdir iAppBVT_Python)
                    '''

                dir("iAppBVT_Python") {
                    git branch: 'master', url: 'https://gitee.com/funuanqing/iAppBVT_Python.git'
                }
            }
        }

        stage('Install Dependencies') {
            steps {
                script {
                    // 安装依赖
                    bat 'pip install pytest'

                }
            }
        }

        stage('运行自动化测试') {
            steps {
                bat '''

                    cd iAppBVT_Python

                    rem 更新python依赖库
                    pip install -r requirements.txt

                    rem 运行自动化测试
                    pytest -sv test/bvt_test.py
                '''
            }
        }
    }

    post {
        success {
            archiveArtifacts artifacts: 'AndroidSampleApp\\app\\build\\outputs\\apk\\debug\\app-debug.apk'
        }

        always {
            emailext body: '$DEFAULT_CONTENT', recipientProviders: [[$class: 'RequesterRecipientProvider']], subject: '$DEFAULT_SUBJECT'
        }
    }
}
linux系统
pipeline{
    agent {
        label 'master'
    }

    stages{
        stage('安卓程序源码同步') {
            steps {
                sh 'mkdir -p AndroidSampleApp'
                dir("AndroidSampleApp"){
                    git branch:'master', url:'git@github.com:princeqjzh/AndroidSampleApp.git'
                }
            }
        }

        stage('安卓编译打包') {
            steps {
                sh '''
                    . ~/.bash_profile
                    cd AndroidSampleApp
                    sh gradlew clean assembleDebug
                '''
            }
        }


        stage('安卓部署') {
            steps {
                sh '''
                    . ~/.bash_profile
                    cd AndroidSampleApp
                    apk=app/build/outputs/apk/debug/app-debug.apk
                    {
                        #try: 卸载现有的安卓app
                        adb uninstall com.appsflyer.androidsampleapp
                    } || {
                        #catch
                        echo 'no com.appsflyer.androidsampleapp package'
                    }
                    sleep 5

                    #安装安卓app
                    adb install $apk
                '''
            }
        }

        stage('自动测试程序源码同步') {
            steps {
                sh 'mkdir -p iAppBVT_Python'
                dir("iAppBVT_Python"){
                    git branch:'master', url:'git@github.com:princeqjzh/iAppBVT_Python.git'
                }
            }
        }

        stage('运行自动化测试') {
            steps {
                sh '''
                    . ~/.bash_profile

                    cd iAppBVT_Python

                    #更新python依赖库
                    pip3.9 install -r requirements.txt

                    #运行自动化测试
                    pytest -sv test/bvt_test.py --tc-file ~/iAppBVT_Python.json --tc-format json
                '''
            }
        }
    }

    post {
        success {
            archiveArtifacts artifacts: 'AndroidSampleApp/app/build/outputs/apk/debug/app-debug.apk'
        }

        always {
            emailext body: '$DEFAULT_CONTENT', recipientProviders: [[$class: 'RequesterRecipientProvider']], subject: '$DEFAULT_SUBJECT'
        }
    }
}
运行截图

在Jenkins进行流水线部署时,会出现控制台中文乱码
原因
对于win系统来说,默认编码时GBK,而pycharm和其他的编辑器默认都是UTF,而Jenkins默认读取系统的编码,也就是gbk,和外来的utf编码的jenkinsfile文件一冲突,自然是中文乱码
解决:
- 目的是让二者编码统一,简单一点就是使用编辑器打开jenkinsfile文件,修改编码为GBK
2.方法二是修改Jenkins的编码,首先如何查看Jenkins的编码:manage jenkins → system info 里面有个file.encoding 的值
修改:
- 第一步往Jenkins全局属性中添加以下键值对:
JAVA_TOOL_OPTIONS = -Dfile.encoding=UTF-8
LANG=zh.CH.UTF-8 - 然后再前往jenkins.xml文件中找到 xxx 中,往其中插入:-Dfile.encoding=UTF-8 与其他设置以空格隔开即可
然后重启Jenkins服务: net stop Jenkins net start jenkins (管理员终端)
但是很遗憾,以上两步执行后仍然没有改变编码
后面是执行了第三步才成功修改编码:
进入win的环境变量设置中添加以下环境变量:
JAVA_TOOL_OPTIONS=“-Dfile.encoding=UTF-8” 然后再重启Jenkins,就好了至于上面的步骤究竟有没有起到用处,就不得而知了
在上述操作中安卓编译操作中执行命令:gradlew clean assembleDebug,报错
报错信息
X:\environment-root\jenkins_node-root\workspace\app_auto_build_test\AndroidSampleApp>call gradlew clean assembleDebug
Picked up JAVA_TOOL_OPTIONS: -Dfile.encoding=UTF-8
Starting a Gradle Daemon, 1 incompatible Daemon could not be reused, use --status for details
java.lang.NoClassDefFoundError: Could not initialize class org.codehaus.groovy.vmplugin.v7.Java7


Caused by: java.lang.ExceptionInInitializerError: Exception org.codehaus.groovy.GroovyBugError [in thread "Daemon worker"]
	at org.codehaus.groovy.vmplugin.v7.Java7.<clinit>(Java7.java:45)
	at java.base/jdk.internal.reflect.NativeConstructorAccessorImpl.newInstance0(Native Method)
	at java.base/jdk.internal.reflect.NativeConstructorAccessorImpl.newInstance(NativeConstructorAccessorImpl.java:77)
	at java.base/jdk.internal.reflect.DelegatingConstructorAccessorImpl.newInstance(DelegatingConstructorAccessorImpl.java:45)
	at java.base/java.lang.reflect.Constructor.newInstanceWithCaller(Constructor.java:499)
	at java.base/java.lang.reflect.ReflectAccess.newInstance(ReflectAccess.java:128)
	at java.base/jdk.internal.reflect.ReflectionFactory.newInstance(ReflectionFactory.java:347)
	at java.base/java.lang.Class.newInstance(Class.java:645)
	at org.codehaus.groovy.vmplugin.VMPluginFactory.createPlugin(VMPluginFactory.java:57)
	at org.codehaus.groovy.vmplugin.VMPluginFactory.<clinit>(VMPluginFactory.java:39)
	... 125 more

FAILURE: Build failed with an exception.

* What went wrong:
Could not create an instance of type org.gradle.initialization.DefaultSettings_Decorated.
> Could not initialize class org.codehaus.groovy.reflection.ReflectionCache
分析
看报错情况,好像说时groovy版本和jdk不匹配,而groovy实际上和gradle版本关联,后面找了下groovy和jdk的版本关联,以及如何查找当前groovy版本
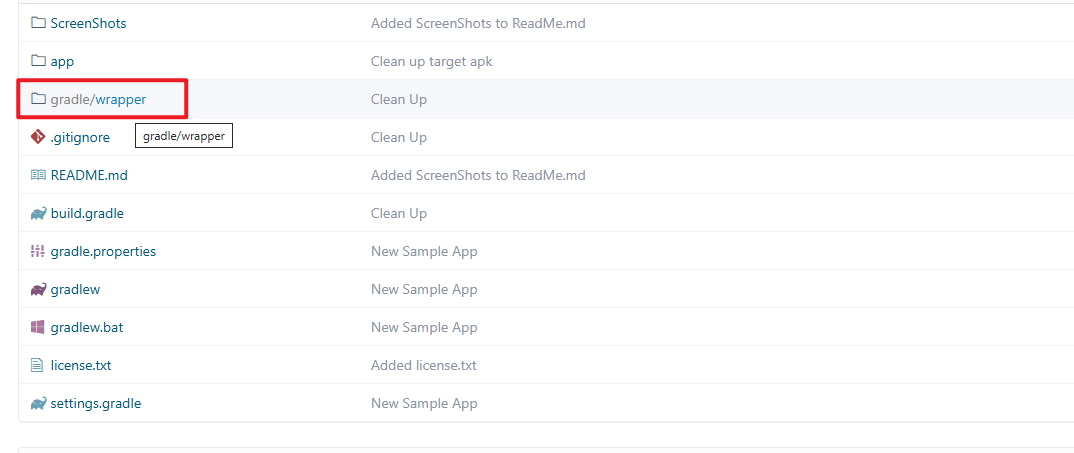
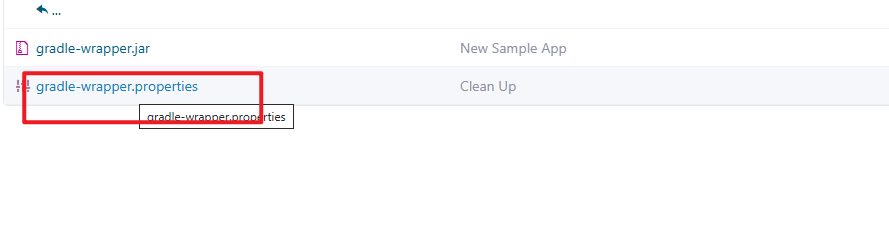
- 查看项目的grdle版本:找了下这个编译操作前面导入了一个git仓库,然后在这个git仓库中看到了关于gradle的配置
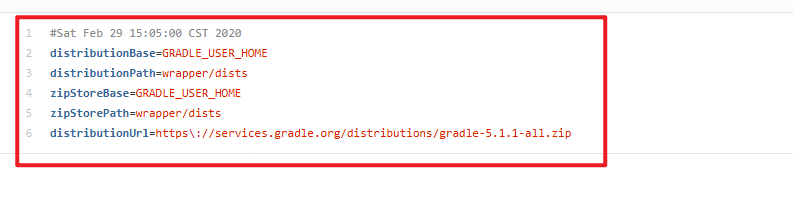
从这里可以看到这里是安装了一个gradle-5.1.1-all版本的gradle - 然后我们来看看
gradle和JDK的对应关系
JDK8->Gradle 2.0
JDK9->Gradle 4.3
JDK10->Gradle 4.7
JDK11->Gradle 5.0
JDK12->Gradle 5.4
JDK13->Gradle 6.0
JDK14->Gradle 6.3
JDK15->Gradle 6.7
JDK16->Gradle 7.0
JDK17->Gradle 7.3
JDK18->Gradle 7.5
JDK19->Gradle 7.6
可以看到如果不想修改Gradle的版本的话,我们就要使用JDK11
以下是在流水线中指定JDK版本
- 首先在Jenkins全局配置中添加工具
- 在流水线脚本中使用
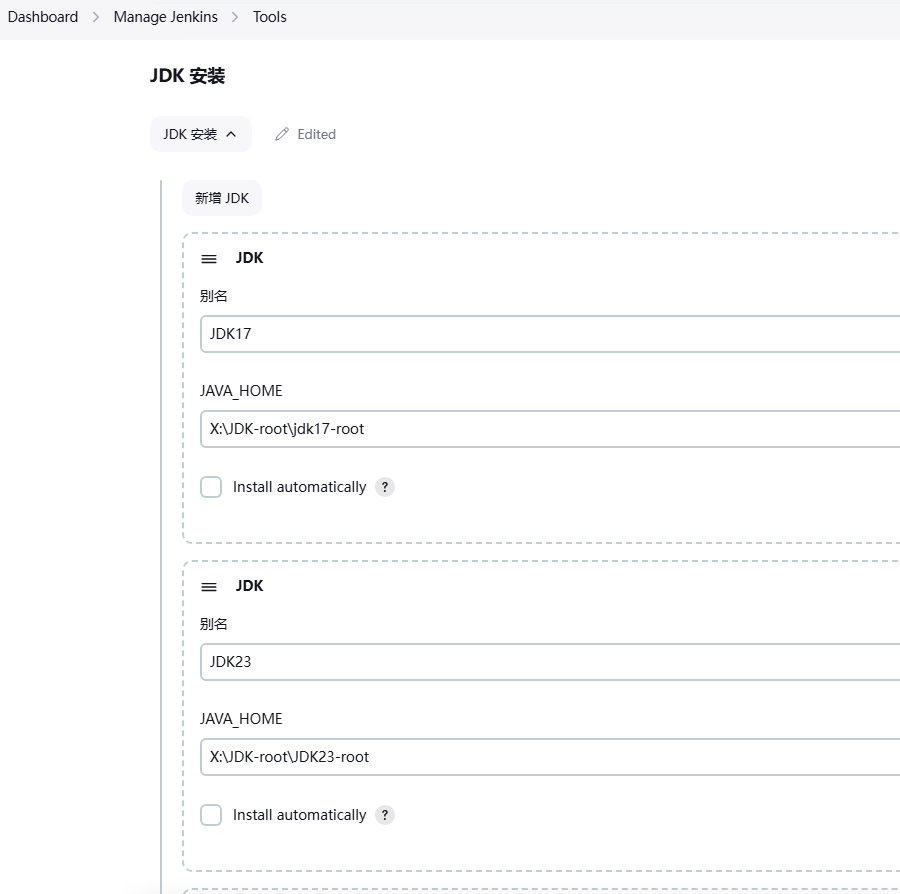
pipeline {
    agent {
        label 'xianzhe_win'
    }
    tools {
        jdk 'JDK11'
    }
如此,问题应该解决了
报错,项目Android SDK不接受
报错截图
> Configure project :app
WARNING: Configuration 'compile' is obsolete and has been replaced with 'implementation' and 'api'.
It will be removed at the end of 2018. For more information see: http://d.android.com/r/tools/update-dependency-configurations.html
Errors during XML parse:
Additionally, the fallback loader failed to parse the XML.
Checking the license for package Android SDK Platform 26 in X:\environment-root\android-sdk-root\android-sdk_r24.4.1-windows\android-sdk-windows\licenses
Warning: License for package Android SDK Platform 26 not accepted.

FAILURE: Build failed with an exception.

* What went wrong:
A problem occurred configuring project ':app'.
> Failed to install the following Android SDK packages as some licences have not been accepted.
     platforms;android-26 Android SDK Platform 26
  To build this project, accept the SDK license agreements and install the missing components using the Android Studio SDK Manager.
  Alternatively, to transfer the license agreements from one workstation to another, see http://d.android.com/r/studio-ui/export-licenses.html

  Using Android SDK: X:\environment-root\android-sdk-root\android-sdk_r24.4.1-windows\android-sdk-windows

* Try:
Run with --stacktrace option to get the stack trace. Run with --info or --debug option to get more log output. Run with --scan to get full insights.
分析
我查了一下报错信息,好像说是在构建 Android 项目时,某些 SDK 许可证尚未被接受,尤其是 Android SDK Platform 26。
解决
这个东西好像是你的SDK Manager里面没有这个SDK Platform 26
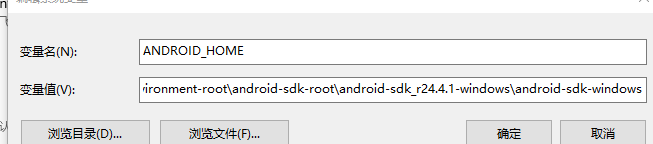
- 首先将你的SKD Manger地址丢到环境变量里,配置一个ANDROID_HOME,value是
SDK Manager的根目录
- 然后进入path中配置:
- %ANDROID_HOME%\tools\bin
- %ANDROID_HOME%\platform-tools
- %ANDROID_HOME%\tools
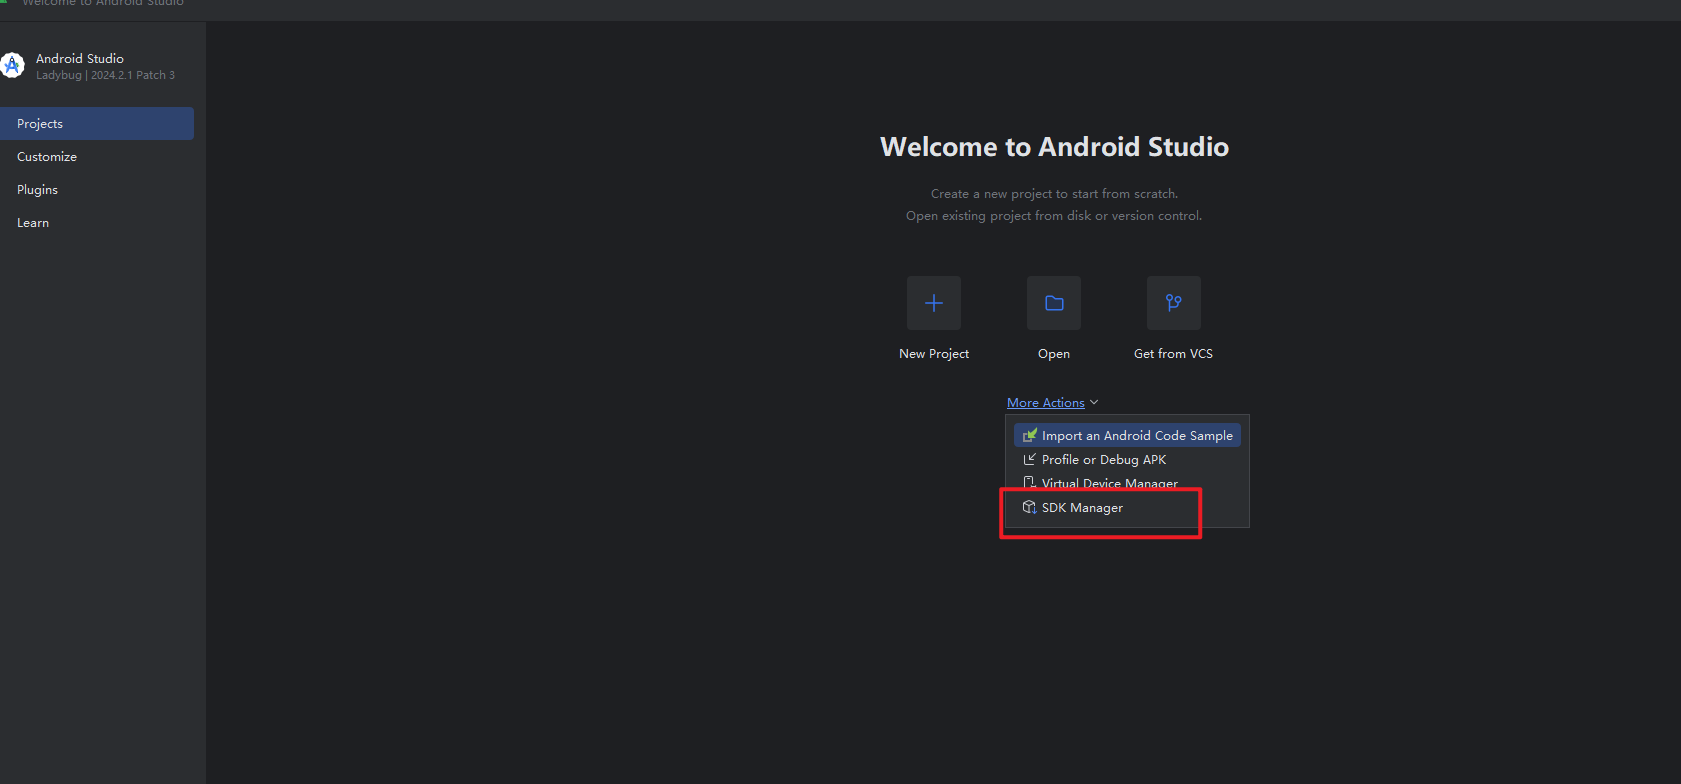
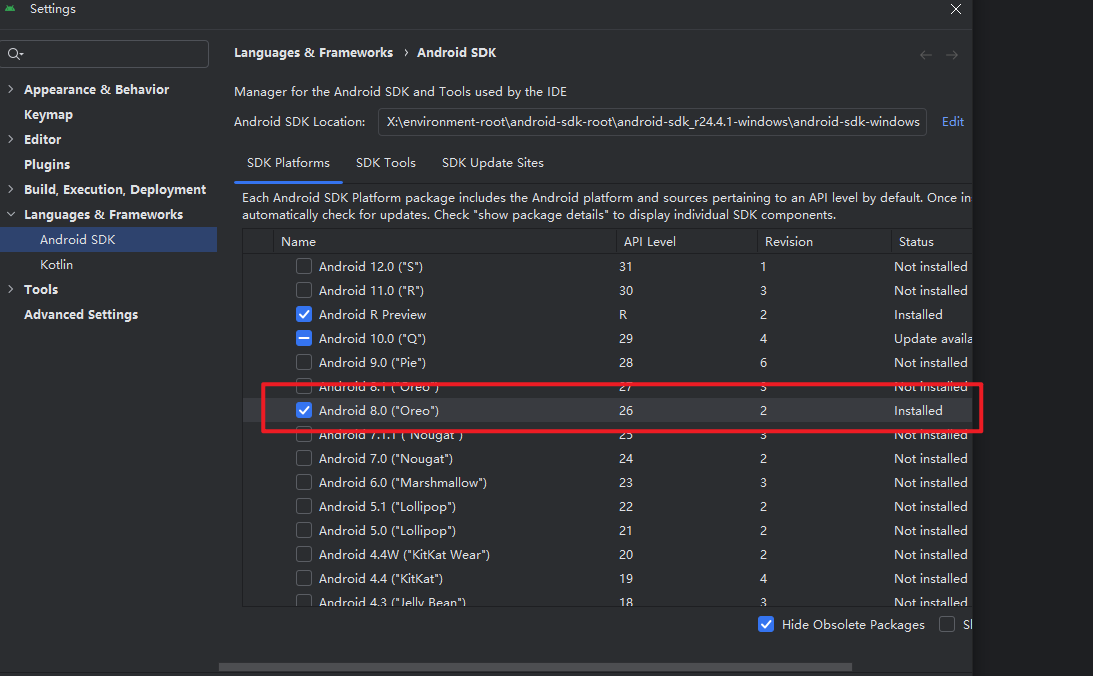
- 最好还是下载一个
Android Studio,然后在里面添加一个对应的SDK
点击里面SDK Manager,然后勾选对应的SDK进行下载即可
然后应该就没有问题了
