PPT
代码地址
课后调查
https://jinshuju.net/f/pANRbR
日志配置
参考配置代码:https://ceshiren.com/t/topic/16036
参考视频:python-日志基础/日志高级配置
实战练习二
- 假设每条用例执行需要 1 秒,加速执行用例(速度提升一倍以上)-- pytest-xdist
- 调整执行用例的顺序,先执行 add P0 级别,再执行 add P2 级别(addP0>addP2 其它的用例按正确顺序执行)
- 如果 P0 级别的用例执行失败,则重新尝试执行最多 3 次,如果执行成功则只执行一次
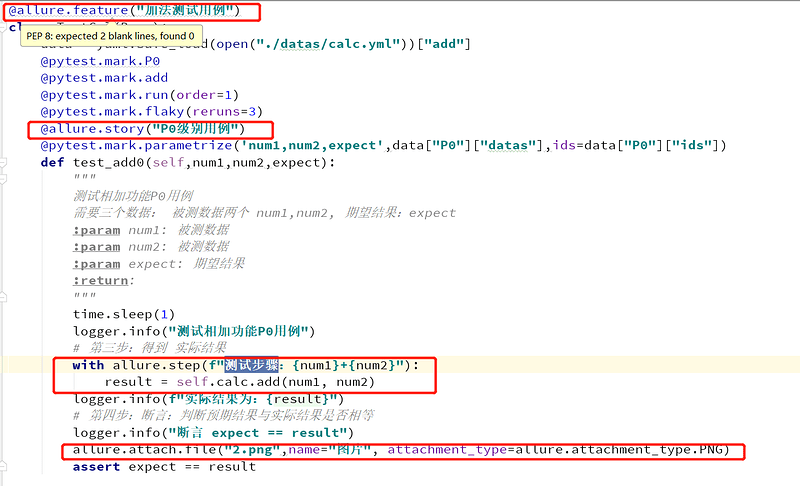
- 生成测试报告(添加用例分类feature story,添加测试步骤 step,添加图像<本地任意图片>放到 用例中)
pip install pytest-ordering
pip install pytest-xdist
pip install pytest-rerunfailures
pip install allure-pytest
pytest-xdist 分布式并发执行用例
pip install pytest-xdist
注意: 使用时,路径不可以有中文,否则会报错
pytest-ordering 调整 执行用例的顺序
生成测试报告
- Java环境 1.8 配置环境变量
- Allure 环境 配置环境变量
-
allure-pytest pip 安装
测试报告定制
参考:https://ceshiren.com/t/topic/14834/2
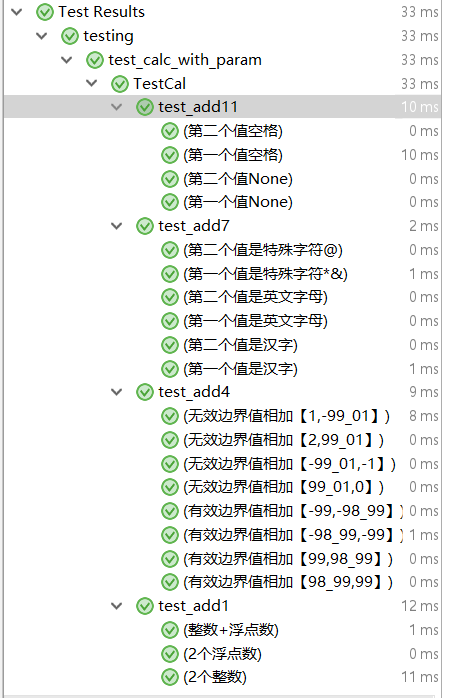
test_calc_with_param.py
import yaml
import pytest
from pytest_prac.src.calculator import Calculator
from pytest_prac.testing.base import Base
from pytest_prac.testing.utils.log_util import logger

"""
参数化:
- 将变化的参数提出出来 放在 方法的参数中,通过外部传递进来 ,完成测试用例的自动生成

数据驱动:
- 将测试数据存储起来(文件,网络,数据库.....)
- 用测试数据文件驱动测试的执行
"""
# 将通用的方法,放在base.py 模块中, 通过继承将这些方法继承过来使用
class TestCal(Base):
    data = yaml.safe_load(open("E:/test1201/pytest_prac/testing/datas/calc.yml"))["add"]
    @pytest.mark.P0
    @pytest.mark.add
    @pytest.mark.parametrize('num1,num2,expect',data["P0"]["datas"],ids=data["P0"]["ids"])
    def test_add1(self,num1,num2,expect):
        """
        测试相加功能P0用例
        需要三个数据: 被测数据两个 num1,num2, 期望结果:expect
        :param num1: 被测数据
        :param num2: 被测数据
        :param expect: 期望结果
        :return:
        """
        logger.info("测试相加功能P0用例")
        # 第三步:得到 实际结果
        result = self.calc.add(num1, num2)
        logger.info(f"实际结果为:{result}")
        # 第四步:断言:判断预期结果与实际结果是否相等
        logger.info("断言 expect == result")
        assert expect == result

    @pytest.mark.P1_1
    @pytest.mark.add
    @pytest.mark.parametrize("num1,num2,expect",data["P1_1"]["datas"],ids=data["P1_1"]["ids"])
    def test_add4(self,num1,num2,expect):
        """测试相加功能 P1 用例 有效边界值"""
        # 第三步:得到 实际结果
        logger.info("测试相加功能 P1 用例 有效边界值")
        result = self.calc.add(num1, num2)
        logger.info(f"实际结果为:{result}")
        # 第四步:断言:判断预期结果与实际结果是否相等
        logger.info("断言 expect == result")
        assert expect == result

    @pytest.mark.P1_2
    @pytest.mark.add
    @pytest.mark.parametrize("num1,num2,expect", data["P1_2"]["datas"], ids=data["P1_2"]["ids"])
    def test_add7(self,num1,num2,expect):
        """测试相加功能 P1 用例  无效边界值"""
        logger.info("测试相加功能 P1 用例 无效边界值")
        with pytest.raises(Exception) as e:
            result = self.calc.add("文", 9.3)
        logger.info(f"e.typename = {e.typename}")
        logger.info("断言 e.typename == 'TypeError'")
        assert e.typename == 'TypeError'

    @pytest.mark.P1_3
    @pytest.mark.add
    @pytest.mark.parametrize("num1,num2,expect", data["P2"]["datas"], ids=data["P2"]["ids"])
    def test_add11(self,num1,num2,expect):
        # 方法二:pytest 异常处理机制
        logger.info("测试相加功能 P2 用例 字符类型")
        with pytest.raises(Exception) as e:
            result = self.calc.add("文", 9.3)
        logger.info(f"e.typename = {e.typename}")
        logger.info("断言 e.typename == 'TypeError'")
        assert e.typename == 'TypeError'

-
假设每条用例执行需要 1 秒,加速执行用例(速度提升一倍以上)-- pytest-xdist
==》pytest test_calc_with_param.py -n 2
-
调整执行用例的顺序,先执行 add P0 级别,再执行 add P2 级别(addP0>addP2 其它的用例按正确顺序执行)
==》用例P0设置装饰器:@pytest.mark.run(order=1) 用例P2设置装饰器:@pytest.mark.run(order=2)
-
如果 P0 级别的用例执行失败,则重新尝试执行最多 3 次,如果执行成功则只执行一次
==》@pytest.mark.flaky(reruns=3)
-
生成测试报告(添加用例分类feature story,添加测试步骤 step,添加图像<本地任意图片>放到 用例中)
pytest test_calc_with_param.py -s -q --alluredir=./result/


