一、准备
简介
说起图形界面库,你可能会想到 TkInter、PyQt、PyGUI 等流行的图形界面库。
本期的主题要讲的一款非常棒的python库,那就是 PySimpleGUI,它基于 tkinter, Qt, WxPython, and Remi等GUI框架进行了封装并提供了简单易用的接口供我们使用。截至目前在 GitHub仓库有 7K 个 star。
Transforms the tkinter, Qt, WxPython, and Remi (browser-based) GUI frameworks into a simpler interface. The window definition is simplified by using Python core data types understood by beginners (lists and dictionaries). Further simplification happens by changing event handling from a callback-based model to a message passing one.
安装
命令行中执行如下指令:
$ pip install pysimplegui -i https://pypi.tuna.tsinghua.edu.cn/simple
引用
import PySimpleGUI as sg
Demo
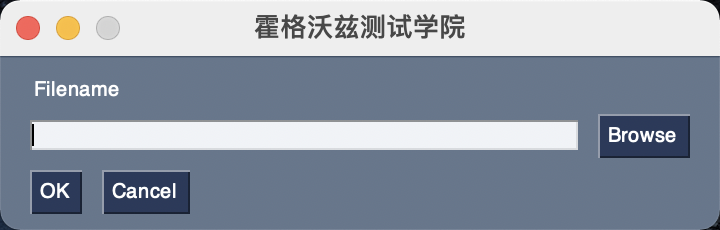
- 极简代码示例
import PySimpleGUI as sg

event, values = sg.Window('霍格沃兹测试学院', [[sg.Text('Filename')], [sg.Input(), sg.FileBrowse()], [sg.OK(), sg.Cancel()]]).read(close=True)
- 结构化代码示例
# (1)导入库
import PySimpleGUI as sg

# (2)定义布局
layout = [
    [sg.Text('Filename')],
    [sg.Input(), sg.FileBrowse()],
    [sg.OK(), sg.Cancel()]]

# (3)创建窗口
window = sg.Window('test', layout)

# (4)事件循环
while True:
    event, value = window.read()

    if event is None:
        break

# (5)关闭窗口
window.close()
二、元素 Elements
“Elements” are the building blocks used to create windows. Some GUI APIs use the term “Widget” to describe these graphic elements.
支持的元素清单
- Text
- Input
-
Buttons
- File Browse
- Folder Browse
- Calendar picker
- Date Chooser
- Read window
- Close window (“Button” & all shortcut buttons)
- Realtime
- Checkbox
- Radio Button
- Listbox
- Slider
- Multi-line Text Input/Output
- Scroll-able Output
- Vertical Separator
- Progress Bar
- Option Menu
- Menu
- ButtonMenu
- Frame
- Column
- Graph
- Image
- Table
- Tree
- Tab, TabGroup
- StatusBar
- Pane
- Stretch (Qt only)
- Sizer (plain PySimpleGUI only)
元素通用参数
无论何种元素都支持的参数。
-
key
Used with window[key], events, and in return value dictionary.
键。可以理解成key是元素的名字或ID,对于整个窗口来说名字必须是唯一的,不能重复。它的用途在于两个方面:一是方便获取对应的值,二是方便控制元素的更新。例如,我们对一个输入框设定key值
sg.Input(key='-NICKNAME-'),通过event, values = window.read(),可以使用values['-NICKNAME-']获取到该输入框的输入值。或者,直接使用window[-NICKNAME-].get()来获取该元素的值。再比如,如果我们想更新该输入框的值,可以使用wind[-NICKNAME-].update('jack')来实现。 -
tooltip
Hover your mouse over the element and you’ll get a popup with this text.
提示语。当用户鼠标悬停在元素上方时采用冒泡提示的方式展示一段说明文本。例如
sg.Input(tooltip='只允许输入数字!') -
size
Usually measured in characters-wide, rows-high. Sometimes they mean pixels.
尺寸。用来设定元素的尺寸,格式是元组
(width, height),尺寸单位是像素px。例如sg.Input(size=(10, 1))。 -
font
Specifies the font family, size, etc.
字体。用来设定文本的字体,大小和样式,格式是元祖
(family, size, styles)。例如sg.Input(font=('Times', 8, 'bold'))。 -
pad
Amount of padding to put around element.
边距。控制元素四周留出的空白空间,尺寸单位是像素,默认值是(5, 3),即左、右各边距5像素,上下各边距3像素。例如
sg.Input(pad=((10, 20), (30, 40)))表示左边距是10像素,右边距是20像素,上边距是30像素,下边距是40像素。 -
enable_events
Turns on the element specific events.
是否开启事件,参数值是布尔类型。例如
sg.Input('enable_events=True')。有些元素默认是关闭事件触发的。 -
visible
Make elements appear and disappear.
是否可见。用来控制元素在界面上的隐藏和显示,visible参数的值是布尔类型。例如
sg.Input(visible=False)。
常用元素
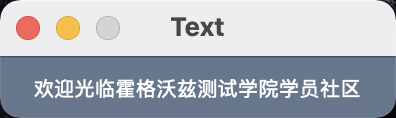
Text
文本元素,简写是T。
import PySimpleGUI as sg

layout = [
            [sg.Text('欢迎光临霍格沃兹测试学院学员社区')],
         ]
window = sg.Window('Text', layout)
event, values = window.read()
window.close()
支持的完整参数
Text(
    text: Any = '',
    size: Tuple[int, Optional[int]] = (None, None),
    auto_size_text: bool = None,
    click_submits: bool = False,
    enable_events: bool = False,
    relief: Any = None,
    font: Union[str, tuple[str, int], None] = None,
    text_color: str = None,
    background_color: str = None,
    border_width: int = None,
    justification: str = None,
    pad: Union[Tuple[int, int], Tuple[Tuple[int, int], Tuple[int, int]], Tuple[int, Tuple[int, int]], Tuple[Tuple[int, int], int]] = None,
    key: Union[str, int, tuple, object] = None,
    k: Union[str, int, tuple, object] = None,
    right_click_menu: List[List[Union[List[str], str]]] = None,
    grab: bool = None,
    tooltip: str = None,
    visible: bool = True,
    metadata: Any = None) -> None
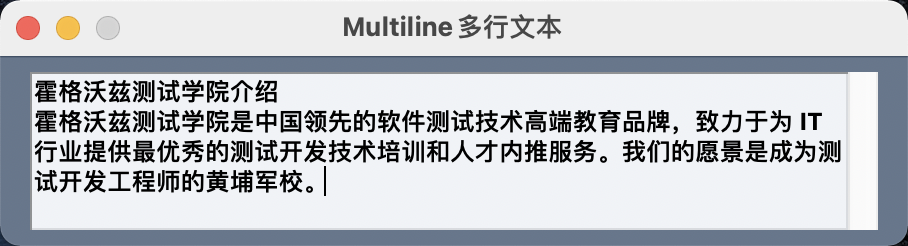
Multiline
多行文本,支持输入和输出。
This Element doubles as both an input and output Element.
示例:
示例代码:
import PySimpleGUI as sg

layout = [[sg.Multiline('霍格沃兹测试学院介绍
霍格沃兹测试学院是中国领先的软件测试技术高端教育品牌,致力于为 IT 行业提供最优秀的测试开发技术培训和人才内推服务。我们的愿景是成为测试开发工程师的黄埔军校。', size=(45, 5), font=('微软雅黑', 12, 'bold'))]]

window = sg.Window('Multiline多行文本', layout)
event, values = window.read()
window.close()
支持参数:
Multiline(
    default_text: str = '',
    enter_submits: bool = False,
    disabled: bool = False,
    autoscroll: bool = False,
    border_width: int = None,
    size: Tuple[int, int] = (None, None),
    auto_size_text: bool = None,
    background_color: str = None,
    text_color: str = None,
    change_submits: bool = False,
    enable_events: bool = False,
    do_not_clear: bool = True,
    key: Union[str, int, tuple, object] = None,
    k: Union[str, int, tuple, object] = None,
    write_only: bool = False,
    auto_refresh: bool = False,
    reroute_stdout: bool = False,
    reroute_stderr: bool = False,
    reroute_cprint: bool = False,
    echo_stdout_stderr: bool = False,
    focus: bool = False,
    font: Union[str, tuple[str, int]] = None,
    pad: Union[Tuple[int, int], Tuple[Tuple[int, int], Tuple[int, int]], Tuple[int, Tuple[int, int]], Tuple[Tuple[int, int], int]] = None,
    tooltip: str = None,
    justification: str = None,
    scrollbar: bool = True,
    right_click_menu: List[List[Union[List[str], str]]] = None,
    visible: bool = True,
    metadata: Any = None) -> None
支持方法:
-
print()
类似于update()方法,可以追加输出内容,支持设定文本颜色和背景颜色等。
def print(self,
    *args: Any,
    end: str = None,
    sep: str = None,
    text_color: str = None,
    background_color: str = None,
    justification: str = None,
    colors: Union[str, tuple[str, str]] = None,
    t: str = None,
    b: str = None,
    c: Union[str, tuple[str, str]] = None) -> None
print方法示例:
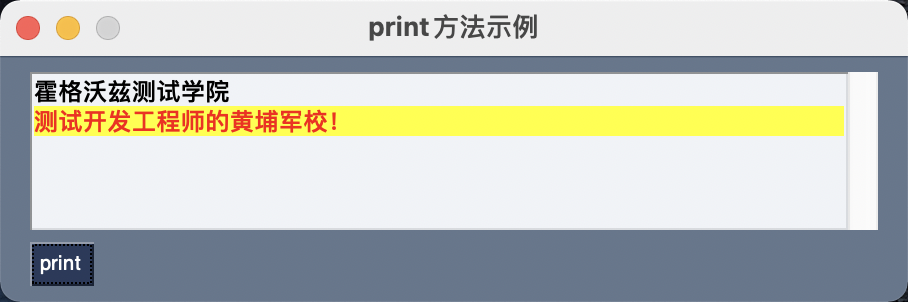
示例代码:
import PySimpleGUI as sg

layout = [[sg.Multiline('霍格沃兹测试学院 \n', key='-ML-', size=(45, 5), font=('微软雅黑', 12, 'bold'))],
          [sg.Button('print', key='-YM-')]]

window = sg.Window('print方法示例', layout)

while True:
    event, values = window.read()
    if event == '-YM-':
        window['-ML-'].print('测试开发工程师的黄埔军校!', text_color='red', background_color='yellow')
    if event is None:
        break

window.close()
InputText
单行输入文本框。
InputText == Input == In

示例代码:
import PySimpleGUI as sg

layout = [[sg.InputText('Hello Hogwarts!', font=('微软雅黑', 12, 'bold'))]]

window = sg.Window('Input单行输入框', layout)
event, values = window.read()
window.close()
详细参数:
Input(
    default_text: Any = '',
    size: Any = (None, None),
    disabled: bool = False,
    password_char: Any = '',
    justification: str = None,
    background_color: str = None,
    text_color: str = None,
    font: Union[str, tuple[str, int]] = None,
    tooltip: str = None,
    border_width: int = None,
    change_submits: bool = False,
    enable_events: bool = False,
    do_not_clear: bool = True,
    key: Union[str, int, tuple, object] = None,
    k: Union[str, int, tuple, object] = None,
    focus: bool = False,
    pad: Union[Tuple[int, int], Tuple[Tuple[int, int], Tuple[int, int]], Tuple[int, Tuple[int, int]], Tuple[Tuple[int, int], int]] = None,
    use_readonly_for_disable: bool = True,
    readonly: bool = False,
    disabled_readonly_background_color: str = None,
    disabled_readonly_text_color: str = None,
    right_click_menu: List[List[Union[List[str], str]]] = None,
    visible: bool = True,
    metadata: Any = None) -> None
Button
按钮
示例
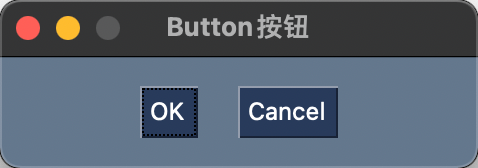
示例代码
import PySimpleGUI as sg

layout = [[
    sg.Button('OK', font=('微软雅黑', 12, 'normal'), pad=((60, 10), 10)),
    sg.Button('Cancel', font=('微软雅黑', 12, 'normal'), pad=((10, 60), 10))]]

window = sg.Window('Button按钮', layout)
event, values = window.read()
window.close()
详细参数
Button(
    button_text: str = '',
    button_type: int = BUTTON_TYPE_READ_FORM,
    target: Union[str, tuple[int, int]] = (None, None),
    tooltip: str = None,
    file_types: Any = (("ALL Files", "*.*"),),
    initial_folder: str = None,
    default_extension: str = '',
    disabled: Union[bool, str] = False,
    change_submits: bool = False,
    enable_events: bool = False,
    image_filename: str = None,
    image_data: Union[bytes, str] = None,
    image_size: Tuple[int, int] = (None, None),
    image_subsample: int = None,
    border_width: int = None,
    size: Tuple[int, int] = (None, None),
    auto_size_button: bool = None,
    button_color: Union[tuple[str, str], str, tuple[int, int], None] = None,
    disabled_button_color: tuple[str, str] = None,
    highlight_colors: tuple[str, str] = None,
    use_ttk_buttons: bool = None,
    font: Union[str, tuple[str, int]] = None,
    bind_return_key: bool = False,
    focus: bool = False,
    pad: Union[Tuple[int, int], Tuple[Tuple[int, int], Tuple[int, int]], Tuple[int, Tuple[int, int]], Tuple[Tuple[int, int], int]] = None,
    key: Union[str, int, tuple, object] = None,
    k: Union[str, int, tuple, object] = None,
    visible: bool = True,
    metadata: Any = None) -> None
捷径
sg.OK()
- OK
- Ok
- Submit
- Cancel
- Yes
- No
- Exit
- Quit
- Help
- Save
- SaveAs
- Open
选择器按钮
按钮点击后会弹出对话框,选中内容后,会将选择结果填充到某个目标元素中,例如输入框等。
目标元素可以通过target参数来指定,具体写法:(1)target=目标元素的key(2)目标元素的相对位置(row, column)。推荐使用key值的写法,第2中方式的元组只对处于同一容器的元素起作用。
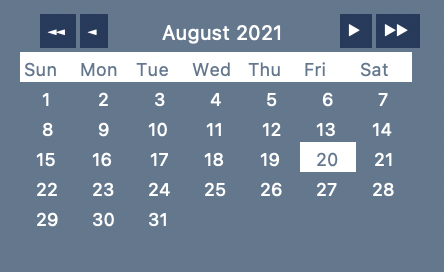
- CalendarButton
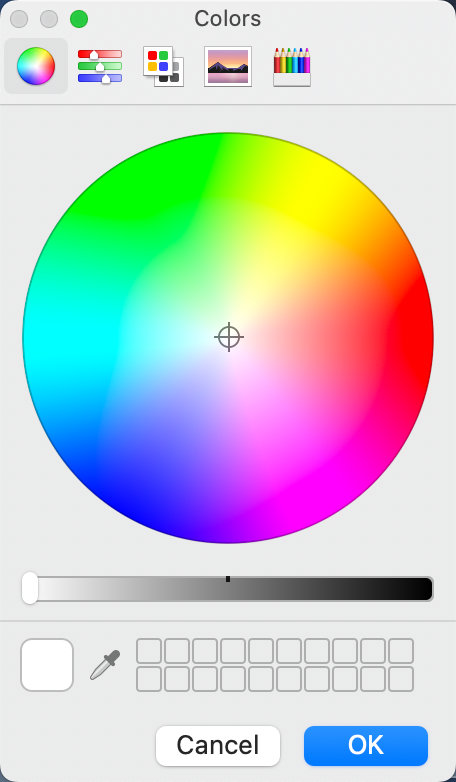
- ColorChooserButton
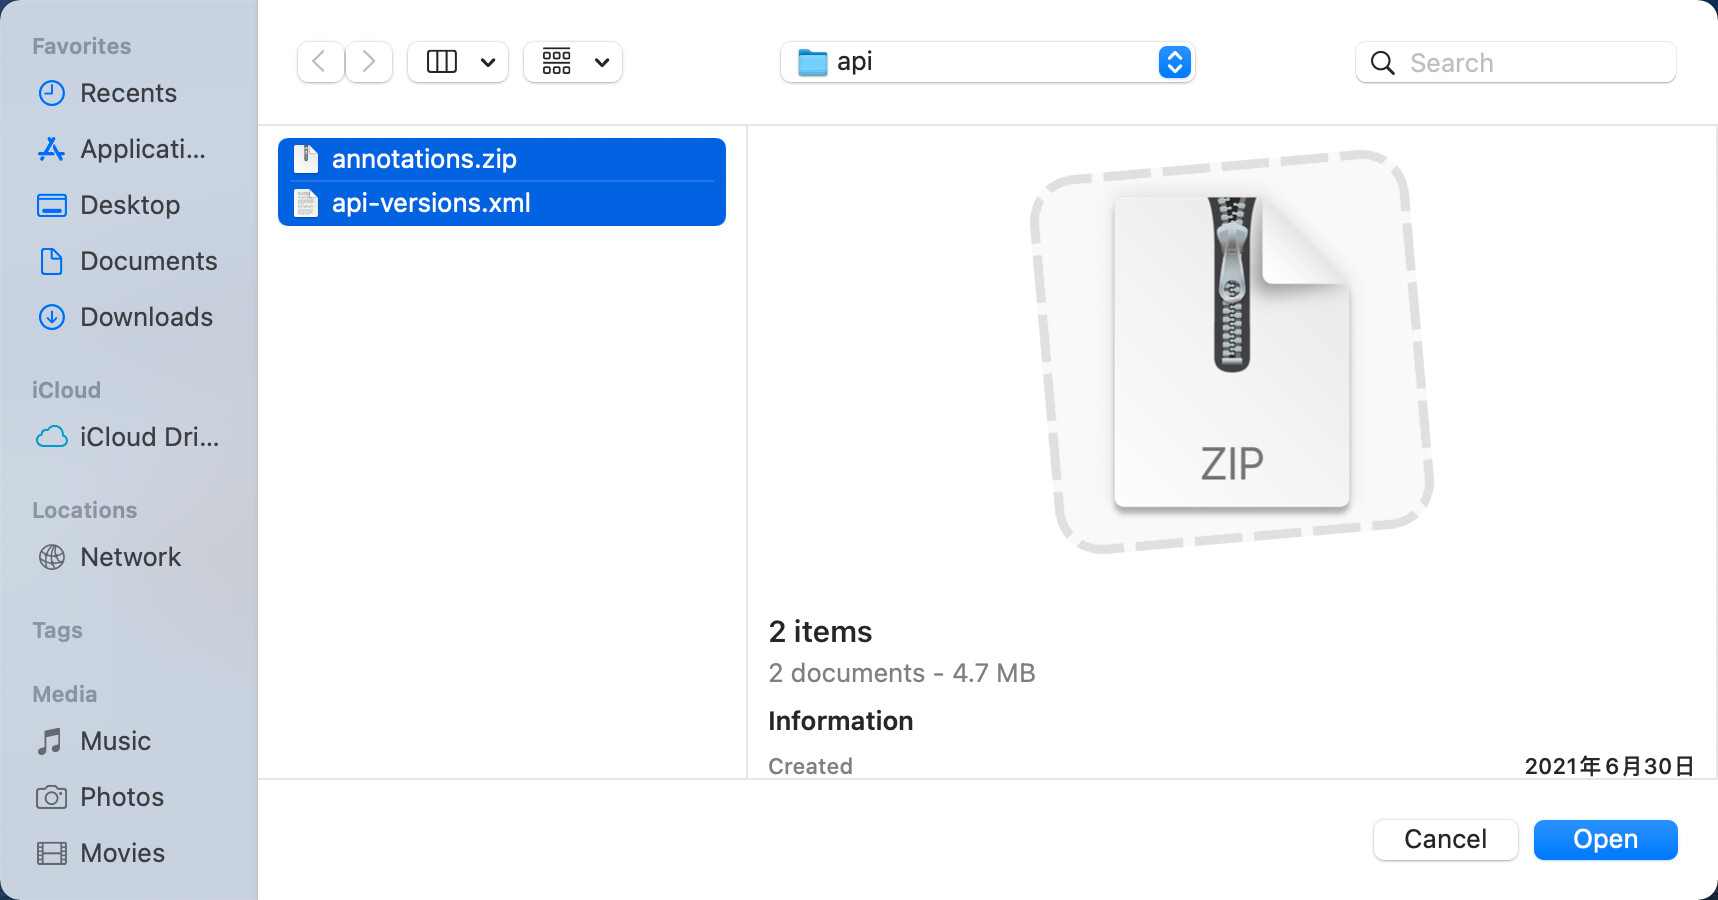
- FileBrowse
- FilesBrowse
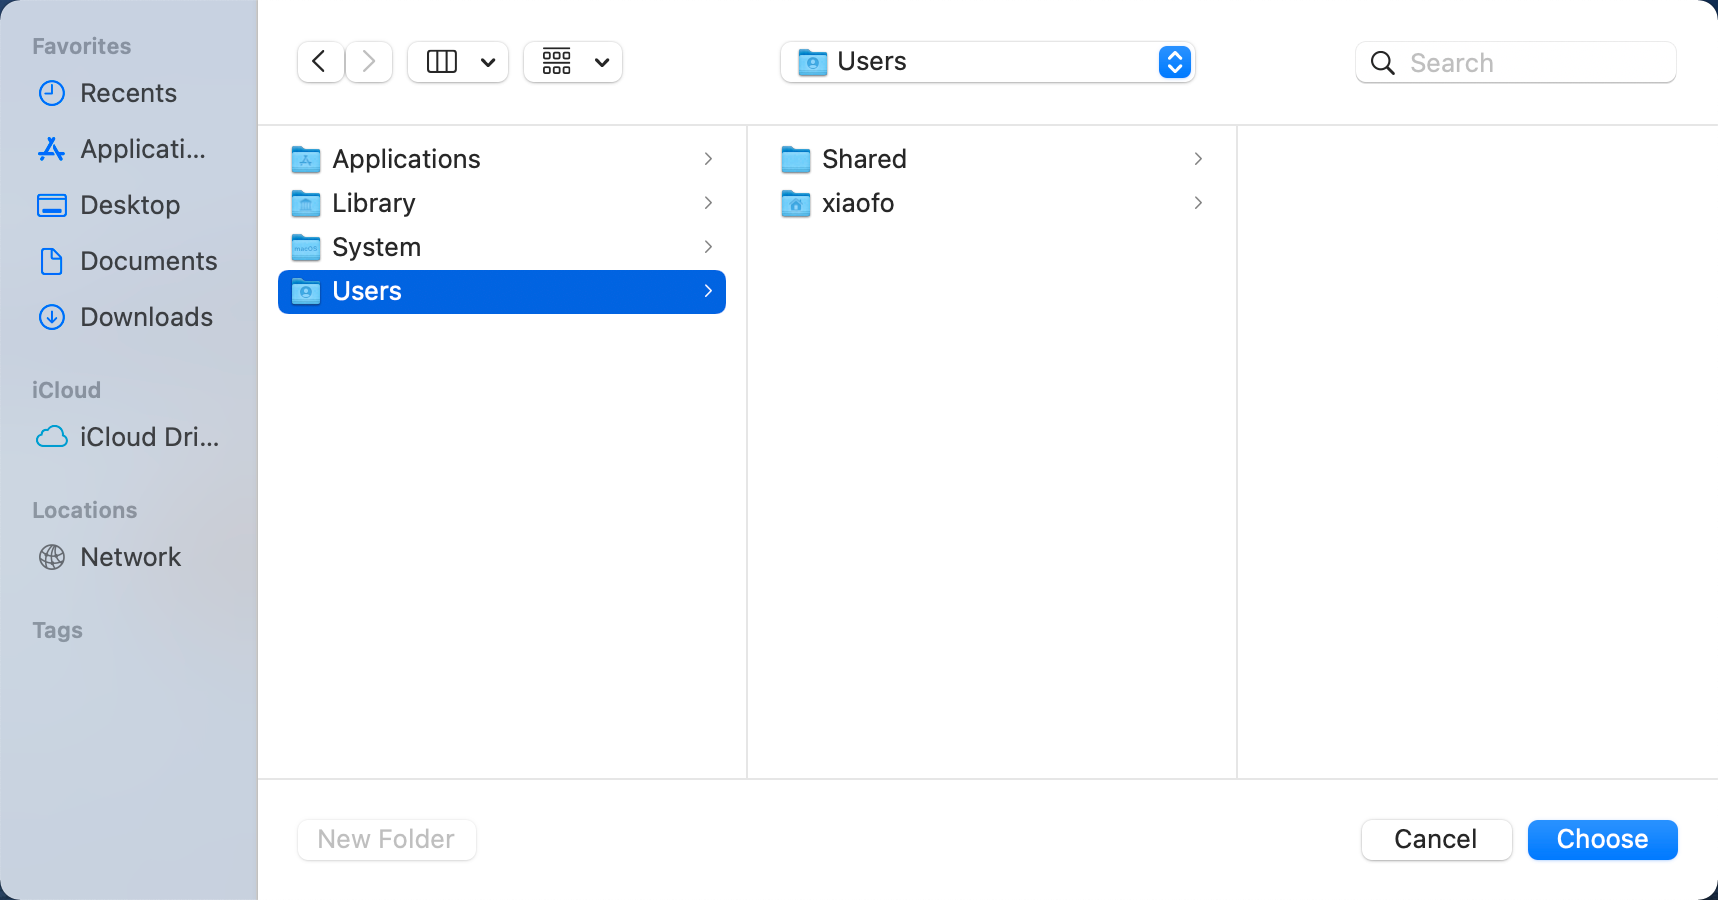
- FolderBrowse
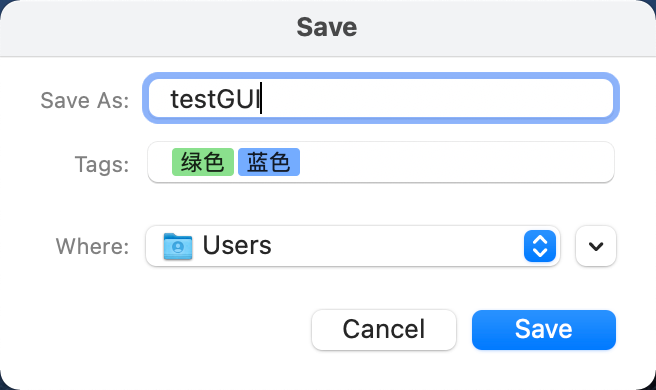
- FileSaveAs
实例:
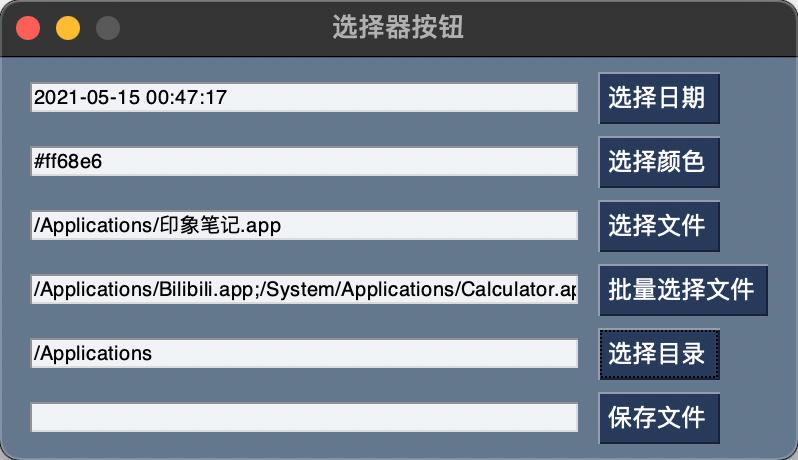
import PySimpleGUI as sg

layout = [
    [sg.Input(key='-DATE-'), sg.CalendarButton('选择日期', target='-DATE-', font=('微软雅黑', 12, 'normal'))],
    [sg.Input(key='-COLOR-'), sg.ColorChooserButton('选择颜色', target='-COLOR-', font=('微软雅黑', 12, 'normal'))],
    [sg.Input(key='-FILE-'), sg.FileBrowse('选择文件', target='-FILE-', font=('微软雅黑', 12, 'normal'))],
    [sg.Input(key='-FILES-'), sg.FilesBrowse('批量选择文件', target='-FILES-', font=('微软雅黑', 12, 'normal'))],
    [sg.Input(key='-FOLDER-'), sg.FolderBrowse('选择目录', target='-FOLDER-', font=('微软雅黑', 12, 'normal'))],
    [sg.Input(key='-SAVE-'), sg.FileSaveAs('保存文件', target='-FOLDER-', font=('微软雅黑', 12, 'normal'))],
    ]


window = sg.Window('选择器按钮', layout)
event, values = window.read()
window.close()
CalendarButton日历按钮
详细参数
CalendarButton(button_text: str,
    target: Tuple[int, int] = (ThisRow, -1),
    close_when_date_chosen: bool = True,
    default_date_m_d_y: Tuple[int, Optional[int], int] = (None, None, None),
    image_filename: Any = None,
    image_data: Any = None,
    image_size: Any = (None, None),
    image_subsample: Any = None,
    tooltip: str = None,
    border_width: Any = None,
    size: Tuple[int, int] = (None, None),
    auto_size_button: bool = None,
    button_color: Union[tuple[str, str], str] = None,
    disabled: bool = False,
    font: Union[str, tuple[str, int]] = None,
    bind_return_key: bool = False,
    focus: bool = False,
    pad: Union[Tuple[int, int], Tuple[Tuple[int, int], Tuple[int, int]], Tuple[int, Tuple[int, int]], Tuple[Tuple[int, int], int]] = None,
    enable_events: Any = None,
    key: Union[str, int, tuple, object] = None,
    k: Union[str, int, tuple, object] = None,
    locale: str = None,
    format: str = '%Y-%m-%d %H:%M:%S',
    begin_at_sunday_plus: int = 0,
    month_names: List[str] = None,
    day_abbreviations: List[str] = None,
    title: str = 'Choose Date',
    no_titlebar: bool = True,
    location: Tuple[int, int] = (None, None),
    metadata: Any = None) -> Button
ColorChooserButton颜色选择按钮
详细参数:
ColorChooserButton(button_text: str,
    target: Union[str, tuple[int, int]] = (None, None),
    image_filename: str = None,
    image_data: Union[bytes, str] = None,
    image_size: Tuple[int, int] = (None, None),
    image_subsample: int = None,
    tooltip: str = None,
    border_width: int = None,
    size: Tuple[int, int] = (None, None),
    auto_size_button: bool = None,
    button_color: Union[tuple[str, str], str] = None,
    disabled: bool = False,
    font: Union[str, tuple[str, int]] = None,
    bind_return_key: bool = False,
    focus: bool = False,
    pad: Union[Tuple[int, int], Tuple[Tuple[int, int], Tuple[int, int]], Tuple[int, Tuple[int, int]], Tuple[Tuple[int, int], int]] = None,
    key: Union[str, int, tuple, object] = None,
    k: Union[str, int, tuple, object] = None,
    metadata: Any = None) -> Button
FileBrowse文件选择按钮

详细参数
FileBrowse(button_text: str = 'Browse',
    target: Tuple[int, int] = (ThisRow, -1),
    file_types: Any = (("ALL Files", "*.*"),),
    initial_folder: Any = None,
    tooltip: str = None,
    size: Tuple[int, int] = (None, None),
    auto_size_button: bool = None,
    button_color: Union[tuple[str, str], str] = None,
    change_submits: bool = False,
    enable_events: bool = False,
    font: Union[str, tuple[str, int]] = None,
    disabled: bool = False,
    pad: Union[Tuple[int, int], Tuple[Tuple[int, int], Tuple[int, int]], Tuple[int, Tuple[int, int]], Tuple[Tuple[int, int], int]] = None,
    key: Union[str, int, tuple, object] = None,
    k: Union[str, int, tuple, object] = None,
    metadata: Any = None) -> Button
FilesBrowse批量文件选择按钮
详细参数
 FilesBrowse(button_text: str = 'Browse',
     target: Tuple[int, int] = (ThisRow, -1),
     file_types: Any = (("ALL Files", "*.*"),),
     disabled: bool = False,
     initial_folder: str = None,
     tooltip: str = None,
     size: Tuple[int, int] = (None, None),
     auto_size_button: bool = None,
     button_color: Union[tuple[str, str], str] = None,
     change_submits: bool = False,
     enable_events: bool = False,
     font: Union[str, tuple[str, int]] = None,
     pad: Union[Tuple[int, int], Tuple[Tuple[int, int], Tuple[int, int]], Tuple[int, Tuple[int, int]], Tuple[Tuple[int, int], int]] = None,
     key: Union[str, int, tuple, object] = None,
     k: Union[str, int, tuple, object] = None,
     files_delimiter: str = BROWSE_FILES_DELIMITER,
     metadata: Any = None) -> Button
FolderBrowse目录选择按钮
详细参数:
FolderBrowse(button_text: str = 'Browse',
    target: Tuple[Any, Any] = (ThisRow, -1),
    initial_folder: str = None,
    tooltip: str = None,
    size: Tuple[int, int] = (None, None),
    auto_size_button: bool = None,
    button_color: Any = None,
    disabled: bool = False,
    change_submits: bool = False,
    enable_events: bool = False,
    font: Union[str, tuple[str, int]] = None,
    pad: Union[Tuple[int, int], Tuple[Tuple[int, int], Tuple[int, int]], Tuple[int, Tuple[int, int]], Tuple[Tuple[int, int], int]] = None,
    key: Union[str, int, tuple, object] = None,
    k: Union[str, int, tuple, object] = None,
    metadata: Any = None) -> Button
FileSaveAs文件保存按钮
详细参数
FileSaveAs(button_text: str = 'Save As...',
    target: Tuple[int, int] = (ThisRow, -1),
    file_types: Any = (("ALL Files", "*.*"),),
    initial_folder: str = None,
    default_extension: str = '',
    disabled: bool = False,
    tooltip: str = None,
    size: Tuple[int, int] = (None, None),
    auto_size_button: bool = None,
    button_color: Union[tuple[str, str], str] = None,
    change_submits: bool = False,
    enable_events: bool = False,
    font: Union[str, tuple[str, int]] = None,
    pad: Union[Tuple[int, int], Tuple[Tuple[int, int], Tuple[int, int]], Tuple[int, Tuple[int, int]], Tuple[Tuple[int, int], int]] = None,
    key: Union[str, int, tuple, object] = None,
    k: Union[str, int, tuple, object] = None,
    metadata: Any = None) -> Button
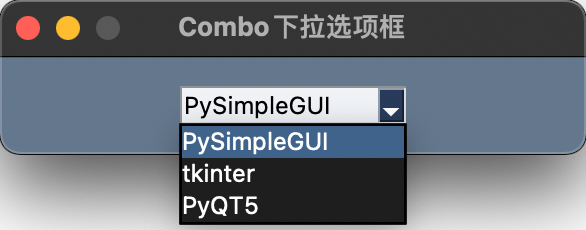
Combo
下拉选项框,
Combo == InputCombo == DropDown ==Drop
示例
示例代码
import PySimpleGUI as sg

layout = [[sg.Combo(['PySimpleGUI', 'tkinter', 'PyQT5'], default_value='PySimpleGUI', font=('微软雅黑', 12, 'normal'), pad=(80, 10))]]

window = sg.Window('Combo下拉选项框', layout)
event, values = window.read()
window.close()
详细参数
Combo(
    values: Union[list, tuple],
    default_value: Any = None,
    size: Tuple[int, int] = (None, None),
    auto_size_text: bool = None,
    background_color: str = None,
    text_color: str = None,
    change_submits: bool = False,
    enable_events: bool = False,
    disabled: bool = False,
    key: Union[str, int, tuple, object] = None,
    k: Union[str, int, tuple, object] = None,
    pad: Union[Tuple[int, int], Tuple[Tuple[int, int], Tuple[int, int]], Tuple[int, Tuple[int, int]], Tuple[Tuple[int, int], int]] = None,
    tooltip: str = None,
    readonly: bool = False,
    font: Union[str, tuple[str, int]] = None,
    visible: bool = True,
    metadata: Any = None) -> None
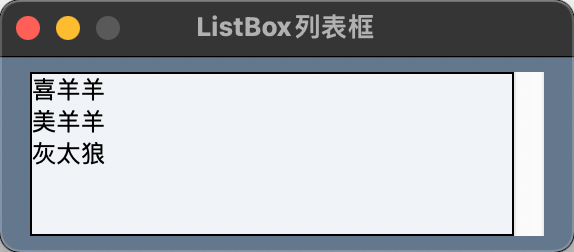
ListBox
列表框。提供一组选项给用户选择,每次只能选择其中一项。
如果
enable_events=True,那么每次选中都会立即触发window.read()并将选中值返回给values。
示例
示例代码
import PySimpleGUI as sg

layout = [[sg.Listbox(values=['喜羊羊', '美羊羊', '灰太狼'], font=('微软雅黑', 12, 'normal'), size=(30, 5), enable_events=True)]]

window = sg.Window('ListBox列表框', layout)
while True:
    event, values = window.read()
    print(values)
    if event is None:
        break
window.close()
详细参数
Listbox(
    values: Union[list, tuple],
    default_values: list = None,
    select_mode: Any = None,
    change_submits: bool = False,
    enable_events: bool = False,
    bind_return_key: bool = False,
    size: Any = (None, None),
    disabled: bool = False,
    auto_size_text: bool = None,
    font: Union[str, tuple[str, int]] = None,
    no_scrollbar: Any = False,
    background_color: str = None,
    text_color: str = None,
    key: Union[str, int, tuple, object] = None,
    k: Union[str, int, tuple, object] = None,
    pad: Union[Tuple[int, int], Tuple[Tuple[int, int], Tuple[int, int]], Tuple[int, Tuple[int, int]], Tuple[Tuple[int, int], int]] = None,
    tooltip: str = None,
    right_click_menu: List[List[Union[List[str], str]]] = None,
    visible: bool = True,
    metadata: Any = None) -> None
Slider
滑块。
QT滑块的数值仅支持整数。
示例

示例代码
import PySimpleGUI as sg

layout = [[sg.Slider(range=(0, 100), default_value=60, size=(40, 10), orientation='horizontal', font=('微软雅黑', 12, 'normal'))]]

window = sg.Window('Slider滑块', layout)
event, values = window.read()
window.close()
详细参数
Slider(
    range: Union[tuple[int, int], tuple[float, float]] = (None, None),
    default_value: Union[int, float] = None,
    resolution: Union[int, float] = None,
    tick_interval: Union[int, float] = None,
    orientation: str = None,
    disable_number_display: bool = False,
    border_width: int = None,
    relief: Optional[str] = None,
    change_submits: bool = False,
    enable_events: bool = False,
    disabled: bool = False,
    size: Tuple[int, int] = (None, None),
    font: Union[str, tuple[str, int]] = None,
    background_color: str = None,
    text_color: str = None,
    trough_color: str = None,
    key: Union[str, int, tuple, object] = None,
    k: Union[str, int, tuple, object] = None,
    pad: Union[Tuple[int, int], Tuple[Tuple[int, int], Tuple[int, int]], Tuple[int, Tuple[int, int]], Tuple[Tuple[int, int], int]] = None,
    tooltip: str = None,
    visible: bool = True,
    metadata: Any = None) -> None
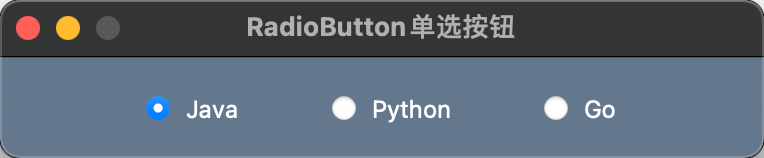
Radio Button
单选按钮
示例
示例代码
import PySimpleGUI as sg

layout = [[sg.Radio('Java', 'LAN', default=True, font=('微软雅黑', 12, 'normal'), pad=((60, 20), 10)),
           sg.Radio('Python', 'LAN', font=('微软雅黑', 12, 'normal'), pad=((20, 20), 10)),
           sg.Radio('Go', 'LAN', font=('微软雅黑', 12, 'normal'), pad=((20, 60), 10))]]

window = sg.Window('RadioButton单选按钮', layout)
event, values = window.read()
window.close()
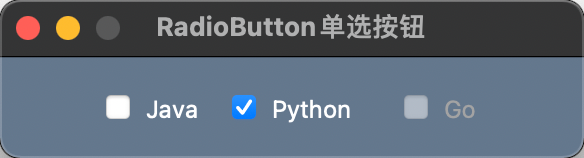
Checkbox
复选框,
CheckBox == CBox == CB == Check
示例
示例代码
import PySimpleGUI as sg

sg.theme('SystemDefault')
layout = [[sg.Checkbox('Java', font=('微软雅黑', 12, 'normal'), pad=((40, 0), 10)),
           sg.CB('Python', default=True, font=('微软雅黑', 12, 'normal'), pad=((10, 10), 10)),
           sg.Check('Go', disabled=True, font=('微软雅黑', 12, 'normal'), pad=((10, 40), 10))]]

window = sg.Window('RadioButton单选按钮', layout)
event, values = window.read()
window.close()
详细参数
Checkbox(
    text: str,
    default: bool = False,
    size: Tuple[int, int] = (None, None),
    auto_size_text: bool = None,
    font: Union[str, tuple[str, int]] = None,
    background_color: str = None,
    text_color: str = None,
    checkbox_color: str = None,
    change_submits: bool = False,
    enable_events: bool = False,
    disabled: bool = False,
    key: Union[str, int, tuple, object] = None,
    k: Union[str, int, tuple, object] = None,
    pad: Union[Tuple[int, int], Tuple[Tuple[int, int], Tuple[int, int]], Tuple[int, Tuple[int, int]], Tuple[Tuple[int, int], int]] = None,
    tooltip: str = None,
    visible: bool = True,
    metadata: Any = None) -> None
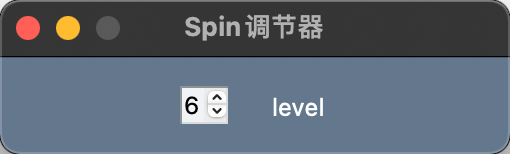
Spin
调节器
示例
示例代码
import PySimpleGUI as sg

layout = [[sg.Spin([i for i in range(1, 11)], initial_value=0, font=('微软雅黑', 12, 'normal'), pad=((80, 10), 10)),
           sg.Text('level', font=('微软雅黑', 12, 'normal'), pad=((10, 80), 10))]]

window = sg.Window('Spin调节器', layout)
event, values = window.read()
window.close()
详细参数
Spin(
    values: Union[tuple, list],
    initial_value: Any = None,
    disabled: bool = False,
    change_submits: bool = False,
    enable_events: bool = False,
    readonly: bool = False,
    size: Tuple[int, int] = (None, None),
    auto_size_text: bool = None,
    font: Union[str, tuple[str, int]] = None,
    background_color: str = None,
    text_color: str = None,
    key: Union[str, int, tuple, object] = None,
    k: Union[str, int, tuple, object] = None,
    pad: Union[Tuple[int, int], Tuple[Tuple[int, int], Tuple[int, int]], Tuple[int, Tuple[int, int]], Tuple[Tuple[int, int], int]] = None,
    tooltip: str = None,
    visible: bool = True,
    metadata: Any = None) -> None
Image
图像
支持的图片格式仅为PNG和GIF。
示例代码
import PySimpleGUI as sg

layout = [[sg.Image('/usr/local/xxx.png')]]

window = sg.Window('Image图片', layout)
event, values = window.read()
window.close()
详细参数:
Image(
    filename: Optional[str] = None,
    data: Union[bytes, str, None] = None,
    background_color: str = None,
    size: Tuple[int, int] = (None, None),
    pad: Union[Tuple[int, int], Tuple[Tuple[int, int], Tuple[int, int]], Tuple[int, Tuple[int, int]], Tuple[Tuple[int, int], int]] = None,
    key: Union[str, int, tuple, object] = None,
    k: Union[str, int, tuple, object] = None,
    tooltip: str = None,
    right_click_menu: List[List[Union[List[str], str]]] = None,
    visible: bool = True,
    enable_events: bool = False,
    metadata: Any = None) -> None
动图示例代码
import PySimpleGUI as sg
from PIL import Image

gif_path = r'D:\progress.gif'

layout = [[sg.Image(gif_path, key='-GIF-', size=Image.open(gif_path).size, background_color='white')]]
window = sg.Window('GIF动图演示', layout)

while True:
    event, values = window.read(timeout=100)
    window['-GIF-'].UpdateAnimation(gif_path, time_between_frames=50)

    if event is None:
        break

window.close()
ButtonMenu
按钮菜单
是按钮,点击后可以展现菜单选项,类似于顶级菜单效果。
示例:
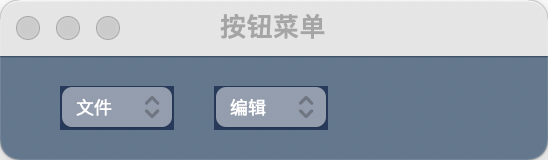
示例代码:
import PySimpleGUI as sg

layout = [
    [
        sg.ButtonMenu(button_text='文件',
                      menu_def=['Menu', ['&打开', '编辑::optional_key', '保存', '配置']],
                      font=('微软雅黑', 9, 'normal'),
                      pad=((20, 20), 10)),
        sg.ButtonMenu(button_text='编辑',
                      menu_def=['Menu', ['&复制', '剪切::optional_key', '撤销', '全选']],
                      font=('微软雅黑', 9, 'normal'),
                      pad=((0, 100), 10),
                      button_color='black')]]
window = sg.Window('按钮菜单', layout)
event, values = window.read()
window.close()
详细参数
ButtonMenu(
    button_text: str,
    menu_def: List[List[str]],
    tooltip: str = None,
    disabled: bool = False,
    image_filename: str = None,
    image_data: Union[bytes, str] = None,
    image_size: Tuple[int, int] = (None, None),
    image_subsample: int = None,
    border_width: int = None,
    size: Tuple[int, int] = (None, None),
    auto_size_button: bool = None,
    button_color: Union[tuple[str, str], str] = None,
    text_color: str = None,
    background_color: str = None,
    disabled_text_color: str = None,
    font: Union[str, tuple[str, int]] = None,
    item_font: Union[str, tuple[str, int]] = None,
    pad: Union[Tuple[int, int], Tuple[Tuple[int, int], Tuple[int, int]], Tuple[int, Tuple[int, int]], Tuple[Tuple[int, int], int]] = None,
    key: Union[str, int, tuple, object] = None,
    k: Union[str, int, tuple, object] = None,
    tearoff: bool = False,
    visible: bool = True,
    metadata: Any = None) -> None
ProgressBar
进度条
示例
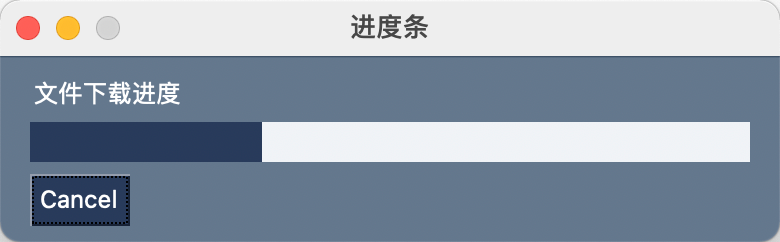
示例代码
import PySimpleGUI as sg

layout = [
    [sg.Text('文件下载进度')],
    [sg.ProgressBar(400, orientation='h', size=(40, 20), key='-PROGRESS-')],
    [sg.Cancel()]
]

window = sg.Window('进度条', layout, font=('微软雅黑', 12, 'normal'))
for i in range(400):
    event, values = window.read(timeout=10)
    if event in (sg.WIN_CLOSED, 'Cancel'):
        break
    window['-PROGRESS-'].UpdateBar(i+1)
window.close()
详细参数
ProgressBar(
    max_value: int,
    orientation: str = None,
    size: Tuple[int, int] = (None, None),
    auto_size_text: bool = None,
    bar_color: Union[tuple[str, str], str] = None,
    style: str = None,
    border_width: int = None,
    relief: str = None,
    key: Union[str, int, tuple, object] = None,
    k: Union[str, int, tuple, object] = None,
    pad: Union[Tuple[int, int], Tuple[Tuple[int, int], Tuple[int, int]], Tuple[int, Tuple[int, int]], Tuple[Tuple[int, int], int]] = None,
    visible: bool = True,
    metadata: Any = None) -> None
Output
控制台输出
展示代码中凡是print输出的内容。如果没有及时展示,可以在print代码后直接调用``window.Refresh`来即刻刷新界面。
示例
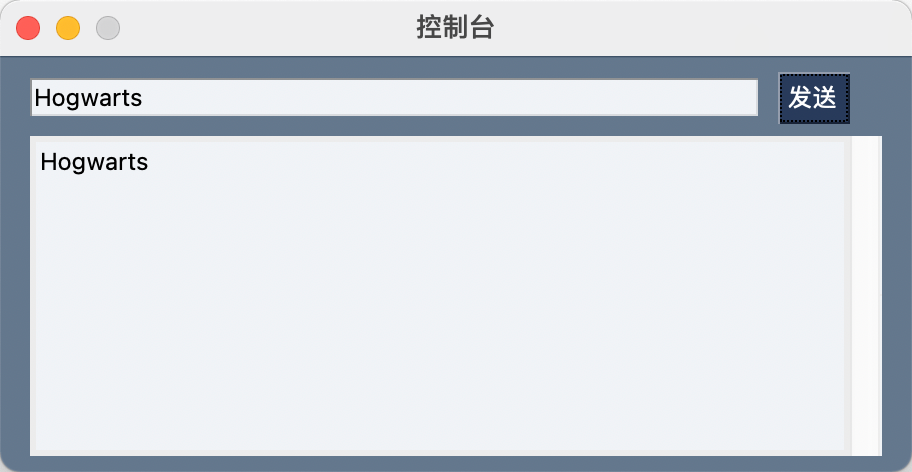
示例代码
import PySimpleGUI as sg

layout = [
    [sg.Input(key='-MESSAGE-'), sg.Button('发送', key='-SEND-', enable_events=True)],
    [sg.Output(size=(50, 10))]
]

window = sg.Window('控制台', layout, font=('微软雅黑', 12, 'normal'))
while True:
    event, values = window.read()
    if event == '-SEND-':
        print(values['-MESSAGE-'])
    if event == sg.WIN_CLOSED:
        break
window.close()
详细参数
Output(
    size: Tuple[int, int] = (None, None),
    background_color: str = None,
    text_color: str = None,
    pad: Union[Tuple[int, int], Tuple[Tuple[int, int], Tuple[int, int]], Tuple[int, Tuple[int, int]], Tuple[Tuple[int, int], int]] = None,
    echo_stdout_stderr: bool = False,
    font: Union[str, tuple[str, int]] = None,
    tooltip: str = None,
    key: Union[str, int, tuple, object] = None,
    k: Union[str, int, tuple, object] = None,
    right_click_menu: List[List[Union[List[str], str]]] = None,
    visible: bool = True,
    metadata: Any = None) -> None
Column
列
三大容器元素之一。可以将多个元素放进一排。
示例
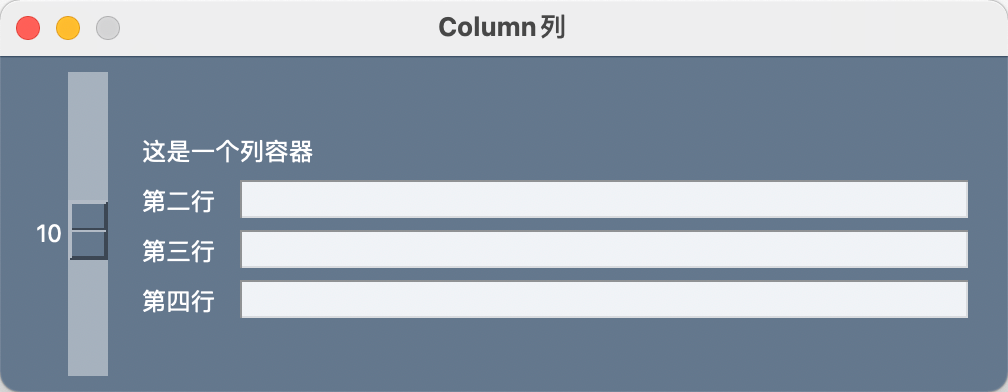
示例代码:
import PySimpleGUI as sg

col = [[sg.Text('这是一个列容器')],
       [sg.Text('第二行'), sg.Input()],
       [sg.Text('第三行'), sg.Input()],
       [sg.Text('第四行'), sg.Input()],
       ]

layout = [[sg.Slider(range=(1, 20), default_value=10, orientation='v', size=(8, 20)), sg.Column(col)]]

window = sg.Window('Column列', layout, font=('微软雅黑', 12, 'normal'))
event, values = window.read()
window.close()
详细参数
Column(
    layout: List[List[Element]],
    background_color: str = None,
    size: Tuple[int, int] = (None, None),
    pad: Union[Tuple[int, int], Tuple[Tuple[int, int], Tuple[int, int]], Tuple[int, Tuple[int, int]], Tuple[Tuple[int, int], int]] = None,
    scrollable: bool = False,
    vertical_scroll_only: bool = False,
    right_click_menu: List[List[Union[List[str], str]]] = None,
    key: Union[str, int, tuple, object] = None,
    k: Union[str, int, tuple, object] = None,
    visible: bool = True,
    justification: str = None,
    element_justification: str = None,
    vertical_alignment: str = None,
    grab: bool = None,
    expand_x: bool = None,
    expand_y: bool = None,
    metadata: Any = None) -> None
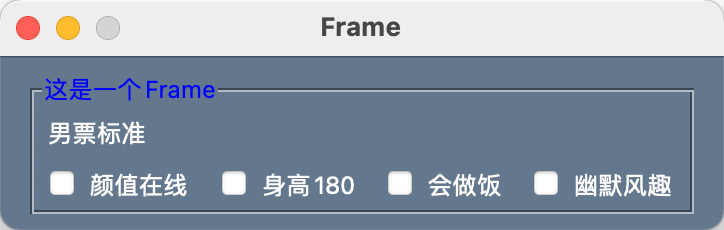
Frame
框
三大容器元素之一。可以容纳多个元素的容器,可以设置标题。
示例
示例代码:
import PySimpleGUI as sg

frame_layout = [
                  [sg.T('男票标准')],
                  [sg.Checkbox('颜值在线'), sg.Checkbox('身高180'), sg.Checkbox('会做饭'), sg.Checkbox('幽默风趣')]
               ]
layout = [
          [sg.Frame('这是一个Frame', frame_layout, title_color='blue')]
         ]

window = sg.Window('Frame', layout, font=('微软雅黑', 12, 'normal'))
event, values = window.read()
window.close()
详细参数
Frame(
    title: str,
    layout: List[list],
    title_color: str = None,
    background_color: str = None,
    title_location: enum.py = None,
    relief: enum.py = DEFAULT_FRAME_RELIEF,
    size: Tuple[int, int] = (None, None),
    font: Union[str, tuple[str, int]] = None,
    pad: Union[Tuple[int, int], Tuple[Tuple[int, int], Tuple[int, int]], Tuple[int, Tuple[int, int]], Tuple[Tuple[int, int], int]] = None,
    border_width: int = None,
    key: Union[str, int, tuple, object] = None,
    k: Union[str, int, tuple, object] = None,
    tooltip: str = None,
    right_click_menu: List[List[Union[List[str], str]]] = None,
    visible: bool = True,
    element_justification: str = 'left',
    vertical_alignment: str = None,
    metadata: Any = None) -> None
Tab
页签
三大容器元素之一。
示例

示例代码
import PySimpleGUI as sg

text = """Tabs are another of PySimpleGUI "Container Elements". It is capable of "containing" a layout just as a \
window contains a layout. Other container elements include the Column and Frame elements."""

layout_tab_1 = [[sg.Text('这是首页的内容')], [sg.Multiline(default_text=text, size=(50, 5))]]
layout_tab_2 = [[sg.Text('这是论坛的内容')]]

tab_group = sg.TabGroup([[sg.Tab('首页', layout_tab_1), sg.Tab('论坛', layout_tab_2)]])

layout = [[tab_group]]

window = sg.Window('Tab & TabGroup页签', layout, font=('微软雅黑', 12, 'normal'))
while True:
    event, values = window.read()
    if event in (sg.WIN_CLOSED, None):
        break
window.close()
详细参数
PySimpleGUI.PySimpleGUI.Tab

Tab(
    title: str,
    layout: List[List[Element]],
    title_color: str = None,
    background_color: str = None,
    font: Union[str, tuple[str, int]] = None,
    pad: Union[Tuple[int, int], Tuple[Tuple[int, int], Tuple[int, int]], Tuple[int, Tuple[int, int]], Tuple[Tuple[int, int], int]] = None,
    disabled: bool = False,
    border_width: int = None,
    key: Union[str, int, tuple, object] = None,
    k: Union[str, int, tuple, object] = None,
    tooltip: str = None,
    right_click_menu: List[List[Union[List[str], str]]] = None,
    visible: bool = True,
    element_justification: str = 'left',
    metadata: Any = None) -> None
PySimpleGUI.PySimpleGUI.TabGroup

TabGroup(
    layout: List[List[Tab]],
    tab_location: str = None,
    title_color: str = None,
    tab_background_color: str = None,
    selected_title_color: str = None,
    selected_background_color: str = None,
    background_color: str = None,
    font: Union[str, tuple[str, int]] = None,
    change_submits: bool = False,
    enable_events: bool = False,
    pad: Union[Tuple[int, int], Tuple[Tuple[int, int], Tuple[int, int]], Tuple[int, Tuple[int, int]], Tuple[Tuple[int, int], int]] = None,
    border_width: int = None,
    theme: enum.py = None,
    key: Union[str, int, tuple, object] = None,
    k: Union[str, int, tuple, object] = None,
    tooltip: str = None,
    visible: bool = True,
    metadata: Any = None) -> None
Table
表格
示例

示例代码
import random

import PySimpleGUI as sg

li = [i for i in range(70, 100)]
score = [random.sample(li, 6) for i in range(10)]
random.shuffle(score)

header = ['语文', '数学', '英语', '物理', '化学', '生物']
layout = [[sg.Table(headings=header,
                    values=score,
                    size=(200, 10),
                    def_col_width=6,
                    auto_size_columns=False,
                    display_row_numbers=True)]]
window = sg.Window('Table表格', layout, font=('微软雅黑', 12, 'normal'))
event, values = window.read()
window.close()
详细参数
PySimpleGUI.PySimpleGUI.Table

Table(
    values: List[List[Union[str, int, float]]],
    headings: List[str] = None,
    visible_column_map: List[bool] = None,
    col_widths: List[int] = None,
    def_col_width: int = 10,
    auto_size_columns: bool = True,
    max_col_width: int = 20,
    select_mode: enum.py = None,
    display_row_numbers: bool = False,
    num_rows: int = None,
    row_height: int = None,
    font: Union[str, tuple[str, int]] = None,
    justification: str = 'right',
    text_color: str = None,
    background_color: str = None,
    alternating_row_color: str = None,
    selected_row_colors: Union[str, tuple[str, str]] = (None, None),
    header_text_color: str = None,
    header_background_color: str = None,
    header_font: Union[str, tuple[str, int]] = None,
    row_colors: List[Union[tuple[int, str], tuple[Any, str, str]]] = None,
    vertical_scroll_only: bool = True,
    hide_vertical_scroll: bool = False,
    size: Tuple[int, int] = (None, None),
    change_submits: bool = False,
    enable_events: bool = False,
    bind_return_key: bool = False,
    pad: Union[Tuple[int, int], Tuple[Tuple[int, int], Tuple[int, int]], Tuple[int, Tuple[int, int]], Tuple[Tuple[int, int], int]] = None,
    key: Union[str, int, tuple, object] = None,
    k: Union[str, int, tuple, object] = None,
    tooltip: str = None,
    right_click_menu: List[List[Union[List[str], str]]] = None,
    visible: bool = True,
    metadata: Any = None) -> None
单击触发事件change_submits
双击触发事件bind_return_key
其他元素
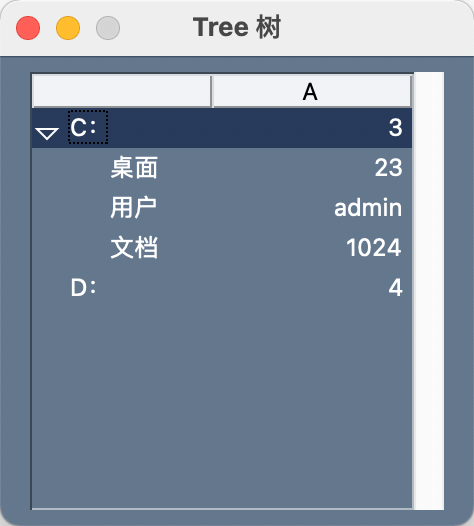
Tree
树形目录
示例
示例代码
import PySimpleGUI as sg

tree_data = sg.TreeData()

tree_data.Insert('', '-C-', 'C:', [3])
tree_data.Insert('', '-D-', 'D:', [4])
tree_data.Insert('-C-', '-DESKTOP-', '桌面', ['23'])
tree_data.Insert('-C-', '-USERS-', '用户', ['admin'])
tree_data.Insert('-C-', '-DOCS-', '文档', ['1024'])

layout = [[sg.Tree(data=tree_data, headings=['A'], auto_size_columns=False, def_col_width=10)]]

window = sg.Window('Tree 树', layout, font=('微软雅黑', 12, 'normal'))
event, values = window.read()
window.close()
详细参数
import PySimpleGUI as sg

tree_data = sg.TreeData()

tree_data.Insert('', '-C-', 'C:', [3])
tree_data.Insert('', '-D-', 'D:', [4])
tree_data.Insert('-C-', '-DESKTOP-', '桌面', ['23'])
tree_data.Insert('-C-', '-USERS-', '用户', ['admin'])
tree_data.Insert('-C-', '-DOCS-', '文档', ['1024'])

layout = [[sg.Tree(data=tree_data, headings=['A'], auto_size_columns=False, def_col_width=10)]]

window = sg.Window('Tree 树', layout, font=('微软雅黑', 12, 'normal'))
event, values = window.read()
window.close()
*Graph
绘画
对标基于TKCanvas的Canvas元素。
官方解释:
In my opinion, the tkinter Canvas Widget is the most powerful of the tkinter widget. While I try my best to completely isolate the user from anything that is tkinter related, the Canvas Element is the one exception. It enables integration with a number of other packages, often with spectacular results.
However, there’s another way to get that power and that’s through the Graph Element, an even MORE powerful Element as it uses a Canvas that you can directly access if needed. The Graph Element has a large number of drawing methods that the Canvas Element does not have. Plus, if you need to, you can access the Graph Element’s “Canvas” through a member variable.
Sizer
用来创建一个指定尺寸的容器。可以放置在Column、Frame、Tab或者Window中。
VerticalSeparator
垂直分隔线
垂直分隔多个容器元素(占据多行)。
同理,还有HorizontalSeparator水平分隔线元素。
示例

示例代码:
import PySimpleGUI as sg

col1 = sg.Column(layout=[[sg.Text('教育背景')],
                         [sg.Text('学校:'), sg.Input(size=(20, 10))],
                         [sg.Text('学历:'), sg.Input(size=(20, 10))],
                         [sg.Text('学位:'), sg.Input(size=(20, 10))],
                         ])
col2 = sg.Column(layout=[[sg.Text('工作经历')], [sg.Input(size=(20, 10))], [sg.Input(size=(20, 10))]])

layout = [
    [col1, sg.VerticalSeparator(pad=((4, 4), 0)), col2],
    [sg.HorizontalSeparator(pad=((0, 0), 10))],
    [sg.Multiline('自我介绍:', size=(50, 5))]
]

window = sg.Window('分割线', layout, font=('微软雅黑', 12, 'normal'))
event, values = window.read()
window.close()
详细参数
VerticalSeparator(
    color: str = None,
    pad: Union[Tuple[int, int], Tuple[Tuple[int, int], Tuple[int, int]], Tuple[int, Tuple[int, int]], Tuple[Tuple[int, int], int]] = None,
    key: Union[str, int, tuple, object] = None,
    k: Union[str, int, tuple, object] = None) -> None
HorizontalSeparator(
    color: str = None,
    pad: Union[Tuple[int, int], Tuple[Tuple[int, int], Tuple[int, int]], Tuple[int, Tuple[int, int]], Tuple[Tuple[int, int], int]] = None,
    key: Union[str, int, tuple, object] = None,
    k: Union[str, int, tuple, object] = None) -> None
MenuBar
示例代码
import PySimpleGUI as sg

menu_def = [
    ['File', ['Open', 'Save', 'Exit']],
    ['Edit', ['Paste', ['Special', 'Normal'], 'Undo']],
    ['Help', 'About']
]

layout = [[sg.MenuBar(menu_definition=menu_def)], [sg.Sizer(300, 200)]]

window = sg.Window('Menu菜单', layout, font=('微软雅黑', 12, 'normal'))
event, values = window.read()
window.close()
快捷键
# ------ Menu Definition ------ #
menu_def = [['&File', ['&Open', '&Save', '---', 'Properties', 'E&xit'  ]],
            ['&Edit', ['Paste', ['Special', 'Normal',], 'Undo'],],
            ['&Help', '&About...'],]
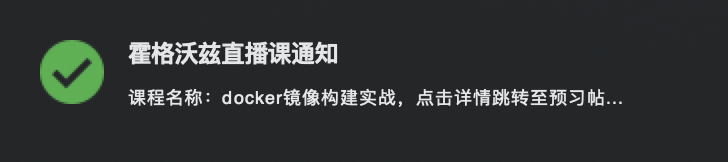
SystemTray
发送系统冒泡通知
示例代码
import PySimpleGUI as sg


layout = [[sg.Submit('发送通知', key='-SUBMIT-', pad=((80, 80), 10))]]

window = sg.Window('通知', layout, font=('微软雅黑', 12, 'normal'))
while True:
    event, values = window.read()
    if event == '-SUBMIT-':
        sg.SystemTray.notify('Notification Title', 'This is the notification message')
    if event is None:
        break

window.close()
三、布局 layout
layout = [[ ]]
样式生成方法:
-
Layout + Layout concatenation
[[A]] + [[B]] = [[A], [B]] -
Element Addition on Same Row
[[A] + [B]] = [[A, B]] -
List Comprehension to generate a row
[A for x in range(10)] = [A,A,A,A,A...] -
List Comprehension to generate multiple rows
[[A] for x in range(10)] = [[A],[A],...] -
User Defined Elements / Compound Elements
示例
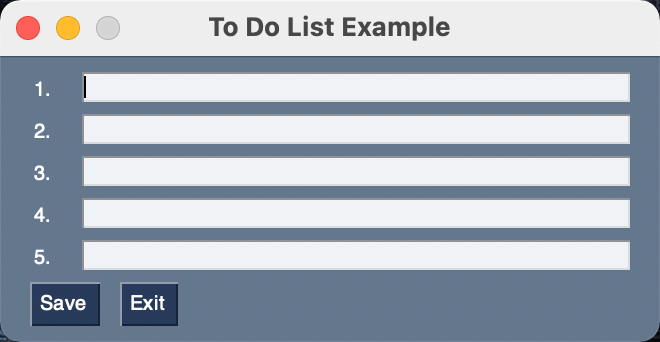
各种写法:
import PySimpleGUI as sg

layout = [
            [sg.Text('1. '), sg.In(key=1)],
            [sg.Text('2. '), sg.In(key=2)],
            [sg.Text('3. '), sg.In(key=3)],
            [sg.Text('4. '), sg.In(key=4)],
            [sg.Text('5. '), sg.In(key=5)],
            [sg.Button('Save'), sg.Button('Exit')]
         ]

window = sg.Window('To Do List Example', layout)
event, values = window.read()
import PySimpleGUI as sg

layout = []
for i in range(1, 6):
    layout += [sg.Text(f'{i}. '), sg.In(key=i)],
layout += [[sg.Button('Save'), sg.Button('Exit')]]

window = sg.Window('To Do List Example', layout)
event, values = window.read()
import PySimpleGUI as sg

layout = [[sg.Text(f'{i}. '), sg.In(key=i)] for i in range(1, 6)] + [[sg.Button('Save'), sg.Button('Exit')]]

window = sg.Window('To Do List Example', layout)

event, values = window.read()
四、主题 theme
主题theme包括:窗口的背景颜色,文本Text颜色,按钮的字体的颜色,按钮颜色。
当前主题多达140多种。默认主题:Dark_blue 3
预览主题:sg.theme_previewer()
获取主题列表:sg.theme_list()
设置主题
sg.theme('LightGreen3')
主题信息示例
'LightGreen3':{
    'BACKGROUND' : '#A8C184',
    'TEXT': 'black',
    'INPUT': '#DDE0DE',
    'SCROLL': '#E3E3E3',
    'TEXT_INPUT': 'black',
    'BUTTON': ('white', '#6D9F85'),
    'PROGRESS': DEFAULT_PROGRESS_BAR_COLOR,
    'BORDER': 1,
    'SLIDER_DEPTH': 0,
    'PROGRESS_DEPTH': 0
}
设置方法
sg.theme_background_color()
sg.theme_border_width()
sg.theme_button_color()
sg.theme_element_background_color()
sg.theme_element_text_color()
sg.theme_input_background_color()
sg.theme_input_text_color()
sg.theme_progress_bar_border_width()
sg.theme_progress_bar_color()
sg.theme_slider_border_width()
sg.theme_slider_color()
sg.theme_text_color()
SetOptions
SetOptions(background_color='#9FB8AD',
       text_element_background_color='#9FB8AD',
       element_background_color='#9FB8AD',
       scrollbar_color=None,
       input_elements_background_color='#F7F3EC',
       progress_meter_color = ('green', 'blue')
       button_color=('white','#475841'))
Cursor
Window.set_cursor()
X_cursor, arrow, based_arrow_down, based_arrow_up, boat, bogosity, bottom_left_corner, bottom_right_corner, bottom_side, bottom_tee, box_spiral, center_ptr, circle, clock, coffee_mug, cross, cross_reverse, crosshair, diamond_cross, dot, dotbox, double_arrow, draft_large, draft_small, draped_box, exchange, fleur, gobbler, gumby, hand1, hand2, heart, icon, iron_cross, left_ptr, left_side, left_tee, leftbutton, ll_angle, lr_angle, man, middlebutton, mouse, pencil, pirate, plus, question_arrow, right_ptr, right_side, right_tee, rightbutton, rtl_logo, sailboat, sb_down_arrow, sb_h_double_arrow, sb_left_arrow, sb_right_arrow, sb_up_arrow, sb_v_double_arrow, shuttle, sizing, spider, spraycan, star, target, tcross, top_left_arrow, top_left_corner, top_right_corner, top_side, top_tee, trek, ul_angle, umbrella, ur_angle, watch, xterm
五、事件Events
The Non-OO and Non-Event-Driven Model
The two “advanced concepts” that beginning Python students have with GUIs are the use of classes and callbacks with their associated communication and coordination mechanisms (semaphores, queues, etc)
How do you make a GUI interface easy enough for first WEEK Python students?
This meant classes could be used to build and use it, but classes can not be part of the code the user writes. Of course, an OO design is quite possible to use with PySimpleGUI, but it’s not a requirement. The sample code and docs stay away from writing new classes in the user space for the most part.
What about those pesky callbacks? They’re difficult for beginners to grasp and they’re a bit of a pain in the ass to deal with. The way PySimpleGUI got around events was to utilize a “message passing” architecture instead.
Instead of a user function being called when there’s some event, instead the information is “passed” to the user when they call the function
Window.read()Everything is returned through this
Window.readcall. Of course the underlying GUI frameworks still perform callbacks, but they all happen inside of PySimpleGUI where they are turned into messages to pass to you.All of the boilerplate code, the event handling, widget creation, frames containing widgets, etc, are exactly the same objects and calls that you would be writing if you wrote directly in tkinter, Qt, etc. With all of this code out of the way and done for you, that leaves you with the task of doing something useful with the information the user entered. THAT, after all, is the goal here… getting user information and acting on it.
The full complement of Widgets are available to you via PySimpleGUI Elements. And those widgets are presented to you in a unique and fun way.
If you wish to learn more about the Architecture of PySimpleGUI, take a look at the Architecture document located on ReadTheDocs.
- 窗口关闭事件
- 按钮点击事件
- 其他元素事件
- Keyboard key press
- Mouse wheel up/down
- Menu item selected
- An Element Changed (slider, spinner, etc.)
- A list item was clicked
- Return key was pressed in input element
- Timeout waiting for event
- Text was clicked
- Combobox item chosen
- Table row selected
5.1 窗口关闭事件
while True:
    event, value = window.read()

    if event is None:
        break
while True:
    event, value = window.read()

    if event is sg.WIN_CLOSED:
        break
判断事件是否发生的几种方式
- ==
if event == '确认':
	sg.Popup('您点击了确认按钮')
	break
- in
if event in ('Exit', None):
    sg.Popup('您点击了"Exit"按钮或者窗口关闭按钮')
    break
- startswith
if event.startswith('Exit'):
    sg.Popup('您点击了"Exit***"按钮')
    break
- endswith
if event.endswith('Exit'):
    sg.Popup('您点击了"Exit***"按钮')
    break
5.1 按钮点击事件
while True:
    event, value = window.read()

    if event is None:
        break

    if event == '确认':
        sg.Popup('执行 确认')
    if event == '取消':
        sg.Popup('执行 取消')
5.3 其他元素事件
文本/输入框/下拉菜单等事件默认属性是关闭的。
手动添加元素的属性:enable_events=True
[sg.Text('请输入基本信息', enable_events=True)],
5.4 返回值value
默认情况下,事件返回的数据结果字典类型,并且key是数字序列。
import PySimpleGUI as sg
from PySimpleGUI import Window

layout = [
    [sg.Text('请输入基本信息')],
    [sg.Text('姓名'), sg.InputText('张明明')],
    [sg.Text('性别'), sg.InputText('男')],
    [sg.Text('国籍'), sg.InputText('中国')],
    [sg.Button('确认'), sg.Button('取消')]
]

window = Window('python GUI', layout)

while True:
    event, value = window.read()

    if event is None:
        break

    if event == '确认':
        print(value)
    break

window.close()
点击“确认”按钮后,返回的结果是{0: '张明明', 1: '男', 2: '中国'}
5.5 自定义key
在每个控件元素设置key属性。
import PySimpleGUI as sg
from PySimpleGUI import Window

layout = [
    [sg.Text('请输入基本信息')],
    [sg.Text('姓名'), sg.InputText('张明明', key='name')],
    [sg.Text('性别'), sg.InputText('男', key='gender')],
    [sg.Text('国籍'), sg.InputText('中国', key='country')],
    [sg.Button('确认'), sg.Button('取消')]
]

window = Window('python GUI', layout)

while True:
    event, value = window.read()

    if event is None:
        break

    if event == '确认':
        print(value)
    break

window.close()
六、打包
安装依赖
$ pip install pysimplegui-exemaker
启动打包程序
windows系统
$ python -m pysimplegui-exemaker.pysimplegui-exemaker
也可以考虑使用pyinstaller 进行打包。
